Android Tutorial for Beginners: Part 2
An Android Tutorial that shows you how to make your first app app step-by-step, using Android Studio! By Darryl Bayliss.

Note: We have a more up-to-date version of this tutorial here. We recommend you check that out instead. Enjoy!
This tutorial is the second of three parts. If you’re looking to start from scratch, Part One is the tutorial for you!
The first part of this series covered a lot of zoomed-out Android concepts, as well as the general structure of Android projects. In this part of the tutorial, you’ll learn more “on the ground” Android: how a layout file works and the specifics of Android layouts and views.
By the time you’re done with this section, you’ll have an app with:
- An image from a PNG file;
- An editable text field for writing messages;
- A button to submit your input;
- A text view that shows your most recent message;
- A list that displays all your messages;
- An option to share your message through Facebook, Twitter, SMS or email; and
- A greeting that saves and retrieves your name each time you open the app.
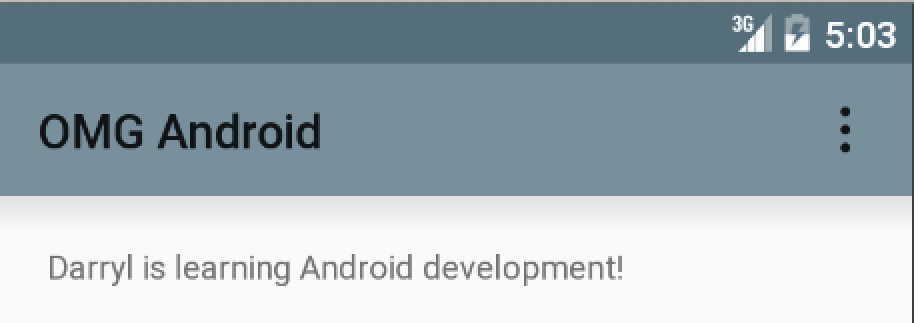
You should already be at the point where you have a “Hello World” app running on your emulator or device. At the end of the last section, you changed the text so that it greets you personally, like mine:
It’s great that you’ve come this far — but now it’s time to take it to the next level! There’s a lot to do, so let’s get to it!
Getting Started
Looking ahead, the first thing you should do is check that you’re making your app as simple as possible. You don’t want to introduce additional complexity unless it’s needed since extra complexity in how something is implemented means that it takes more time and requires more work if you were to later modify the bits with the extra complexity.
First, open app/res/layout/activity_main.xml. After opening the file, you may have to switch the editor to Text mode if you can’t see the raw XML. Click the appropriate tab at the bottom of the editor pane as shown below.
![]()
The only thing you need to remove here are the padding attributes that Android Studio automatically generates in your .xml layout. They look something like this (your values may vary slightly):
android:paddingLeft="@dimen/activity_horizontal_margin"
android:paddingRight="@dimen/activity_horizontal_margin"
android:paddingTop="@dimen/activity_vertical_margin"
android:paddingBottom="@dimen/activity_vertical_margin"
Delete these lines from your layout, your activity_main.xml file should now look like this:
<RelativeLayout xmlns:android="http://schemas.android.com/apk/res/android"
    xmlns:tools="http://schemas.android.com/tools"
    android:layout_width="match_parent"
    android:layout_height="match_parent"
    tools:context=".MainActivity">

    <TextView
        android:text="@string/hello_world"
        android:layout_width="wrap_content"
        android:layout_height="wrap_content" />

</RelativeLayout>
Now, double-click on MainActivity.java on the left pane of Android Studio to take a look at your first piece of Android code.

The only lines you need to remove here are the following:
@Override
public boolean onOptionsItemSelected(MenuItem item) {
    // Handle action bar item clicks here. The action bar will
    // automatically handle clicks on the Home/Up button, so long
    // as you specify a parent activity in AndroidManifest.xml.
    int id = item.getItemId();

    //noinspection SimplifiableIfStatement
    if (id == R.id.action_settings) {
       return true;
    }

    return super.onOptionsItemSelected(item);
}
Be careful not to remove the extra curly brace at the bottom that closes the end of your class.
Now that you’ve finished that bit of cleaning up, you’re all set to begin. It’s time to bring your Activity to life!
XML Layout Basics
Android layouts are in XML format, in the form of a tree with a single root and a hierarchy of views. The hierarchy is very strict and straightforward: each view in the tree is termed the parent of the views it contains and the child of the view that contains it.
Open res/layout/activity_main.xml. You can see the XML for your activity here. There is a parent RelativeLayout and a child TextView.
Look at the TextView specifically. You can see that it contains three attributes. Of those, two are present in every view you’ll ever put into your Android layouts: layout_width and layout_height. The values for these attributes can take several forms:
-
wrap_content: This constant value specifies that the view will be just large enough to fit whatever is inside it, whether that’s an image, text or child view. -
match_parent: This constant sets the view to be as big as its parent. -
Explicit values: You could set the dimension to a specific number of pixels (Ex:
5px), but it is usually wiser to use density independent pixels (Ex:5dp). Adpis a pixel on a “medium-density” (mdpi) device, and the number of actual pixels automatically scales for devices designated as low-density (ldpi), high-density (hdpi), extra-high-density (xhdpi), etc.
In other words, using straight-up pixels would result in your views being all sorts of crazy sizes, depending on whether a device has 160 pixels per inch or 300 pixels per inch, or what have you. Who knows! Let the Android system take care of the scaling and just use dp.
Note: Designations like mdpi and hdpi are only general categories. Actual pixel densities are even more variable, but they are all given the same scaling factor regardless. So dp scaling, while convenient, is not an exact science.
iOS Developers should be familiar with a similar practice of density independence, using “points” instead of pixels in their layouts to account for early iPhone screens not having Retina displays.
The final attribute of the TextView is simply text, in which you specify the text to be displayed. This attribute is a good example of how different views respond to different attributes. Adding a text attribute to a RelativeLayout or a Space wouldn’t accomplish anything because, unlike the TextView, they wouldn’t know what to do with it.
But the value of the attribute, @string/hello_world, isn’t what’s displaying, is it? What you specify in your layout file is not the actual string to be displayed but rather a string resource ID identifying the actual text. That way, all your app’s copy can be in one place – res/values/strings.xml.
Now let’s look at the parent node in the XML: RelativeLayout. What’s going on there?