Creating Interactive Media Experiences in Unity VR Tutorial
Display stunning 360° VR videos in Unity and create realistic, adrenaline-inducing scenarios in this Unity VR tutorial! By Eric Van de Kerckhove.
This is an abridged version of a chapter from our new book: Unity AR & VR by Tutorials. Enjoy!
The world of VR is broad and diverse. Besides games, there are many experiences out there — 360-degree videos, architecture, medical use and education are just the tip of the iceberg.
In this tutorial, you’ll see that you can not only use Unity to make games with VR functionality but also to create interactive media. You’ll learn about displaying 360° videos and simulating scary situations in VR to overcome them.
Getting Started
Open the starter project for this tutorial in Unity and look at the Project window. A few new files were added to the Razeware folder.
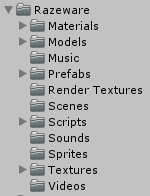
- Scenes: The starter scenes for this tutorial.
- Sounds: An ambient wind sound.
- Videos: Contains a 360-degree video.
Open the Interactive Media A scene from the Razeware\Scenes folder and look at the Hierarchy.
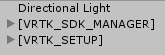
The scene contains a single directional light and a minimal VRTK setup. The controllers don’t have any extra functionality. You’ll be adding a 360-degree video to this next, and you’ll be amazed at how easy it is.
Displaying 360° Video
A 360-degree video is an immersive, 3D video that’s projected onto a sphere. They’re usually recorded using a single omnidirectional camera or a group of cameras. They rose in popularity the last couple of years; you can even watch 360-degree videos on websites like YouTube using a regular flat-display like a monitor or a smartphone.
In the case of this project, the player is placed inside the sphere on which the video is projected. Since all Unity scenes come with a skybox by default (which is just a large sphere basically), you’ll be using that since it’s efficient and easy to set up.
To start, look at the video you’ll be using in the Razeware\Videos folder. It’s called 360_BavarianAlps. Open it in a video player, and you’ll see something like this:

The reason why the video looks a bit weird is that it’s not flatly projected like regular videos, it uses equirectangular projection. This is the same kind of projection that modern world maps use.
Time to get it working in Unity!
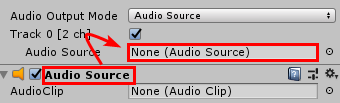
Add a new Video Player to the Hierarchy, and then add an Audio Source component to it. Drag the 360_BavarianAlps video from the Razeware\Videos folder onto the Video Player’s Video Clip slot.
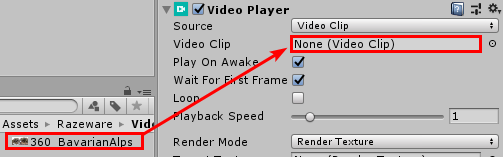
Next, drag the Audio Source component onto the Video Player component’s Audio Source slot; this redirects the sound of the video to the Audio Source.
This GameObject does most of the hard work — it’ll load and play the video with sound.Playing the scene right away won’t do anything yet, you need to add a few more parts.
Create a new Render Texture in the Razeware\Render Textures folder, and name it 360 Render Texture. The most important property to change is the Size, which needs to be the same width and height as the source video.
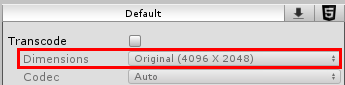
In this case, the video’s dimensions are 4096×2048 as you can see by selecting it and looking at the Inspector:
Select the render texture again and set its Size to 4096×2048. Change the Depth Buffer to No depth buffer, you don’t need to use any depth data and disabling it halves the amount of memory the render texture will need (from 64 MB to 32 MB).Select the Video Player again and drag 360 Render Texture onto its Target Texture slot. This makes the video player render the video to the render texture.

The render texture needs a way to be displayed on the skybox, for this you’ll need to create a new material. Create a new material in the Razeware\Materials folder, and name it 360 Skybox Material.
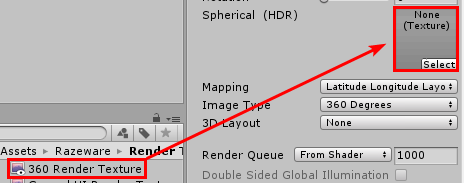
Change its Shader to Skybox/Panoramic, and drag the 360 Render Texture from the Razeware\Render Textures folder onto the Spherical (HDR) slot.
The final step is to assign the new skybox material. Open the Lighting Settings window (Window ▸ Lighting ▸ Settings) and drag the 360 Skybox Material from the Razeware\Materials folder onto the Skybox Material slot. Finally, close the lighting window.

With everything set up, play the scene. Put on your headset, and take a good look around.

Breathe in that fresh air. Doesn’t the water vapor feel cool on your skin? Well, not really, but it’s still a pretty relaxing scene!
You can use videos like these in your own games and experiences. For example, a common technique for mobile VR is pre-rendering a beautifully detailed environment into a 360-degree video and using that as the skybox as you did here.
Another use is giving you the general feel of a real-world place — you could be sitting at a bar in Ireland, standing on top of Mount Fuji or looking at the salt flats of Bolivia, all in a matter of minutes! This particular use has gained popularity with vacation agencies.
No matter how you use 360-degree videos, they’re a valuable tool for sure. Next up is a height simulator. I hope you’re not afraid of heights!
Height Simulator
Everyone is afraid of something. Some people are afraid of spiders, while others are afraid of small spaces or germs.
Most phobias are challenging to conquer. To do so usually involves a confrontation with the thing that scares you. One way of helping with this process is by using VR. Studies show that exposure to the things that scare people in a virtual environment can help a lot in their treatment.
There are already quite a few therapy-related VR applications floating around on the internet. There are apps for overcoming the fear of heights, public speaking, spiders, live burials, snakes and ocean creatures.
If you have one of these phobias and try one of these apps, don’t push yourself. You have to take it slow to reap the benefits.
Now that you have some context, it’s time to show how you can make a simple big height simulator in Unity.
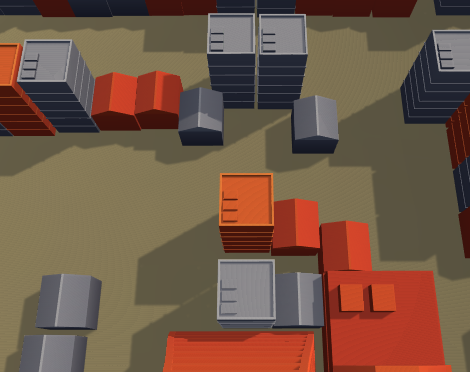
To start off, open the Chapter 11 – Interactive Media B scene, and look around.
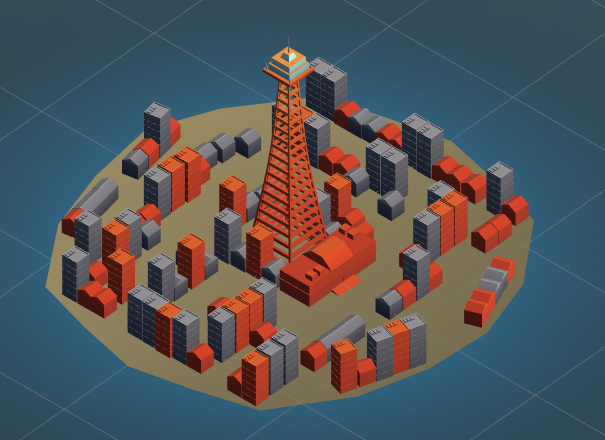
The scene is made to simulate a small island city with a massive tower in the middle. The player is placed near the top of the tower, looking down on the city.
To give a sense of scale, the player starts on the ground level and then teleports to the top. A simple VRTK setup is provided and positioned at the bottom of the tower.
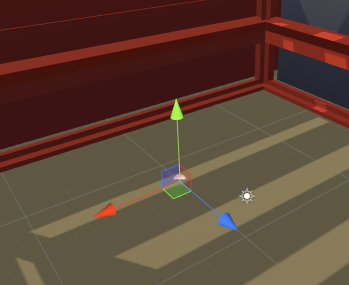
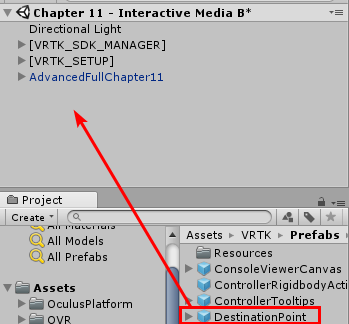
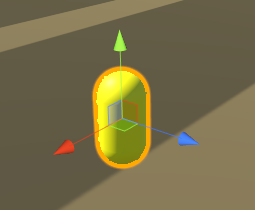
To get the player to the top, you’ll need some familiar friends: Destination Points! Drag a copy of the DestinationPoint prefab from the VRTK\Prefabs folder to the Hierarchy and set its Position to (X:0, Y:0.32, Z:-3).
The teleport “pill” is now added to the ground level.
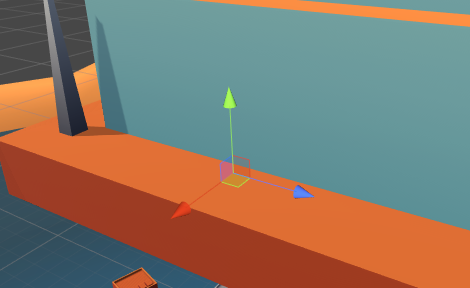
To get the player to the tower, you’ll need a new GameObject to mark the location to teleport to. Create a new GameObject, name it High Point, and change its Position to (X:10.5, Y:144, Z:-2).
Select DestinationPoint, and drag High Point onto its Destination Location slot.
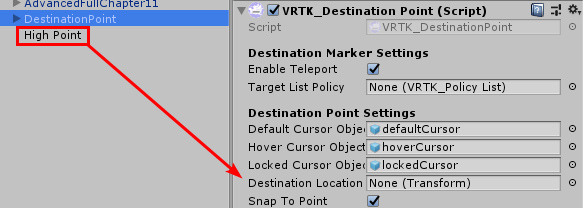
This creates a one-way connection to the position on top of the tower. No escape!
To create a truly immersive experience, there needs to be some noise when the player arrives at the top of the tower. An audio loop for that has been provided for you to use.
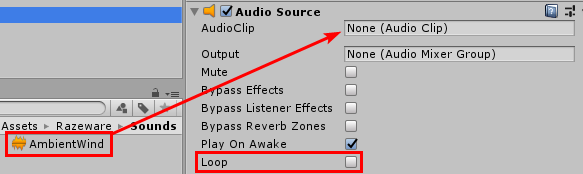
Create a new Audio Source, name it AmbientWind, and change its Position to (X:0, Y:144, Z:0). Now drag the AmbientWind sound from the Razeware\Sounds folder onto the AudioClip slot.
Finally, check the Loop checkbox, so the sound keeps looping.
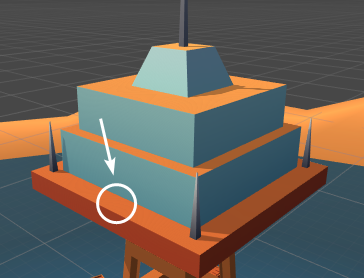
That’s all you need! Run the game and try teleporting to the top of the tower. Step up to the border and carefully take a look down.
You can build upon the scene by adding more realistic models and adding weather effects to enhance the overall feel. In the next sections, you’ll see some examples of how you can use VR to create powerful experiences.