App Actions: Getting Started
App Actions allow Google Assistant to access your app and launch specific actions within the app. This tutorial teaches you how to implement App Actions for your app so users can interact with your app directly through Google Assistant. By Anshdeep Singh.
Adding Your First App Action
To start adding App Actions, you need to do three things:
- Identify the correct built-in intent to use.
- Create the actions.xml file.
- Make your App Actions visible to the app.
Identifying the Correct BII
Identify the main functionality of your app for which you want to define App Actions. For example, if it’s a food delivery app, then the main functionality will be ordering food (no surprises there!). Then, go to this list of built-in intents and identify the correct intent for your use case.
For this tutorial, StockTracker retrieves the latest stock quotes from the internet. The correct BII for this use case is actions.intent.GET_STOCK_QUOTE. It has one intent parameter named tickerSymbol that uniquely identifies each stock.
Creating actions.xml File
Create a new actions.xml file in app/src/main/res/xml.
Add the following code in the newly created actions.xml file below the xml tag:
<actions>
// 1:
  <action intentName="actions.intent.GET_STOCK_QUOTE">
// 2:
    <fulfillment urlTemplate="app://stocktracker/query{?symbol}">
// 3:
      <parameter-mapping
          intentParameter="tickerSymbol"
          required="true"
          urlParameter="symbol" />
    </fulfillment>
// 4:
    <!-- Fallback fulfillment when no parameter supplied -->
    <fulfillment urlTemplate="app://stocktracker/home" />
  </action>
</actions>
In the xml code above, you’re:
- Creating a new action with
actions.intent.GET_STOCK_QUOTE:actionis a required tag, which specifies the App Action you want to implement. Every App Action will have a uniqueactiontag.intentNametakes in the built-in intent for this action. - Defining a new fulfillment for the corresponding action:
fulfillmentprovides information on how the given intent satisfies the request.urlTemplateconstructs deep links as defined in AndroidManifest.xml. For the fulfillment you added,app://stocktrackeris the base deep link and/query{?symbol}is the path that takes in a query parameter namedsymbol. - Creating a new parameter mapping for the above query parameter:
parameter-mappingmaps the query parameters in the URL template to intent parameters. This mapping is because the intent parameter ofactions.intent.GET_STOCK_QUOTEhas the nametickerSymbol, but the name of the query parameter issymbol.requiredmakes the symbol value mandatory for the URL to be valid. - Adding a new fallback fulfillment: In this fulfilment,
urlTemplateconstructs a new deep linkapp://stocktracker/homewhere/homeis the path. This fulfillment is triggered when the user invokes the intent without specifying any symbol in the query parameter.
Open MainActivity.kt to see that the app already handles the deep link paths defined above in handleDeepLink().
Referencing the App Action in Manifest File
Open AndroidManifest.xml and add the following code just before the closing application tag:
<meta-data
  android:name="com.google.android.actions"
  android:resource="@xml/actions" />
The piece of code above makes sure that your actions.xml file is visible to the app. If you used a different name for your actions file, then you must change your android:resource attribute accordingly.
Great job on adding your first App Action successfully! It’s now time to test your App Action.
Testing App Actions
Testing App Actions requires a physical device running API 21 or above. If you try it on a virtual emulator, it may lead to unexpected results. Connect your physical device to your local development machine.
Preparing for Testing
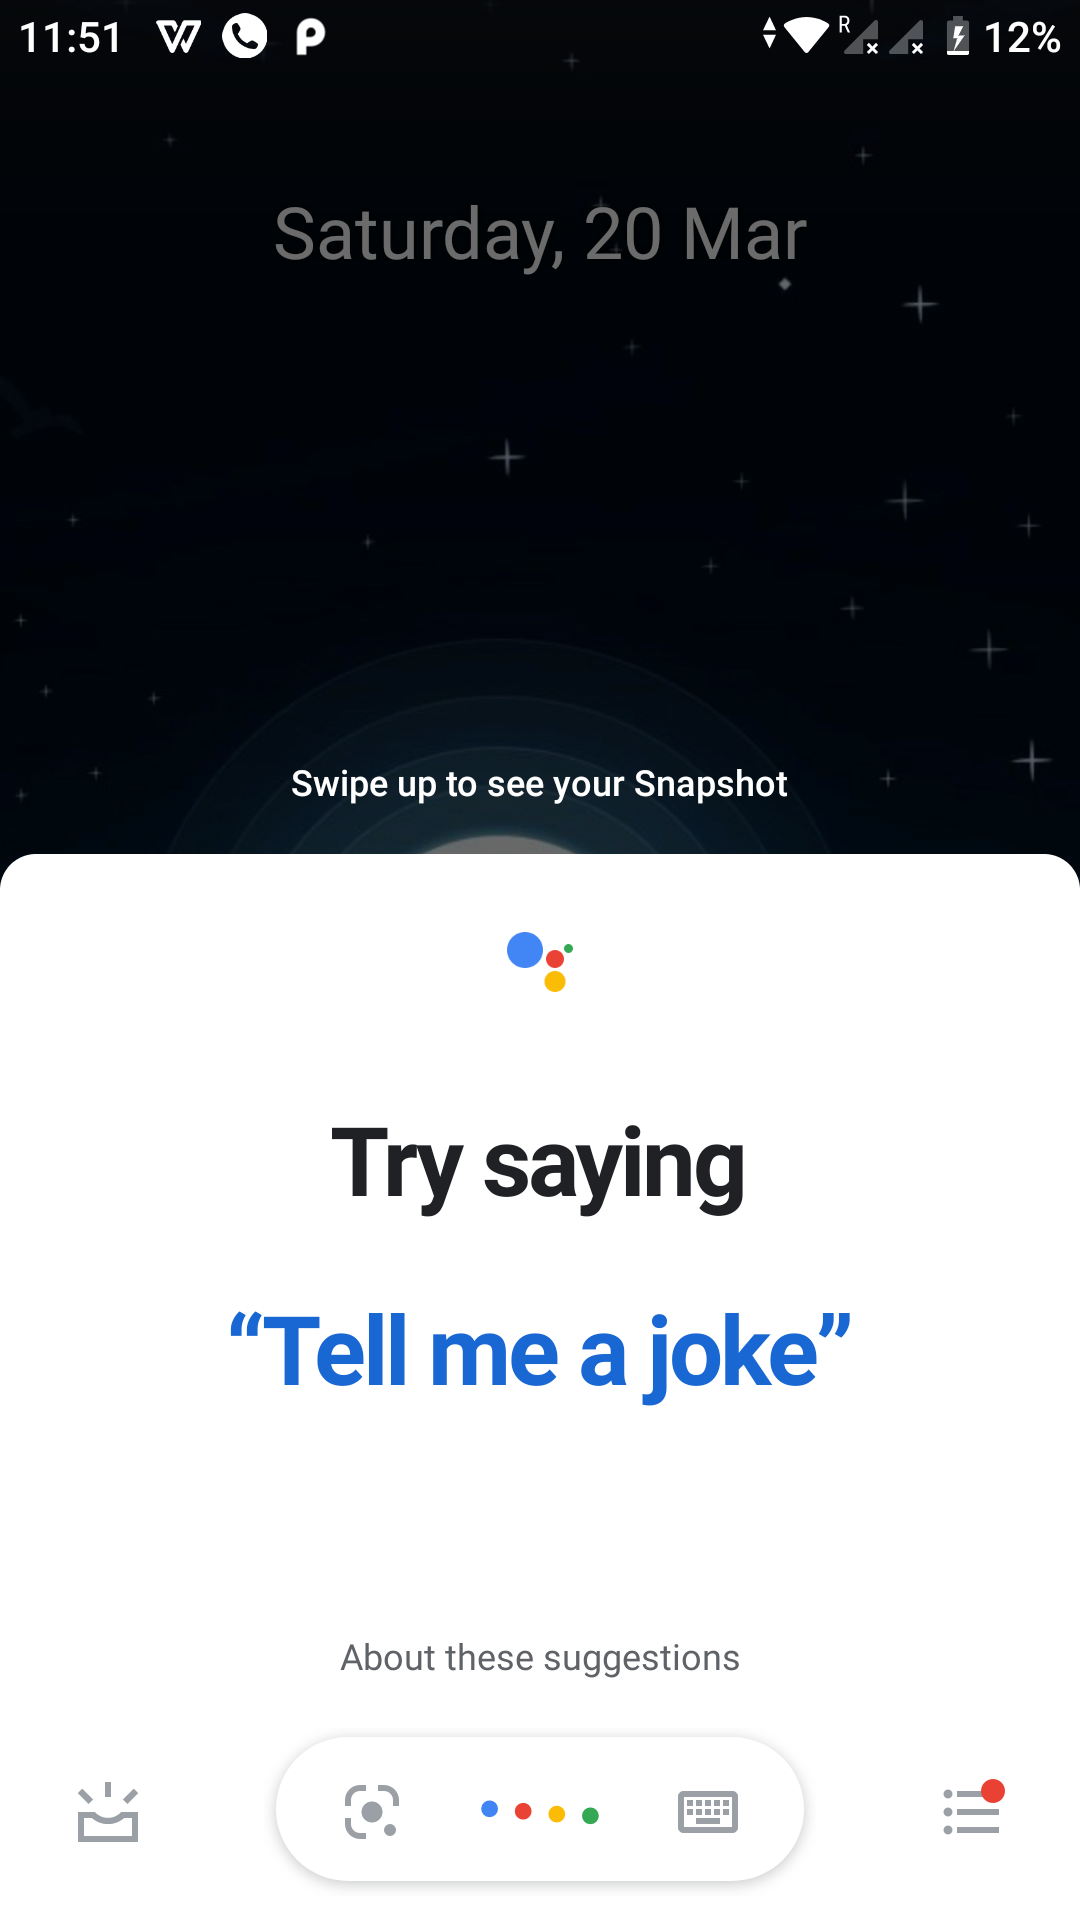
Make sure your device connects to the internet and that Google Assistant is already set up and running. Long-press the home button. If you see a screen similar to the screen below, then you’re all good.
Sign in to Android Studio with the same Google account connected to your physical device. This should also be the same account you used to upload the draft app.
Click the white user icon in the top-right of Android Studio 4.0.0 or later. Follow the instructions as they appear. Once you sign in, you can verify your email is correct by clicking the user icon.
Next, install the App Actions Test Tool plugin by going to File ▸ Settings (Android Studio ▸ Preferences on MacOS). Select the Plugins section on the left side and search for App Actions Test Tool in the marketplace.

Finally, it’s time to try out your new plugin.
Using the App Actions Test Tool
The App Actions Test Tool is a plugin used to test App Actions from Android Studio. It’s a very useful tool during the development phase. It works by creating a preview of your App Action, parsing the actions from the actions.xml file you created above.
Open the App Action Test Tool by going to Tools ▸ App Actions ▸ App Actions Test Tool. You’ll see a screen that looks like this:

In the Invocation name field, enter Stock Tracker. This invocation name triggers your App Action. Leave Locale at the default value. Click Create Preview. After a successful preview creation, you’ll see the screen below:

Notice that it recognizes the built-in intent you added in actions.xml. It also has a tickerSymbol field for making changes. Make sure your target device is showing correctly in this window.
Click Run to test your App Action. It invokes Google Assistant on your device and then deep links into the app to show the correct stock quote for the value passed in tickerSymbol.
Try to invoke Google Assistant manually by saying the command, “Hey, Google, tell me the stock price of Tesla in Stock Tracker”. You’ll see the screen below for a few seconds and then StockTracker opens up, showing you the latest quote.

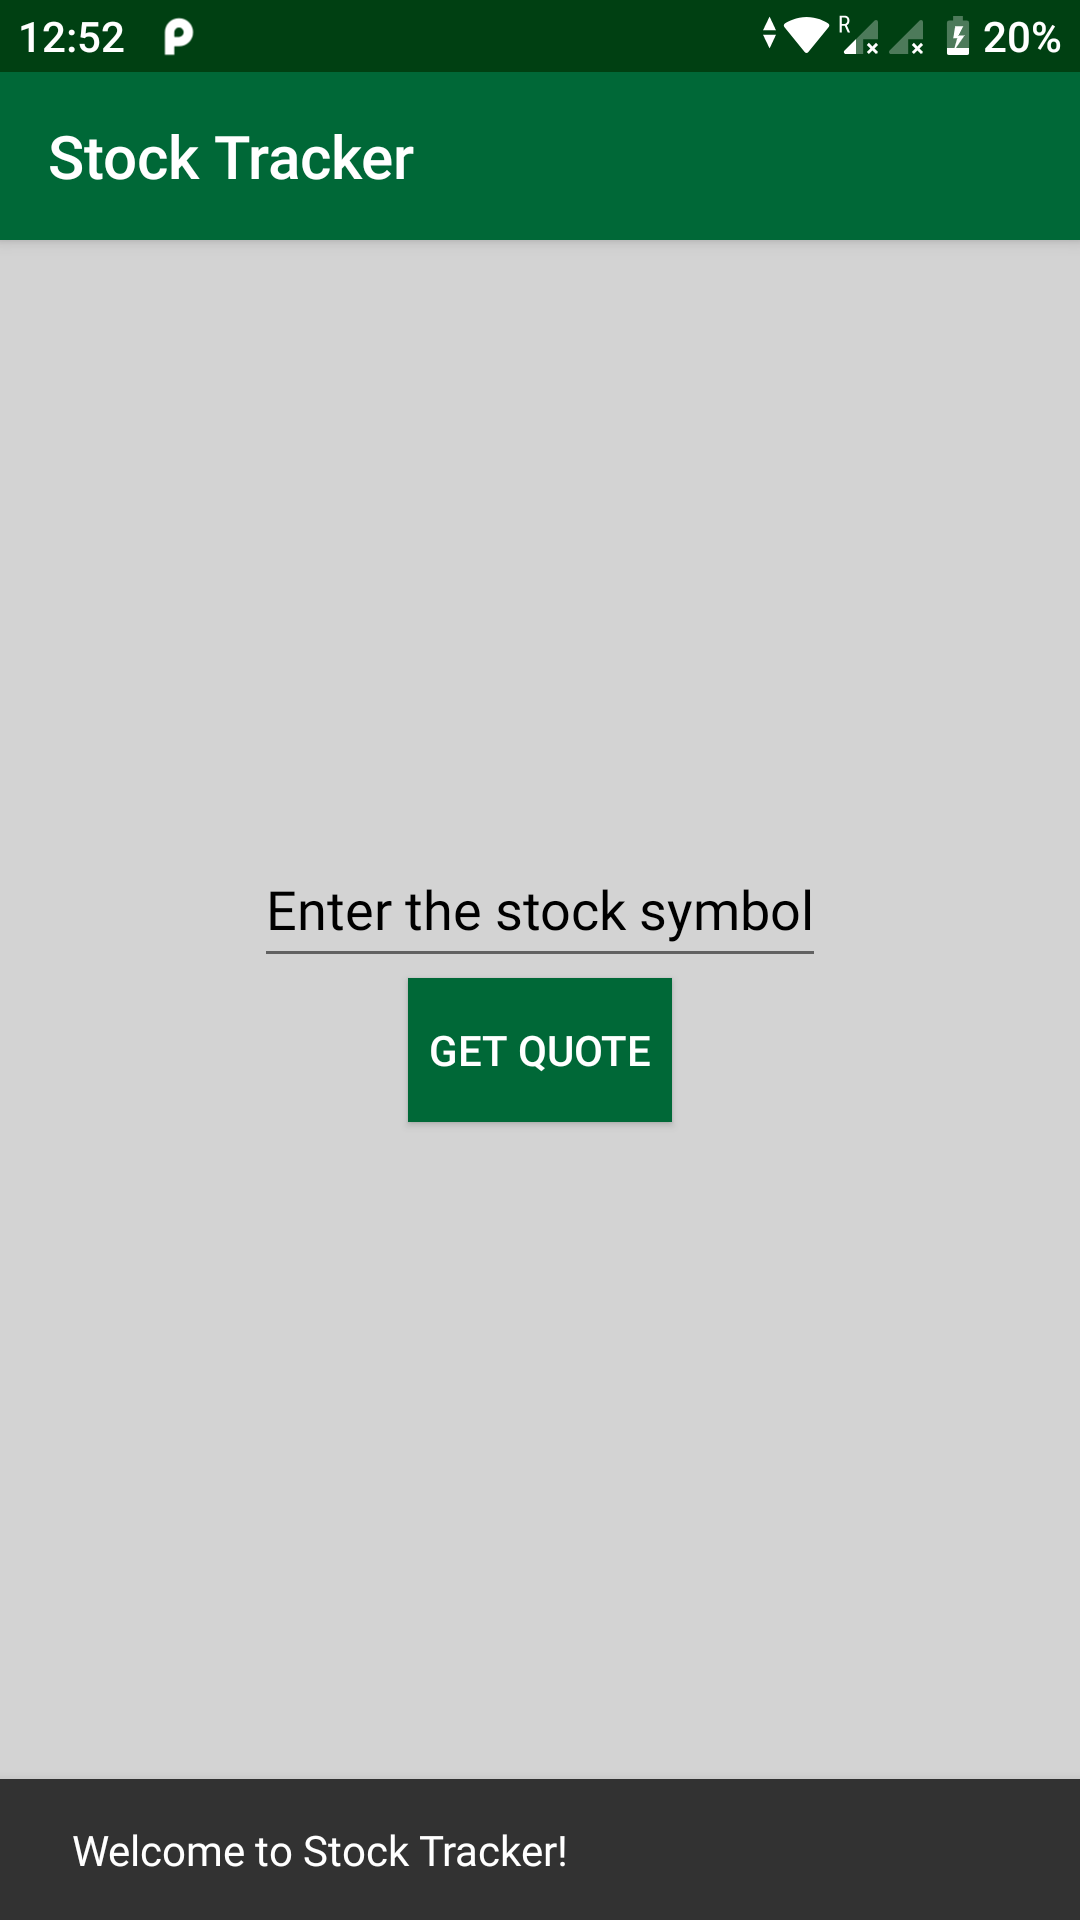
Play with your App Actions by testing Google Assistant with different stocks. To test the fallback fulfillment, say “Hey, Google, tell me the current stock price in Stock Tracker”. Since you didn’t specify any stock this time, it uses the fallback fulfillment and opens the home screen of the app with a welcome message.
Now that you’ve built and tested your App Action, you can release it to the world!