Two-Factor Authentication With Vapor
Learn how to increase the account security of your using two-factor authentication with Vapor. By Jari Koopman.
Testing the Handshake
With all the routes in place, it’s time to test the handshake and make sure it can enable 2FA for a user. Build and run the app, and open the provided API collection in either Postman or Paw.
First, execute the Sign up request to create a user. Then, execute the Get 2FA Token request. The response will look something like this:
{
  "label": "NatanTheChef",
  "key": "VPGF37A5T3PF6PNY4Z3PLY65LQ",
  "backup_codes": [
      "428667",
      "841992",
      "172861",
      "873429",
      "110390",
      "817288",
      "587247",
      "936026",
      "592443",
      "530780"
  ],
  "url": "otpauth://totp/NatanTheChef?secret=VPGF37A5T3PF6PNY4Z3PLY65LQ&issuer=DiningIn",
  "issuer": "DiningIn"
}
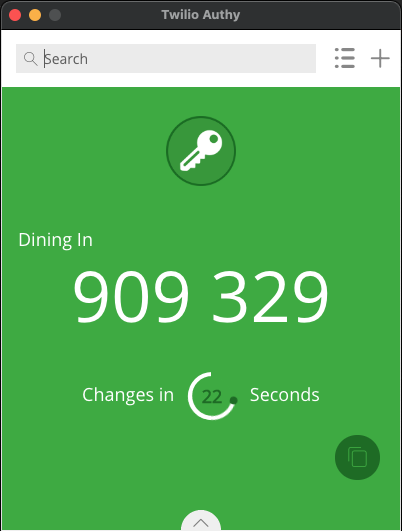
Now for the fun stuff! To finish the handshake, you’ll have to add the token to an authenticator app. For the sake of testing, you can use Authy Desktop, which supports both macOS and Linux. This saves you from sending the key to your mobile device.
In your authenticator app, add a new entry and feed it the key from the response. It’ll start generating OTPs right away.
OTP Generation in Authy
Back in Postman or Paw, open the Enable 2FA request. Set the value of the X-Auth-2FA header to a current OTP code generated by your authenticator app, and execute the request.
If everything went well, you’ll see an empty 200 OK response. Well done!
Logging in With a 2FA Token
Now that users can enable 2FA for their account, it’s time to start enforcing it at the time of login. In UserController.swift, locate login(req:) and add the following below it:
fileprivate func loginWithTwoFactor(
  req: Request
) throws -> EventLoopFuture<NewSession> {
  // 1
  let user = try req.auth.require(User.self)

  // 2
  func createToken() throws -> Token {
    try user.createToken(source: .login)
  }
  // 3
  func createSession(_ token: Token) -> EventLoopFuture<NewSession> {
    return token.save(on: req.db).flatMapThrowing {
      NewSession(token: token.value, user: try user.asPublic())
    }
  }

  // 4
  if user.twoFactorEnabled {
    // 5
    guard let code = req.headers.first(name: "X-Auth-2FA") else {
      throw Abort(.partialContent)
    }
    // 6
    return TwoFactorToken.find(for: user, on: req.db)
      .flatMapThrowing { token in
        // 7
        guard token.validate(code) else { throw Abort(.unauthorized) }
      }
      // 8
      .flatMapThrowing(createToken)
      .flatMap(createSession)
  }
  // 9
  return try createSession(createToken())
}
This will achieve the following:
- Get an instance of
Userby requiring authentication - Create a function that creates a new
Token. - Create a function that takes a token and wraps it in a session.
- Check if the logged-in user has 2FA enabled.
- With 2FA enabled, make sure there’s an OTP in the
X-Auth-2FAheader. If not, return206: Partial Contentindicating to your client they need to include the OTP. - Retrieve the
TwoFactorTokenfrom the database. - Validate the provided OTP against the stored key. If the code doesn’t pass, return
401 Unauthorized. - Create a token, wrap it in a session and return it.
- If 2FA isn’t enabled for the user, immediately return a new session and token.
In boot, update the login route to use loginWithTwoFactor.
Now, it’s time to try it out. Build and run the app and open Postman or Paw. Find the Login request and execute it. It should return 206 Partial Content, indicating an OTP is necessary. Add a valid OTP to the X-Auth-2FA header for the request and execute it again. You should see the expected token response like before.
Extracting 2FA Into Middleware
The entire 2FA flow is working now. Users can enable 2FA on their accounts and exchange valid OTPs for a login token. However, currently, the login route handler handles the login logic. The 2FA code would be reusable if extracted into an Authenticator, like the existing ModelAuthenticatable and ModelTokenAuthenticatable.
Back in Xcode, in the App directory, create a new subfolder called Middleware. Inside, create a new file called OTPAuthenticatable.swift with the following content:
import Fluent
import Vapor

// 1
protocol OTPToken {
  func validate(_ input: String, allowBackupCode: Bool) -> Bool
}

// 2
protocol TwoFactorAuthenticatable: ModelAuthenticatable {
  // 3
  associatedtype _Token: Model & OTPToken
  // 4
  static var twoFactorEnabledKey: KeyPath<Self, Field<Bool>> { get }
  // 5
  static var twoFactorTokenKey: KeyPath<Self, Children<_Token>> { get}
}

extension TwoFactorAuthenticatable {
  // 6
  var _$twoFactorEnabled: Field<Bool> {
    self[keyPath: Self.twoFactorEnabledKey]
  }

  var _$twoFactorToken: Children<_Token> {
    self[keyPath: Self.twoFactorTokenKey]
  }

  var _$username: Field<String> {
    self[keyPath: Self.usernameKey]
  }

  // 9
  static func authenticator(database: DatabaseID? = nil) -> Authenticator {
    return TwoFactorUserAuthenticationMiddleware<Self>(database: database)
  }
}
This creates two new protocols with the following functionality:
-
OTPTokenonly definesvalidate(_:allowBackupCode:)as a requirement. You use this later to validate the OTP. -
TwoFactorAuthenticatablebuilds on top of Vapor’sModelAuthenticatablebut adds a few extra requirements. - The first requirement is the associated type,
_Token, which has to conform toModelandOTPToken. - The second requirement is a static keypath pointing toward a Boolean property which indicates whether or not 2FA is enabled.
- The final requirement is a static keypath pointing toward
_Token. - In an extension, three non-static properties will use the static keypaths to make the actual values available.
- Lastly, implement a static function to create an
Authenticatorthat you’ll use in the route handler.
Implementing Middleware
Before this will work, you must implement TwoFactorUserAuthenticationMiddleware. At the bottom of OTPAuthenticatable.swift add the following:
// 1
struct TwoFactorUserAuthenticationMiddleware<T>:
  Authenticator where T: TwoFactorAuthenticatable {
  let database: DatabaseID?

  func respond(
    to request: Request,
    chainingTo next: Responder
  ) -> EventLoopFuture<Response> {
    // 2
    guard let basic = request.headers.basicAuthorization else {
      return next.respond(to: request)
    }

    // 3
    return T.query(on: request.db(self.database))
      .filter(\._$username == basic.username)
      .first()
      .flatMap { user in
        // 4
        guard let user = user else {
          return next.respond(to: request)
        }

        // 5
        if let twoFactorEnabled = user._$twoFactorEnabled.value,
           twoFactorEnabled {
          // 6
          guard let twoFactorHeader = request.headers.first(
                  name: "X-Auth-2FA") else {
            return request.eventLoop.makeFailedFuture(Abort(.partialContent))
          }
          // 7
          return user._$twoFactorToken
            .query(on: request.db(self.database))
            .first()
            .optionalFlatMapThrowing { token in
              // 8
              if try user.verify(password: basic.password) &&
                  token.validate(twoFactorHeader, allowBackupCode: true) {
                request.auth.login(user)
              }
              // 9
            }.flatMap { _ in next.respond(to: request) }
        }

        do {
          // 10
          if try user.verify(password: basic.password) {
            request.auth.login(user)
          }
        } catch { }
        // 11
        return next.respond(to: request)
      }
  }
}
There’s a lot going on here, so here’s a breakdown:
- First, declare a new
Authenticatorthat’s generic over aTwoFactorAuthenticatabletype. - In the middleware’s
respond(to:chainingTo:)function, first make sure the required basic authentication data is present. If not, pass the request to the next responder. - Using
TwoFactorAuthenticatable, find an instance matching the username from the Basic authentication data. - If there’s no user, pass the request to the next responder.
- When a user is found, check if 2FA is enabled.
- Get the provided OTP from the
X-Auth-2FAheader. Return206 Partial Contentif the header is missing. - Use the user’s linked two-factor tokens to find an instance of
OTPToken. - If an instance is found, verify the user’s password credentials match and validate the supplied OTP matches. If so, log the user in.
- Pass the request to the next responder. Due to using
optionalFlatMapThrowing(_:), the verification process will only happen if anOTPTokenwas found. - If 2FA isn’t enabled for the user, verify basic authentication credentials and log the user in if they’re valid.
- Finally, pass the request to the next responder.
This will make it a lot easier to implement 2FA in future projects!