Swinject Tutorial for iOS: Getting Started
In this tutorial, you will explore Dependency Injection (DI) through Swinject, a Dependency Injection framework written in Swift. Dependency Injection is an approach to organizing code so that its dependencies are provided by a different object, instead of by itself. By Gemma Barlow.
In this tutorial, you’ll explore Dependency Injection (DI) through Swinject, a Dependency Injection framework written in Swift. You’ll do so by improving a small iOS application named Bitcoin Adventurer which displays the current price of Bitcoin. As you go through this tutorial, you’ll refactor the app and add unit tests along the way.
Dependency Injection is an approach to organizing code so that its dependencies are provided by a different object, instead of by itself. Arranging code like this leads to a codebase of loosely-coupled components that can be tested and refactored.
While you can implement Dependency Injection without a third-party library, Swinject uses a popular pattern among DI frameworks: a Dependency Injection (DI) Container. This type of pattern keeps the resolution of your dependencies simple, even as code complexity increases.
Don’t worry, it’s gonna be less painful than this type of injection :]

Why Dependency Injection?
Dependency Injection relies on a principle called Inversion of Control. The main idea is that a piece of code that requires some dependencies won’t create them for itself, rather the control over providing these dependencies is deferred to some higher abstraction. These dependencies are typically passed into an object’s initializer. This is the opposite approach — an inverted approach — to the typical cascade of object creation: Object A creating Object B, creating Object C, and so on.
From a practical perspective, the main benefit of Inversion of Control is that code changes remain isolated. A Dependency Injection Container supports the Inversion of Control principal by providing an object that knows how to provide the dependencies for an object. All you need to do is ask the container for the object you need, and voilà… it’s ready!
Getting Started
Start by downloading the starter project; you can find a link at the top and bottom of this Swinject tutorial. Open Bitcoin Adventurer.xcworkspace. Press Command-R to build and run the app.
Bitcoin Adventurer – the application you will refactor in this tutorial.
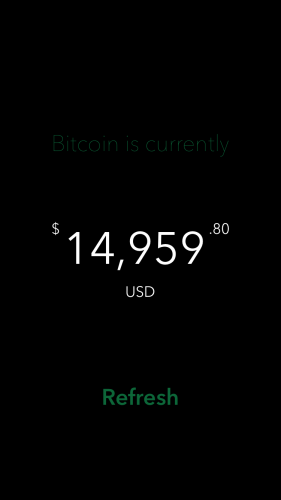
When the app launches, you’ll see the current price of a Bitcoin displayed on the screen. Tapping Refresh makes an HTTP request to retrieve the latest data, which is logged to the Xcode console. Bitcoin is a volatile cryptocurrency whose value fluctuates frequently, therefore, the Coinbase API has a new Bitcoin price available about every 30 seconds.
You may have also noticed an error logged to the console. You can ignore this for now because you’ll address it later in the tutorial.
Go back to Xcode and inspect the project:
-
The app contains a single
UIViewController,BitcoinViewController, that’s backed by the storyboard, Main.storyboard. -
All of the networking and parsing logic lives in BitcoinViewController.swift. As the code stands now, it’s difficult to test the logic independently of the
UIViewControllerlifecycle because the view layer is highly coupled to its underlying logic and dependencies. - We already took care of adding Swinject as a dependency for you, via CocoaPods. It’s currently not being used in any of your Swift files, but that’s about to change! :]
DI and Coupling – Oh my!
Earlier, a dependency was defined as a piece of code needed by another object to do its job, preferably one that can be supplied — or “injected” — by a separate object.
Explore further the dependencies in the Bitcoin Adventurer code.
The code in BitcoinViewController.swift has three main responsibilities: Networking, Parsing and Formatting.
Networking and Parsing
Most of the networking happens in a single method, requestPrice():
private func requestPrice()  {
  let bitcoin = Coinbase.bitcoin.path

  // 1. Make URL request
  guard let url = URL(string: bitcoin) else { return }
  var request = URLRequest(url: url)
  request.cachePolicy = .reloadIgnoringCacheData

  // 2. Make networking request
  let task = URLSession.shared.dataTask(with: request) { data, _, error in

    // 3. Check for errors
    if let error = error {
      print("Error received requesting Bitcoin price: \(error.localizedDescription)")
      return
    }

    // 4. Parse the returned information
    let decoder = JSONDecoder()

    guard let data = data,
          let response = try? decoder.decode(PriceResponse.self,
                                             from: data) else { return }

    print("Price returned: \(response.data.amount)")

    // 5. Update the UI with the parsed PriceResponse
    DispatchQueue.main.async { [weak self] in
      self?.updateLabel(price: response.data)
    }
  }

  task.resume()
}
Here’s the breakdown:
If the HTTP request is successful, it returns a JSON response in the following format:
- Create a
URLRequestwith the Coinbase Bitcoin spot price URL. - Create a
URLSessionDataTaskusing this newrequest, then run it by callingtask.resume(). This fires an HTTP request to retrieve the price of a Bitcoin.{ "data": { "base": "BTC", "currency": "USD", "amount": "15840.01" } } - When a response is returned, check for errors and print them out if they exist.
- If things are error free, use a
JSONDecoderto map the JSON response to aPriceResponsemodel object. - The model object is passed to
updateLabel(price:), which is explicitly dispatched to the main thread because UI updates must be done on the main thread.
{
  "data": {
    "base": "BTC",
    "currency": "USD",
    "amount": "15840.01"
  }
}
Formatting
updateLabel(price:) on BitcoinViewController uses multiple formatter objects to ensure the Bitcoin price returned from the API is correctly split into dollars and cents so it’s display-ready.
private func updateLabel(price: Price) {
  guard let dollars = price.components().dollars,
        let cents = price.components().cents,
        let dollarAmount = standardFormatter.number(from: dollars) else { return }

  primary.text = dollarsDisplayFormatter.string(from: dollarAmount)
  partial.text = ".\(cents)"
}
This is quite a lot of logic forced into a single UIViewController. The Networking, Parsing and Formatting functionality is tightly coupled here. It’s difficult to test any portion of it independently of the entire BitcoinViewController object, or reuse the same logic somewhere else.
That doesn’t sound good – can we fix this?

The alternative to tightly coupled components involves creating objects that can be easily linked and unlinked from one another — objects that are loosely coupled.
It’s time to refactor BitcoinViewController so it creates separate objects for the Networking and Parsing responsibilities. When that’s done, you’ll adjust their usage to achieve truly decoupled components, using Swinject.
Extracting Dependencies
Start by creating a new folder named Dependencies. This will hold all of the various logic pieces you’ll be extracting throughout the rest of this tutorial.
Right-click on the Bitcoin Adventurer folder and select New Group. Then set its name to Dependencies.

Are you ready to start extracting the different logic pieces and make the code testable, robust and beautiful? Thought so! :]