Getting Started with AWS AppSync for iOS
Learn how to consume GraphQL APIs in your SwiftUI iOS apps in a simple and type-safe way using AWS AppSync framework.
Version
- Swift 5, iOS 14, Xcode 12

Most apps nowadays require a back end to work. Need user accounts? You’ll need a back end for that. Want to sync data across devices? Guess what, you’ll need a back end. Targeted push notifications? Back end… you get the idea.
You may have heard the acronym BaaS (Back end as a service) before. BaaS tools offer integration with cloud storage services via the use of simple APIs. Once configured, these BaaS services function the same way any other API would with little to no upfront back end knowledge required.
In this tutorial, you’ll use Amazon’s BaaS offering called AppSync along with the Amplify framework to add a back end component to your iOS app. You’ll learn how to:
- Install AWS Amplify and its dependencies
- Implement models using GraphQL and generate local files with Amplify
- Perform CRUD operations on your data
- Save your application’s data to AWS AppSync
You’ll learn all this by implementing a to do list app with SwiftUI. The app will allow you to create, delete and complete to dos while keeping your app’s data synchronized with the AppSync cloud service. The app will work both with and without an internet connection as well!
Getting Started
Download the project materials using the Download Materials button at the top or bottom of this tutorial. Open RazeList.xcodeproj inside the starter folder.
RazeList helps your to dos stay in sync across all your iOS devices. It’s your one source of truth for all of your to dos, and more importantly, all of your “dones”! When you’re finished with this tutorial, you’ll always know where you are with your tasks, no matter which device you’re using.
Inside Xcode, build and run the project.
Right now, the project is nothing more than a greeting. You’re going to change that, but there are a few prerequisites you need to take care of first.
About GraphQL and AppSync
Before writing any code, you’ll first need to learn what GraphQL is and how it works with AppSync.
What is GraphQL?
GraphQL was developed by Facebook in 2012; it’s a query language and server-side runtime for executing queries designed to work with server-side APIs.
If you’ve worked with server-side APIs before, you’re likely already familiar with REST. REST APIs work by exposing multiple endpoints for applications, each one designed for a specific data type. Most APIs these days would be considered RESTful; however, the REST standard is loosely interpreted so you’ll likely have a different experience across multiple REST APIs.
Contrary to REST, GraphQL only exposes a single endpoint which you interact with via queries. With this approach, clients only access the data they need and minimize the amount of data sent over the network. The best way to see how GraphQL operates is with an example.
type Todo {
id: ID!
name: String!
description: String
completed: Boolean!
}
Above is an example of a GraphQL schema describing the Todo
type, the basic to do structure you’ll use when building RazeList. The server defines this type so that you can fetch it. Assume you have a screen in your app that lists all to dos, but only requires the name
and completed
fields. This is how you would fetch the data for that screen, using a GraphQL query:
query TodoQuery {
listTodos {
items {
name
completed
}
}
}
This GraphQL query only accesses the data required by specifying the fields it cares about. You send this query to the server and the server responds with a data structure that matches your query. Adding and removing fields in this way would require changes to the API when using REST, whereas here, you can just change the query inside the app, without having to modify the server at all.
GraphQL with AWS AppSync
AWS AppSync does all the heavy lifting of your back-end web service. It acts as a bridge between GraphQL and other AWS services such as data storage, caching and real-time updates.
AppSync provides a dashboard for your project where you can view and query your data, as well as add custom functionality through custom functions.
Your app will communicate with AppSync via GraphQL behind the scenes; however, you’ll be using the AppSync iOS framework to abstract away a lot of this complexity. After some configuration, you’ll only talk your back end in a type-safe way.
Installing the Amplify Framework
You’re going to start by installing the project dependencies. You may already have some (or all) of these installed. If that’s the case, you can skip to the relevant section.
Installing npm
Node Package Manager (npm) is a package manager and CLI (command line interface) for managing Node.js packages. In this project, you’ll be using npm to install the Amplify CLI.
If you’re unsure if you have npm installed, open Terminal and type npm -v
, then press Enter. If it’s installed, you should see the version number printed in the Terminal window.
npm is installed along with Node.js. To install both Node.js and npm navigate to the node.js website and click the download link labeled LTS. At the time of writing, the current LTS version is 14.15.1 LTS.
Once downloaded, open the .pkg file, and you should see the following:
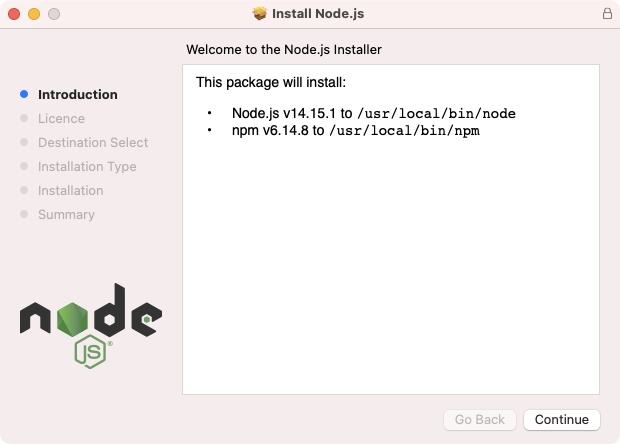
Click Continue and follow the steps. When the installation completes, restart Terminal and type npm -v
and press Enter. You should now see the version number.
Installing Amplify CLI
Amplify is installed via the command line. Inside Terminal, type the following and press Enter.
sudo npm install -g @aws-amplify/cli
Enter your system password when required. You’ll see a lot of activity in the Terminal window as npm does its thing. When Amplify is installed, you should see something like the following:
---------------------------------------- Successfully installed the Amplify CLI ----------------------------------------
Once this process completes, enter the following command and press Enter:
amplify configure
This command will open the AWS login page in a new browser window. If you don’t already have an AWS account, you’ll need to sign up for one before completing this step. Signing up is quick and easy; instructions on how to do this can be found at the AWS knowledge center. When you’re done, be sure to continue the tutorial from this point.
Log in into your AWS account in the browser window. Once logged in, return to the Terminal window and press Enter.
Next you’ll need to specify your region. Choose the region that best represents your location with the arrow keys and then press Enter.
Next enter the username for your new user and press Enter. This can be anything you want.
This will direct you to the AWS console to finish the setup. Click through the setup process using the buttons at the bottom, and be sure that AdministratorAccess is checked on the permissions screen.
On the success screen of user setup, copy your Access key ID and Secret access key to a secure location — you will need them later. Be sure to click Show when copying the Secret Access Key.
Return to the Terminal window and press Enter.
When prompted by Terminal, enter your Access Key ID and Secret Access Key.
Finally, press Enter one last time when asked for the Profile Name. This will set your profile to default.
Installing CocoaPods
You will use CocoaPods to add the AppSync frameworks to your project. If you are not familiar with CocoaPods, you can learn about it in our CocoaPods Tutorial for Swift
CocoaPods is installed through Ruby, which is already installed on your Mac. Open Terminal, type the following command and press Enter.
sudo gem install cocoapods
After a short delay you should see Successfully installed cocoapods-VERSION
in the Terminal window.
Adding Amplify to the Project
Now that you’re all set up with dependencies, you can move on to setting up the project in Xcode. Make sure you close Xcode for the next step… yes you heard that right!
Open a Terminal screen, and use cd
to navigate to the starter project directory. Then, type the following into the terminal window:
pod init
Once the command completes, you’ll notice a new file named Podfile has appeared inside your project directory. Open Podfile in a text editor and add the following below # Pods for RazeList
:
pod 'Amplify'
pod 'Amplify/Tools'
pod 'AmplifyPlugins/AWSAPIPlugin'
pod 'AmplifyPlugins/AWSDataStorePlugin'
Navigate back to the terminal window and type the following command:
pod install
After a few seconds, you should see the following message:
Pod installation complete! There are 4 dependencies from the Podfile and 12 total pods installed.
Voilà! Just like that, your packages have been installed and included in your project.
Open the project directory in Finder, you’ll notice you now have a workspace file called RazeList.xcworkspace, which CocoaPods created. Double-click this file and your project will open in Xcode. Use this file from now on to open your project instead of RazeList.xcodeproj, because it’s the one that contains all the dependencies needed.
Adding AppSync Script
You’re almost over the finish line. The last thing you need to do before writing any code is add a Run Script to the Build Phases tab inside Xcode. This script performs some tasks needed to use AppSync in your project.
Select the RazeList project inside Xcode. In the project explorer, click Build Phases. Click the + button and select New Run Script Phase.
You’ll notice a new Run Script entry at the bottom of the list. Click the arrow to expand it.
Inside the code editor at the top, add the following code:
"${PODS_ROOT}/AmplifyTools/amplify-tools.sh"
Now build and run the project. The build will take a little longer this time, because Xcode executes the Run Script as part of the build process. When the build finishes, you’ll have a few more files inside your project; you’ll be working with these in the next section. It’s important that you wait for the project to build before moving onto the next stage.
Initializing Amplify
Once the build process is complete, you’ll need to initialize amplify within your project. You’ll know the build has done its job as you’ll see a new folder called AmplifyConfig in the Project navigator.
Make sure you’re in the project directory in Terminal and enter the following command:
amplify init
Enter the following information when prompted:
? Enter a name for the environment
Press Enter
? Choose your default editor
None
? Do you want to use an AWS profile?
Y
? Please choose the profile you want to use
Press Enter for default
In the same Terminal window, enter the following command and then press Enter.
amplify add api
Enter the following information when prompted. Press enter on other steps to use the default setting.
? Please select from one of the below mentioned services:
GraphQL
? Provide API name:
Press Enter to set this to your directory name.
Next enter the following command.
amplify push
Enter the following information when prompted.
? Are you sure you want to continue?
Y
? Do you want to generate code for your newly created GraphQL API
N
This may seem like a lot of setup, but Amplify has done a lot for you. You’ve created a user, set up an app and added it the AWS dashboard, created a GraphQL API and published it to AWS. Everything from here is good to go!
Creating Models Using GraphQL
When working with a back-end service, you’ll likely want to represent your data types as models. Amplify saves you the trouble of having to type them up yourself. Isn’t that nice?
You still need to tell Amplify what to generate, however, and you’ll do that with GraphQL!
Open schema.graphql inside the AmplifyConfig group.
Replace the contents of this file with the following:
type Todo @model {
id: ID!
name: String!
description: String
completed: Boolean!
}
Next, open amplifytools.xcconfig in the same directory. Change push
and modelgen
to true
.
Build and run your project. When the build finishes, there will be a new directory in your Project navigator called AmplifyModels. Changing the line above in the configuration told Amplify to generate your model files for you from the GraphQL schema and update your configuration on AWS. Expand AmplifyModels and take a look around. You’ll see Todo.swift containing your model and some helper files.
Using Amplify in the App
In the Project navigator on the left, open AppMain.swift and add the following imports:
import Amplify
import AmplifyPlugins
Inside the AppDelegate
class, add the following code before return true
in the application(_:didFinishLaunchingWithOptions:)
function:
let apiPlugin = AWSAPIPlugin(modelRegistration: AmplifyModels())
let dataStorePlugin = AWSDataStorePlugin(modelRegistration: AmplifyModels())
do {
try Amplify.add(plugin: apiPlugin)
try Amplify.add(plugin: dataStorePlugin)
try Amplify.configure()
print("Initialized Amplify")
} catch {
print("Could not initialize Amplify: \(error)")
}
Build and run the project.
There are no visual changes to speak of, but you’ve fully configured your project to work with AppSync and Amplify.
Building the To Do List UI
With the libraries installed, CocoaPods set up and models generated, it’s time to make RazeList come to life.
Some of the SwiftUI coding for this tutorial has been done for you, but you still need to build the main to do list. That’s what you’ll be doing in this section.
Adding Rows to the To Do List
You’ll start by defining the row. Right click the Views group and select the New File option. Choose SwiftUI View and click Next. Name the file TodoRowView.swift and create it.
Open that file and, just below the TodoRowView
declaration, add the following.
// 1
let todoItem: Todo
// 2
let onToggleCompleted: (Todo) -> Void
The to do row defines two requirements.
- A
Todo
model to use for rendering. - A closure called when the user toggles the completed state.
This will cause an error as the preview doesn’t pass in these dependencies. Replace the entire contents of TodoRowView_Previews
with the following:
struct TodoRowView_Previews: PreviewProvider {
static var previews: some View {
TodoRowView(
todoItem: Todo(
id: UUID().uuidString,
name: "Build this cool app",
description: "I need to finish building this awesome todo list app :]",
completed: false)) { _ in }
}
}
Next, you’ll define a method called when the todo is toggled by the user. Add the following method to TodoRowView
:
func toggleCompleted() {
withAnimation {
onToggleCompleted(todoItem)
}
}
This function simply wraps onToggleCompleted
in an animation block that will animate the movement of the row between sections.
Next, replace the entire body
with the following:
var body: some View {
// 1
VStack(alignment: .leading, spacing: 8) {
HStack(spacing: 10) {
// 2
Button(action: { onToggleCompleted(todoItem) }) {
Image(systemName: todoItem.completed ? "checkmark.square" : "square")
.imageScale(.large)
.foregroundColor(todoItem.completed ? .pink : .primary)
}
// 3
Text(todoItem.name)
.font(.system(size: 18, weight: .semibold))
}
// 4
if let description = todoItem.description {
Text(description)
.font(.system(size: 14, weight: .medium))
.padding(.leading, 32)
.padding(.trailing, 10)
.foregroundColor(.gray)
}
}
}
Here’s what the above code does:
- Define a
VStack
container. - Define an
HStack
containing a button with a checkbox image. The image is either checked or unchecked depending on the state the to do model’scompleted
property. Tapping the button will callonToggleCompleted(_:)
. - The second item in the stack is a
Text
view containing the name of the to do. - If the to do contains a description, render it inside a
Text
view.
Setting up Your Data
Open TodoListViewModel.swift. Add the following code inside the class implementation:
@Published var todos: [Todo] = []
@Published var completedTodos: [Todo] = []
TodoListViewModel
conforms to ObservableObject
. Conforming to this protocol allows the object to publish updates when the state changes. Using the @Published
property wrapper tells the object to broadcast changes through its publisher to anyone listening. SwiftUI uses this to redraw the UI when the object updates.
If you want to learn more about ObservableObject
, check out Combine: Asynchronous Programming with Swift.
Next, open TodoListView.swift and add the following code inside the view implementation:
@ObservedObject var viewModel = TodoListViewModel()
Here you’re creating a reference to TodoListViewModel
using the @ObservedObject
property wrapper. Creating a property in this way tells SwiftUI that you care about the state of this object and it should respond to changes.
Adding Sections
Next you’ll define two sections, one for to dos and one for completed to dos. Generally speaking, you want to aim to keep the body
property light. With that in mind, you’ll define these two sections as computed properties.
Add the first section to TodoListView
:
var todoSection: some View {
// 1
Group {
// 2
if viewModel.todos.isEmpty {
Text("Nothing to do!")
} else {
// 3
ForEach(viewModel.todos, id: \.id) { todo in
// 4
TodoRowView(todoItem: todo) { todo in
withAnimation {
// Toggle complete
}
}
.padding(.vertical, 6)
}
.onDelete(perform: viewModel.deleteTodos)
}
}
}
Taking it bit-by-bit:
- You can’t optionally return a
Text
view orForEach
view, so they’re wrapped inside aGroup
. - If there are no to dos in your list, return a
Text
view reflecting this. - If there are to dos, loop through each to do inside a
ForEach
. - For each to do in the list, generate a
TodoRowView
and pass in the current to do.
You’ll do the same thing next with the completed to dos. Below the todoSection
property, add the following:
var completedTodoSection: some View {
Group {
if viewModel.completedTodos.isEmpty {
Text("Completed Tasks Appear Here")
} else {
ForEach(viewModel.completedTodos, id: \.id) { todo in
TodoRowView(todoItem: todo) { todo in
withAnimation {
// Toggle complete
}
}
.padding(.vertical, 6)
}
.onDelete(perform: viewModel.deleteCompletedTodos)
}
}
}
The only difference here is that you’ve replaced references to viewModel.todos
with viewModel.completedTodos
.
Now you’ve defined your two list sections, it’s time to see them in action!
Replace the contents of body
with the following:
// 1
List {
// 2
Section(header: Text("Todo")) {
todoSection
}
// 3
Section(header: Text("Completed")) {
completedTodoSection
}
}
// 4
.listStyle(GroupedListStyle())
The code above does the following:
- Creates a list to contain the sections you created earlier.
- Embeds the to do section inside a
Section
view. - Embeds the completed to dos section inside a
Section
view. - Gives the list a grouped style. This will separate the sections and apply some default styling.
Build and run to see the result.
You’re finally rid of the hello world app! Nice.
Adding a To Do
In the final part of this section, you’ll integrate the add to do screen. The UI has already been built, so this is a fairly simple step.
Go to TodoListView.swift and add a new property inside the view implementation:
@State var addNewTodoPresented: Bool = false
This will be in charge of presenting and dismissing the add to do view.
At the bottom of body
, on the line after .listStyle(GroupedListStyle())
, add the following view modifiers:
// 1
.navigationBarItems(
trailing: Button(action: { addNewTodoPresented.toggle() }) {
Image(systemName: "plus")
.imageScale(.large)
}
)
// 2
.sheet(isPresented: $addNewTodoPresented) {
AddTodoView { name, description in
// add todo
addNewTodoPresented.toggle()
}
}
This looks a bit complicated but is actually fairly straightforward:
- The
navigationBarItems(trailing:)
view modifier adds navigation items to the navigation bar of the enclosingNavigationView
. You’re adding a single button here, which togglesaddNewTodoPresented
when tapped. - The
sheet(isPresented:content:)
view modifier presents a model when theisPresented
state istrue
. The closure returns the view to be presented. In this case, you’re returningAddTodoView
.
Build and run to see the result.
You now have an add button in the navigation bar and a screen to add new todos!
Creating and Editing To Dos
You’re all set up and have a functioning UI. The last thing you need to do is wire everything up!
Open TodoListViewModel.swift and add a new import.
import Amplify
Adding To Dos
Next, add the following method:
func createTodo(name: String, description: String?) {
// 1
let item = Todo(name: name, description: description, completed: false)
// 2
todos.append(item)
// 3
Amplify.DataStore.save(item) { result in
switch result {
case .success(let savedItem):
print("Saved item: \(savedItem.name)")
case .failure(let error):
print("Could not save item with error: \(error)")
}
}
}
With all the configuration from the previous steps, this is all you need to save data to your local and cloud data stores. Here’s what’s happening:
- Creates a new to do item using the variables passed in.
- Adds it to the local
todos
array. - Using the Amplify framework, adds the to do to your data store.
Next open TodoListView.swift, and scroll down to the .sheet
modifier at the end of body
. In the closure on the line above addNewTodoPresented.toggle()
, add a call to the createTodo(name:description:)
function.
viewModel.createTodo(name: name, description: description)
You can save todos now, but that’s no good unless you can load them!
Back in TodoListViewModel.swift, replace loadToDos()
with the following.
func loadToDos() {
Amplify.DataStore.query(Todo.self) { result in
switch result {
case .success(let todos):
self.todos = todos.filter { !$0.completed }
completedTodos = todos.filter { $0.completed }
case .failure(let error):
print("Could not query DataStore: \(error)")
}
}
}
Now in TodoListView.swift add a new view modifier underneath .sheet
.
.onAppear {
viewModel.loadToDos()
}
Build and run the project to add your first todo!
Completing To Dos
So far, the app is great for showing you what you need to do — but not so good at letting you complete those tasks.
Open TodoListViewModel. Scroll to the bottom and add the following new method after loadTodos()
:
func toggleComplete(_ todo: Todo) {
// 1
var updatedTodo = todo
updatedTodo.completed.toggle()
// 2
Amplify.DataStore.save(updatedTodo) { result in
switch result {
case .success(let savedTodo):
print("Updated item: \(savedTodo.name )")
case .failure(let error):
print("Could not update data with error: \(error)")
}
}
// 3
if updatedTodo.completed {
if let index = todos.firstIndex(where: { $0.id == todo.id }) {
todos.remove(at: index)
completedTodos.insert(updatedTodo, at: 0)
}
// 4
} else {
if let index = completedTodos.firstIndex(where: { $0.id == todo.id }) {
completedTodos.remove(at: index)
todos.insert(updatedTodo, at: 0)
}
}
}
Okay, that’s a fair chunk of code. Here’s what it does:
- Make a mutable copy of the to do so it can be modified, then toggle the completed value.
- Using Amplify, save the to do back to your data store.
- If the to do is completed, remove it from
todos
and add it tocompletedTodos
. - If the to do is not completed, remove it from
completedTodos
and add it totodos
.
Open TodoListView.swift and navigate to the two properties at the top. In todoSection
and completedTodoSection
, you’ll notice two placeholder comments // Toggle complete
. Replace that comment in both places with the following:
viewModel.toggleComplete(todo)
Build and run the app. Now you can tap each todo in either list and change the completed state with a cool animation!
Deleting To Dos
The final thing you need add is a way to delete rows. Swipe-to-delete already exists in the UI, so you just need to wire it up.
Open TodoListViewModel.swift, and you’ll notice three delete methods at the top. These will act as helpers to delete to do items from their respective list.
Add the following method:
func delete(todo: Todo) {
Amplify.DataStore.delete(todo) { result in
switch result {
case .success:
print("Deleted item: \(todo.name)")
case .failure(let error):
print("Could not update data with error: \(error)")
}
}
}
This method deletes the model from the data store by calling delete(_:)
from the Amplify framework.
Next, replace the three delete methods above with the following:
// 1
func deleteItems(at offsets: IndexSet, from todoList: inout [Todo]) {
for index in offsets {
let todo = todoList[index]
delete(todo: todo)
}
todoList.remove(atOffsets: offsets)
}
// 2
func deleteTodos(at offsets: IndexSet) {
deleteItems(at: offsets, from: &todos)
}
// 3
func deleteCompletedTodos(at offsets: IndexSet) {
deleteItems(at: offsets, from: &completedTodos)
}
Here’s what you’ve done:
- The first delete method calls
delete(at:from:)
, which you just added. - This method routes the call to delete with the
todos
array. - This method routes the call to delete with the
completedTodos
array.
Build and run the project. You can now swipe to delete todos!
You now have a to do list that allows you to add, edit and delete to dos. It works offline and stays synchronized to an AWS back end.
Where to Go From Here?
You can download the completed version of the project using the Download Materials button at the top or bottom of this tutorial.
You now know the basics of integrating and using AppSync with Amplify in your iOS apps — but there’s a lot more to learn! GraphQL can do much more than what you’ve covered here.
When you’re ready for your next steps with AWS and Amplify, check out Using AWS as a Back End: Authentication & API and Using AWS as a Back End: The Data Store API.
Check out our tutorial GraphQL Using the Apollo Framework: Getting Started to see more practical examples. You can also learn a lot more about GraphQL on the official GraphQL website.
You should also look at the official AWS AppSync tutorials Amazon has produced for further learning.
If you have any questions, please join the discussion in the forum below!
Comments