Assembly Register Calling Convention Tutorial
Learn how the CPU uses registers in this tutorial taken from our newest book, Advanced Apple Debugging & Reverse Engineering! By Derek Selander.
In this tutorial, you’ll look at registers the CPU uses and explore and modify parameters passed into function calls. You’ll also learn about common Apple computer architectures and how their registers are used within a function. This is known as an architecture’s calling convention.
Knowing how assembly works and how a specific architecture’s calling convention works is an extremely important skill to have. It lets you observe function parameters you don’t have the source code for and lets you modify the parameters passed into a function. In addition, it’s sometimes even better to go to the assembly level because your source code could have different or unknown names for variables you’re not aware of.
For example, let’s say you always wanted to know the second parameter of a function call, regardless of what the parameter’s name is. Knowledge of assembly gives you a great base layer to manipulate and observe parameters in functions.
Assembly 101
Wait, so what’s assembly again?
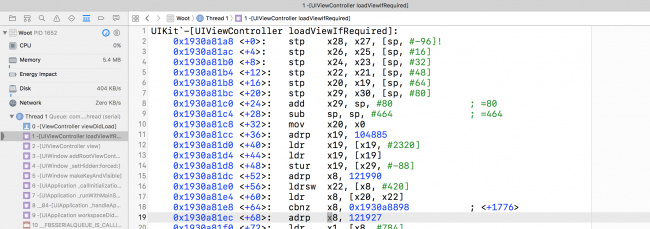
Have you ever stopped in a function you didn’t have source code for, and saw an onslaught of memory addresses followed by scary, short commands? Did you huddle in a ball and quietly whisper to yourself you’ll never look at this dense stuff again? Well… that stuff is known as assembly!
Here’s a picture of a backtrace in Xcode, which showcases the assembly of a function within the Simulator.

Looking at the image above, the assembly can be broken into several parts. Each line in a assembly instruction contains an opcode, which can be thought of as an extremely simple instruction for the computer.
So what does an opcode look like? An opcode is an instruction that performs a simple task on the computer. For example, consider the following snippet of assembly:
pushq   %rbx
subq    $0x228, %rsp
movq    %rdi, %rbx
In this block of assembly, you see three opcodes, pushq, subq, and movq. Think of the opcode items as the action to perform. The things following the opcode are the source and destination labels. That is, these are the items the opcode acts upon.
In the above example, there are several registers, shown as rbx, rsp, rdi, and rbp. The % before each tells you this is a register.
In addition, you can also find a numeric constant in hexadecimal shown as 0x228. The $ before this constant tells you it’s an absolute number.
There’s no need to know what this code is doing at the moment, since you’ll first need to learn about the registers and calling convention of functions.
By default, Apple’s disassembler tools ship with assembly displayed in the AT&T format, as it is in the example above. Although this is a good format to work with, it can admittedly be a little hard on the head.
%’s and $’s that precede the registers and constants. This is how the disassembler formats the assembly. However, there are two main ways that assembly can be showcased. The first is Intel assembly, and the second is AT&T assembly.
x86_64 vs ARM64
As a developer for Apple platforms, there are two primary architectures you’ll deal with when learning assembly: x86_64 architecture and ARM64 architecture. x86_64 is the architecture most likely used on your macOS computer, unless you are running an “ancient” Macintosh.
x86_64 is a 64-bit architecture, which means every address can hold up to 64 1s or 0s. Alternatively, older Macs use a 32-bit architecture, but Apple stopped making 32-bit Macs at the end of the 2010’s. Programs running under macOS are likely to be 64-bit compatible, including programs on the Simulator. That being said, even if your macOS is x86_64, it can still run 32-bit programs.
If you have any doubt of what hardware architecture you’re working with, you can get your computer’s hardware architecture by running the following command in Terminal:
uname -m
ARM64 architecture is used on mobile devices such as your iPhone where limiting energy consumption is critical.
ARM emphasizes power conservation, so it has a reduced set of opcodes that help facilitate energy consumption over complex assembly instructions. This is good news for you, because there are fewer instructions for you to learn on the ARM architecture.
Here’s a screenshot of the same method shown earlier, except this time in ARM64 assembly on an iPhone 7:
 in many of their devices, but have since moved to 64-bit ARM processors. 32-bit devices are almost obsolete as Apple has phased them out through various iOS versions. For example, the iPhone 4s is a 32-bit device which is not supported in iOS 10. All that remains in the 32-bit iPhone lineup is the iPhone 5, which iOS 10 does support.
Interestingly, all Apple Watch devices are currently 32-bit. This is likely because 32-bit ARM CPUs typically draw less power than their 64-bit cousins. This is really important for the watch as the battery is tiny.
Since it’s best to focus on what you’ll need for the future, Advanced Apple Debugging & Reverse Engineering will focus primarily on 64-bit assembly for both architectures. In addition, you’ll start learning x86_64 assembly first and then transition to learning ARM64 assembly so you don’t get confused. Well, not too confused.
x86_64 Register Calling Convention
Your CPU uses a set of registers in order to manipulate data in your running program. These are storage holders, just like the RAM in your computer. However they’re located on the CPU itself very close to the parts of the CPU that need them. So these parts of the CPU can access these registers incredibly quickly.
Most instructions involve one or more registers and perform operations such as writing the contents of a register to memory, reading the contents of memory to a register or performing arithmetic operations (add, subtract, etc.) on two registers.
In x64 (from here on out, x64 is an abbreviation for x86_64), there are 16 general purpose registers used by the machine to manipulate data.
These registers are RAX, RBX, RCX, RDX, RDI, RSI, RSP, RBP and R8 through R15. These names will not mean much to you now, but you’ll explore the importance of each register soon.
When you call a function in x64, the manner and use of the registers follows a very specific convention. This dictates where the parameters to the function should go and where the return value from the function will be when the function finishes. This is important so code compiled with one compiler can be used with code compiled with another compiler.
For example, take a look at this simple Objective-C code:
NSString *name = @"Zoltan";
NSLog(@"Hello world, I am %@. I'm %d, and I live in %@.", name, 30, @"my father's basement");
There are four parameters passed into the NSLog function call. Some of these values are passed as-is, while one parameter is stored in a local variable, then referenced as a parameter in the function. However, when viewing code through assembly, the computer doesn’t care about names for variables; it only cares about locations in memory.
The following registers are used as parameters when a function is called in x64 assembly. Try and commit these to memory, as you’ll use these frequently in the future:
-
First Argument:
RDI -
Second Argument:
RSI -
Third Argument:
RDX -
Fourth Argument:
RCX -
Fifth Argument:
R8 -
Sixth Argument:
R9
If there are more than six parameters, then the program’s stack is used to pass in additional parameters to the function.
Going back to that simple Objective-C code, you can re-imagine the registers being passed like the following pseudo-code:
RDI = @"Hello world, I am %@. I'm %d, and I live in %@.";
RSI = @"Zoltan";
RDX = 30;
RCX = @"my father's basement";
NSLog(RDI, RSI, RDX, RCX);
As soon as the NSLog function starts, the given registers will contain the appropriate values as shown above.
However, as soon as the function prologue (the beginning section of a function that prepares the stack and registers) finishes executing, the values in these registers will likely change. The generated assembly will likely overwrite the values stored in these registers, or just simply discard these references when the code has no more need of them.
This means as soon as you leave the start of a function (through stepping over, stepping in, or stepping out), you can no longer assume these registers will hold the expected values you want to observe, unless you actually look at the assembly code to see what it’s doing.
This calling convention heavily influences your debugging (and breakpoint) strategy. If you were to automate any type of breaking and exploring, you would have to stop at the start of a function call in order to inspect or modify the parameters without having to actually dive into the assembly.