Advanced VR Mechanics With Unity and the HTC Vive – Part 2
Learn how to create a powerful, flexible, and reusable interaction system for your HTC Vive games in Unity with part 2 of this tutorial series! By Eric Van de Kerckhove.

Introduction
In the first part of this HTC Vive in Unity tutorial, you learned how to create an interaction system and use it to grab, snap and throw objects.
In this second part of this advanced HTC Vive tutorial, you’ll learn how to:
- Make a functional bow and arrow.
- Create a virtual backpack.
This tutorial is intended for an advanced audience, and it will skip a lot of the details on how to add components and make new GameObjects, scripts and so on. It’s assumed you already know how to handle these things. If not, check out our series on beginning Unity here.
Getting Started
Download the starter project, unzip it somewhere and open the folder inside Unity. Here’s an overview of the folders in the Project window:
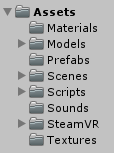
Here’s what each will be used for:
- Materials: Contains all the materials for the scene.
- Models: All models are in here.
- Prefabs: This contains all prefabs that were made in the previous part.
- Scenes: Contains the game scene and some lighting data.
- Scripts: All scripts are in here.
- Sounds: Contains the sound for shooting an arrow from the bow.
- SteamVR: The SteamVR plugin and all related scripts, prefabs and examples are in here.
- Textures: Contains the main texture that’s shared by almost all models for the sake of efficiency and the texture for the book.
Open up the Game scene inside the Scenes folder to get started.
Creating The Bow
At the moment there’s not even a bow present in the scene.
Create a new empty GameObject and name it Bow.
Set the Bow‘s position to (X:-0.1, Y:4.5, Z:-1) and its rotation to (X:0, Y:270, Z:80).
Now drag the Bow model from the Models folder onto Bow in the Hierarchy to parent it.

Rename it BowMesh and set its position, rotation and scale to (X:0, Y:0, Z:0), (X:-90, Y:0, Z:-180) and (X:0.7, Y:0.7, Z:0.7) respectively.
It should now look like this:
Before moving on, I’d like to show you how the string of the bow works.
Select BowMesh and take a look at its Skinned Mesh Renderer. Unfold the BlendShapes field to reveal the Bend blendshape value. This is where the magic happens.
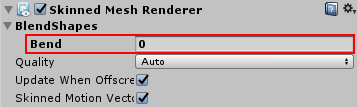
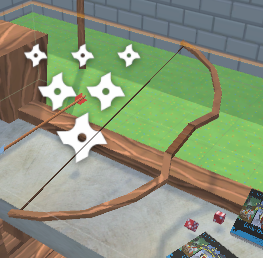
Keep looking at the bow. Change the Bend value from 0 to 100 and back by dragging and holding down your cursor on the word Bend in the Inspector. You should see the bow bending and the string being pulled back:
Set Bend back to 0 for now.
Remove the Animator component from the BowMesh, all animations are done using blendshapes.
Now add an arrow by dragging an instance of RealArrow from the Prefabs folder onto Bow.
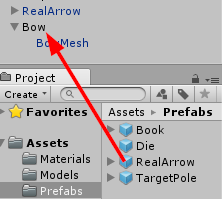
Name it BowArrow and reset its Transform component to move it into position relative to the Bow.
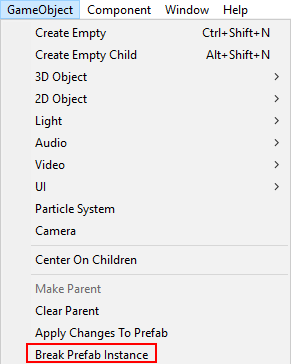
This arrow won’t be used as a regular arrow, so break the connection to its prefab by selecting GameObject\Break Prefab Instance from the top menu.
Unfold BowArrow and delete its child, Trail. This particle system is used by normal arrows only.
Remove the Rigidbody, second Box Collider and RWVR_Snap To Controller components from BowArrow.
All that should be left is a Transform and a Box Collider component.
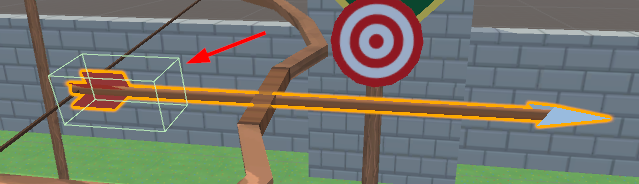
Set the Box Collider‘s Center to (X:0, Y:0, Z:-0.28) and set its size to (X:0.1, Y:0.1, Z:0.2). This will be the part the player can grab and pull back.
Select Bow again and add a Rigidbody and a Box Collider to it. This will make sure it has a physical presence in the world when not in use.
Change the Box Collider‘s Center and Size to (X:0, Y:0, Z:-0.15) and (X:0.1, Y:1.45, Z:0.45) respectively.
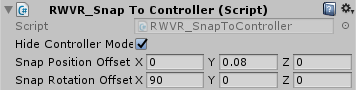
Now add a RWVR_Snap To Controller component to it. Enable Hide Controller Model, set Snap Position Offset to (X:0, Y:0.08, Z:0) and Snap Rotation Offset to (X:90, Y:0, Z:0).
Play the scene and test if you can pick up the bow.
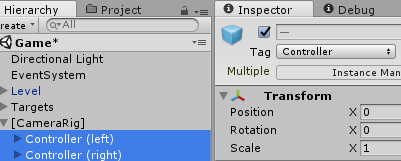
Before moving on, set up the tags on the controllers so future scripts will function correctly.
Unfold [CameraRig], select both controllers and set their tag to Controller.
In the next part you’ll make the bow work by doing some scripting.
Creating Arrows
The bow system you’ll create consists of three key parts:
- The bow.
- The arrow in the bow.
- A regular arrow that shoots out.
Each of these needs their own script to work together to make the bow shoot.
For starters, the normal arrows need some code to allow them to get stuck in objects and be picked up again later.
Create a new C# script inside the Scripts folder and name it RealArrow. Note this script doesn’t belong in the RWVR folder as it’s not a part of the interaction system.
Open it up and remove the Start() and Update() methods.
Add the following variable declarations below the class declaration:
public BoxCollider pickupCollider; // 1
private Rigidbody rb; // 2
private bool launched; // 3
private bool stuckInWall; // 4
Quite simply:
- The arrows have two colliders: one trigger to detect collisions when fired and a regular one that’s used for physical interaction and picking the arrow up again once fired. This variable references the latter.
- A cached reference to this arrow’s Rigidbody.
- Gets set to
truewhen an arrow is launched from the bow. - Will be set to
truewhen this arrow hits a solid object.
Now add the Awake() method:
private void Awake()
{
    rb = GetComponent<Rigidbody>();
}
This simply caches the Rigidbody component that’s attached to this arrow.
Add the following method below Awake() :
private void FixedUpdate()
{
    if (launched && !stuckInWall && rb.velocity != Vector3.zero) // 1
    {
        rb.rotation = Quaternion.LookRotation(rb.velocity); // 2
    }
}
This snippet will make sure the arrow will keep facing the direction it’s headed. This allows for some cool skill shots, like shooting arrows in the sky and then watching them come down upon the ground again with their heads stuck in the soil. It also makes things more stable and prevents arrows from getting stuck in awkward positions.
FixedUpdate does the following:
- If this arrow is launched, not stuck in a wall and has at least some velocity…
- Look in the direction of the velocity.
Add these methods below FixedUpdate():
public void SetAllowPickup(bool allow) // 1
{
    pickupCollider.enabled = allow;
}

public void Launch() // 2
{
    launched = true;
    SetAllowPickup(false);
}
Looking at the two commented sections:
- A small helper method that enables or disables the
pickupCollider. - Called when the arrow gets shot by the bow, sets the
launchedflag totrueand doesn’t allow the arrow to be picked up.
Add the next method to make sure the arrow doesn’t move once it hits a solid object:
private void GetStuck(Collider other) // 1
{
    launched = false; // 2
    rb.isKinematic = true; // 3
    stuckInWall = true; // 4
    SetAllowPickup(true); // 5
    transform.SetParent(other.transform); // 6
}
Taking each commented section in turn:
- Gets a
Collideras a parameter. This is what the arrow will attach itself to. - Make the arrow kinematic so it’s not affected by physics.
- Sets the
stuckInWallflag totrue. - Allow picking this arrow as it stopped moving.
- Parent the arrow to the object it hit. This makes sure the arrow stays firmly attached to any object, even if that object is moving.
The final piece of this script to add is OnTriggerEnter(), which is called when the arrow’s trigger hits something:
private void OnTriggerEnter(Collider other)
{
    if (other.CompareTag("Controller") || other.GetComponent<Bow>()) // 1
    {
        return;
    }

    if (launched && !stuckInWall) // 2
    {
        GetStuck(other);
    }
}
You’ll get an error saying Bow doesn’t exist yet. Ignore this for now: you’ll create the Bow script next.
Here’s what’s the code above does:
- If this arrow hit a controller or a bow, don’t get stuck. This prevents some annoying behavior, as the arrow could get stuck in the bow right after shooting it otherwise.
- This arrow was launched and isn’t stuck yet, so attach it to the object it hit.
Save this script, then create a new C# script in the Scripts folder named Bow. Open it in your code editor.