SwiftyBeaver Tutorial for iOS: A Logging Platform for Swift
In this Swift tutorial, you’ll learn how to integrate SwiftyBeaver logging into your iOS application. By Ted Bendixson.
Other bugs are more sinister. They lurk in the background and happen when you least expect it. They are the dreaded stuff of nightmares and Listerine commercials.
In this tutorial, you’ll discover a secret weapon you can use to crush those sinister bugs in the background. When wielded properly, this weapon is like shining a flashlight into the deepest darkest crevices of your app. Those creepy crawlers won’t stand a chance!
That weapon is SwiftyBeaver, a Swift-based logging framework for iOS and macOS.
In this tutorial, you’ll learn how to debug using SwiftyBeaver and pick up the following skills along the way:
- When SwiftyBeaver logging is better than
print()andNSLog() - How to access your SwiftyBeaver logs on Crypto Cloud
- How to use Log Levels for different types of log messages
- How to filter logs to make bug hunting even easier
Note: Before starting this tutorial, you should be familiar with Cocoapods and the CoreLocation framework. Check out the linked tutorials to brush up on these skills first.
Getting Started
Download the starter project here. It includes all of the project files and artwork you will need to complete this tutorial.
You are going to build an app for tracking your children. If they get too far away from home, the app will warn them to stay in the safe zone.
It’s called Ten PM (Do you know where your children are?) after the famous public service announcements from the ’80s.
Open TenPM.xcworkspace and look around the project. Now open Main.storyboard and you’ll see two view controllers inside a navigation controller:

The view controller on the left is the one parents can use to tell the app where “home” is, and also to specify a maximum distance they will allow their child to wander. The backing class is TrackingSetupViewController, which requests location tracking authorization and stores an input distance for geofencing.
The view controller on the right is the one the kids will use. It shows a map with a green circle that represents the safe zone. It also has a text box down below to tell them if they are currently safe or not. The backing class is TrackingViewController, which draws an overlay on an MKMapView illustrating the allowable child locations.
Here are a few other files of note:
- LocationTracker.swift: Acts as the Core Location Manager’s delegate. It handles location updates and permission changes.
-
ParentProfile.swift: Stores important user data to
NSUserDefaults. The data includes the parents’ home location and the distance their kids are allowed to wander.
Using The Starter App
Build and run the Ten PM app on the iOS Simulator. You will see the view controlled by TrackingSetupViewController:

Before you set up tracking, you need to make sure the simulator is providing a starting location. To do that, select the simulator and in the toolbar select Debug\Location\Apple.

Tap the SETUP TRACKING button and the app will ask your permission to start gathering location data. Because this screen is for the parents, there is an extra alert confirming that you are the parent and you are at home. Select Yes and then Allow. Once the app determines your location, it will save your home address to use as the center point for your kid’s safe zone circle.
Now input 1 in the prompt for Safe Distance from home. This means you don’t want to be any further than 1 kilometer from the simulated Apple location.

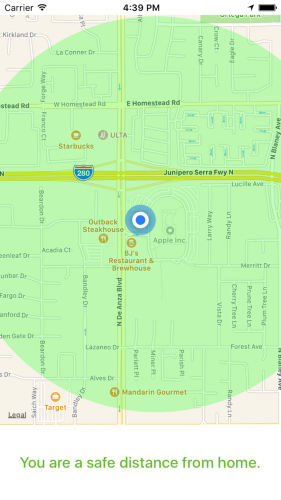
Tap NEXT and you will be taken to the view backed by TrackingViewController. This view has an annotation with your current location along with a green circle outlining your safe zone.
Come to think of it, this app might be useful for Apple employees carrying expensive iPhone prototypes.
Now that you are all set up, it’s time to pretend that it’s the year 2011 and you’ve got an iPhone 4 prototype you’re taking out for a stroll. Let’s simulate a new location, just outside of your safe zone, where you’ve set up a meeting with a reporter from Gawker.
In the simulator menu, go to Debug\Location again, but this time choose Custom Location. Enter 37.3397 as your latitude and -122.0426 as your longitude and hit OK.

You should see the blue dot move to the new location, and the message at the bottom should change to tell you that you are dangerously far from home.
That’s the basic rundown of Ten PM’s functionality. It’s a fairly simple app that can be expanded upon pretty easily. You could have it start sending remote notifications to the parents once their child goes outside of the safe zone, etc.
But you’re not going to do that today. Instead, you’ll use this app to simulate some nasty background bugs that you will then fix with the assistance of SwiftyBeaver.
Installing SwiftyBeaver
First, install SwiftyBeaver via Cocoapods. Find the root directory for Ten PM and locate the Podfile. Open it in the editor of your choice, then add the following line under # Pods for TenPM:
pod 'SwiftyBeaver'
Open a Terminal and navigate to the directory with your Podfile. Type the following:
pod install
After a minute or so, the installation of SwiftyBeaver will complete. Now open AppDelegate.swift and add the following import to the top:
import SwiftyBeaver
Build the project, and you’ll see SwiftyBeaver is now available to the project because the project will successfully compile.
Note: This install guide only works with Cocoapods and Swift 3. More detailed installation instructions can be found on the SwiftyBeaver GitHub Repository page.
Writing Your First Logs With SwiftyBeaver
Whew. Are you ready to write some code?
Look at AppDelegate.swift again. This is where you will set up logging for SwiftyBeaver. Did you notice the skeleton method provided in the stater project?
setupSwiftyBeaverLogging() gets called every time your application launches, and as the name implies, you’ll use it to prepare SwiftyBeaver for use. Go to that method and add the following:
let console = ConsoleDestination()
SwiftyBeaver.addDestination(console)
SwiftyBeaver isn’t any ordinary logging tool. It has multiple inputs called Destinations that you can configure to suit your needs. A Destination defines where your logs appear.
ConsoleDestination() creates a Console Destination, which you added as an active SwiftyBeaver destination. Now any log messages you create will show up in the console, just like a print() statement would.
In application(_:didFinishLaunchingWithOptions:), add the following after the call to setupSwiftyBeaverLogging:
SwiftyBeaver.info("Hello SwiftyBeaver Logging!")
This will print an info level log to the console when the app starts up. You’ll learn more about log levels in a moment.
Build and run Ten PM again. Check the console, and you’ll see the following log message:
12:06:05.402 💙 INFO AppDelegate.application():36 - Hello SwiftyBeaver Logging!
Cool! You’re logging to the console with SwiftyBeaver. The heart relates to the log level, which are explained below.