Android Fragments Tutorial: An Introduction with Kotlin
In this Android Fragments with Kotlin tutorial you will learn the fundamental concepts of fragments while creating an app that displays dogs breeds. By Aaqib Hussain.
Using a factory method
There’s a new kid in town here: FragmentManager. Each activity has a FragmentManager that manages its fragments. It also provides an interface for you to access, add and remove those fragments.
You’ll notice that while DogDetailsFragment has a factory instance method, newInstance(), it does not have any constructors.
Wait, why do you need a factory method but not a constructor?
First, because you did not define any constructors, the compiler automatically generates an empty, default constructor that takes no arguments. This is all that you should have for a fragment: no other constructors.
Second, you probably know that Android may destroy and later re-create an activity and all its associated fragments when the app goes into the background. When the activity comes back, its FragmentManager starts re-creating fragments by using the empty default constructor. If it cannot find one, you get an exception.
For this reason, it is best practice to never specify any non-empty constructors. In fact, the easiest thing to do is to specify none as you did here.
What if you need to pass information or data to a Fragment? Hang on, you’ll get the answer to that later!
Adding a Fragment
Here’s where you get to add a fragment using the simplest approach — adding it to the activity’s XML layout. This is also sometimes called Adding a Fragment Statically.
To do this, open activity_main.xml, select the Text tab and add the following inside of the root FrameLayout:
<fragment
  android:id="@+id/details_fragment"
  class="com.raywenderlich.android.eldogo.DogDetailsFragment"
  android:layout_width="match_parent"
  android:layout_height="match_parent"/>
android:name="com.raywenderlich.android.eldogo.DogDetailsFragment" instead of class="com.raywenderlich.android.eldogo.DogDetailsFragment".
In this step, you’re placing a <fragment> tag inside of the activity layout and specifying the type of fragment the class attribute should inflate. FragmentManager requires the view ID of the <fragment>. By including this in the XML, the FragmentManager knows to add this fragment to the activity automatically.
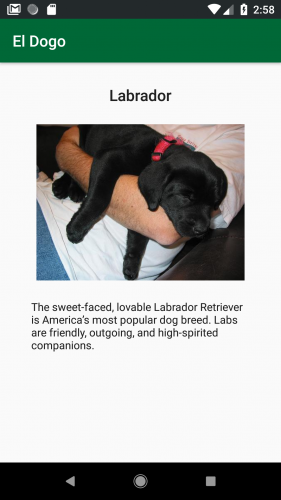
Build and run. You will see the fragment:
Adding a Fragment Dynamically
First, open activity_main.xml again and remove the <fragment> you inserted. Embrace the Zen of deleting code! You’ll replace it with the list of dog breeds.
Open DogListFragment.kt, which has all the list code. You can see that the DogListFragment has no explicit constructors and a newInstance().
The list code in DogListFragment depends on some resources. You have to ensure that the fragment has a valid reference to a Context for accessing those resources. That’s where onAttach() comes into play.
In DogListFragment.kt and add these imports directly below the existing imports:
import android.os.Bundle
import android.support.v7.widget.GridLayoutManager
The GridLayoutManager helps in positioning items in the breed list. The other import is for standard fragment overrides.
Inside of DogListFragment.kt, add the following method above the definition of the DogListAdapter:
override fun onAttach(context: Context?) {
  super.onAttach(context)

  if (context != null) {
    // Get dog names and descriptions.
    val resources = context.resources
    names = resources.getStringArray(R.array.names)
    descriptions = resources.getStringArray(R.array.descriptions)
    urls = resources.getStringArray(R.array.urls)

    // Get dog images.
    val typedArray = resources.obtainTypedArray(R.array.images)
    val imageCount = names.size
    imageResIds = IntArray(imageCount)
    for (i in 0 until imageCount) {
      imageResIds[i] = typedArray.getResourceId(i, 0)
    }
    typedArray.recycle()
  }
}
onAttach() contains code that accesses the resources such as breed names and descriptions you need via the Context to which the fragment is attached. Because the code is in onAttach(), you can rest assured that the fragment has a valid Context.
Add this method right after the onAttach():
override fun onCreateView(inflater: LayoutInflater,
                          container: ViewGroup?,
                          savedInstanceState: Bundle?): View? {
  val view: View = inflater.inflate(R.layout.fragment_dog_list, container,
    false)
  val activity = activity as Context
  val recyclerView = view.findViewById<RecyclerView>(R.id.recycler_view)
  recyclerView.layoutManager = GridLayoutManager(activity, 2)
  recyclerView.adapter = DogListAdapter(activity)
  return view
}
In onCreateView(), you inflate the view hierarchy of DogListFragment, which contains a RecyclerView, and perform some standard RecyclerView setup.
If you have to inspect a fragment’s view, onCreateView() is a good place to start because it generates the view.
Next open MainActivity.kt and add the following to the bottom of onCreate():
// 1
if (savedInstanceState == null) {
  // 2
  supportFragmentManager
          // 3
          .beginTransaction()
          // 4
          .add(R.id.root_layout, DogListFragment.newInstance(), "dogList")
          // 5
          .commit()
}
At this point, to get DogListFragment into MainActivity. You ask your new friend, FragmentManager, to add it.
Here you:
-
The view ID of a container for the fragment’s view hierarchy in the activity’s layout. If you take a look at
activity_main.xml, you’ll find@+id/root_layout. - The fragment instance you want to add.
-
A string that acts as a tag/identifier for the fragment instance. This allows the
FragmentManagerto later retrieve the fragment for you.
- Check that the
savedInstanceStateisnull. This is a way to see if it’s an initial open of the screen. - Grab the
FragmentManagerby referencingsupportFragmentManageras opposed tofragmentManager, since you are using support fragments. - Ask that
FragmentManagerto start a new transaction by callingbeginTransaction()— you probably figured that out yourself. - Specify the add operation that you want by calling
addand passing in: - Finally, ask the
FragmentManagerto execute the transaction by callingcommit().
In the code above, an if block contains the code that displays the fragment and checks that the activity doesn’t have saved state. When an activity saves, all of its active fragments are also saved. If you don’t perform this check, this could happen:

And you may feel like this:

The lesson: Always keep in mind how the saved state affects your fragments.
And with that, you’ve added the fragment!
Build, run and you’ll see a dog list once the app launches:

FragmentManager helped achieve this awesomeness through FragmentTransactions, which are basically fragment operations such as add and remove.
Data Binding
While poking around the project you may have noticed a few things:
- A file called
DataBindingAdapters. - A reference to
dataBindingin the app modulebuild.gradle:dataBinding { enabled = true } - A data section in the
recycler_item_dog_model.xmllayout file.<layout xmlns:android="http://schemas.android.com/apk/res/android"> <data> <variable name="dogModel" type="com.raywenderlich.android.eldogo.DogModel"/> </data> ... </layout> - A
DogModeldata class.
dataBinding {
  enabled = true
}
<layout xmlns:android="http://schemas.android.com/apk/res/android">

  <data>

    <variable
      name="dogModel"
      type="com.raywenderlich.android.eldogo.DogModel"/>
 </data>

  ...
</layout>
If you haven’t used data binding before you may be like…

Let’s take a quick walkthrough.
Normally, if you want to set the value of properties in your layout, you’d use something like the following in your fragments and activities:
programmer.name = "a purr programmer"
view.findViewById<TextView>(R.id.name).setText(programmer.name)
The problem with that is that if you change the value of name for programmer, you would need to do a subsequent setText to the TextView in order to update the item. Imagine having a tool where you could bind a variable from your fragments and activities to your view and allow for changes to the variable to automatically update in the View. That is what data binding does for you.
Looking at our El Dogo app, the enabled=true in the build.gradle enables data binding in the application. Your data class contains data that you want to use in your fragment and display in your view. The data field contains variables consisting of name and type options which specify the type and name of the variable being bound.
This data is used in the view using {@} notation. For example, the following would set a text field to the value held by the name field of the dogModel variable. You can see this in the TextView with the ID name:
tools:text="@{dogModel.name}"
Now that you have your view set up, you need to access your view and bind the variables to it. This is where the data binding magic comes in!
Whenever a view has a data field, the framework automatically generates a binding object. It creates the name of the object by converting the snake case name of the view into camel case and adding binding to the name. For example, a view called recycler_item_dog_model.xml would have a corresponding binding called RecyclerItemDogModelBinding. You can see this in DogListAdapter in DogListFragment.kt:
override fun onCreateViewHolder(viewGroup: ViewGroup, viewType: Int):
  ViewHolder {
  val recyclerDogModelBinding =
      RecyclerItemDogModelBinding.inflate(layoutInflater, viewGroup, false)
  val dog = DogModel(imageResIds[position], names[position],
          descriptions[position], urls[position])
  recyclerDogModelBinding.dogModel = dog
You can then inflate the view via the inflater method on the binding object and set properties via standard property access mechanisms.
Data binding follows a Model-View-ViewModel (MVVM) pattern. MVVM consists of three components:
- View: The layout file.
- Model: The data class
- View Model/Binder: The auto-generated binding files.
For further reading on the MVVM, and other design patterns, refer to the tutorial Common Design Patterns for Android. You’ll see more on data biding later on.