How to Submit An App to Apple: From No Account to App Store – Part 2
In the second half of this two-part series, you’ll learn how to publish an app to the Apple App Store including learning about Xcode’s Automatic Device Provisioning and actually uploading your app to the store. By Rony Rozen.
You’re on your way to becoming a published iOS developer! In Part One, you went through the developer registration process, used the iOS Developer Center to register your devices, created certificates and profiles, and finally brought it all together by running the app on a physical device.
Now, in Part Two, you’ll use iTunes Connect to send Apple the information they need to pay you for your apps and, finally, you’ll submit your app to Apple for approval.
Getting Started
Before we actually get started you should know, rather than setting up the provisioning profiles manually as you did in Part One, there’s an easier way to get your apps running on your devices.
The truth is, in some situations — such as when working with more than one developer account — the automatic provisioning you’re about to see just doesn’t work. But here’s how to do it to save yourself time, when you can.
Open Xcode, if you haven’t already. For this tutorial, the screenshots and instructions are applicable for version 9.2, but should work for future Xcode versions as well.
Once in Xcode, open the Devices window (Shift-Command-2), plug in your iOS device and select it from the menu on the left. If this is the first time you’ve connected your device while Xcode is running, Xcode may take some time to sort itself out. You’ll see a message saying that it’s “processing symbol files.” Eventually, your screen should look something like this:

Now select Xcode\Preferences… (or Command-,) and choose Accounts:

Click + in the lower left, select Apple ID, and click Continue:
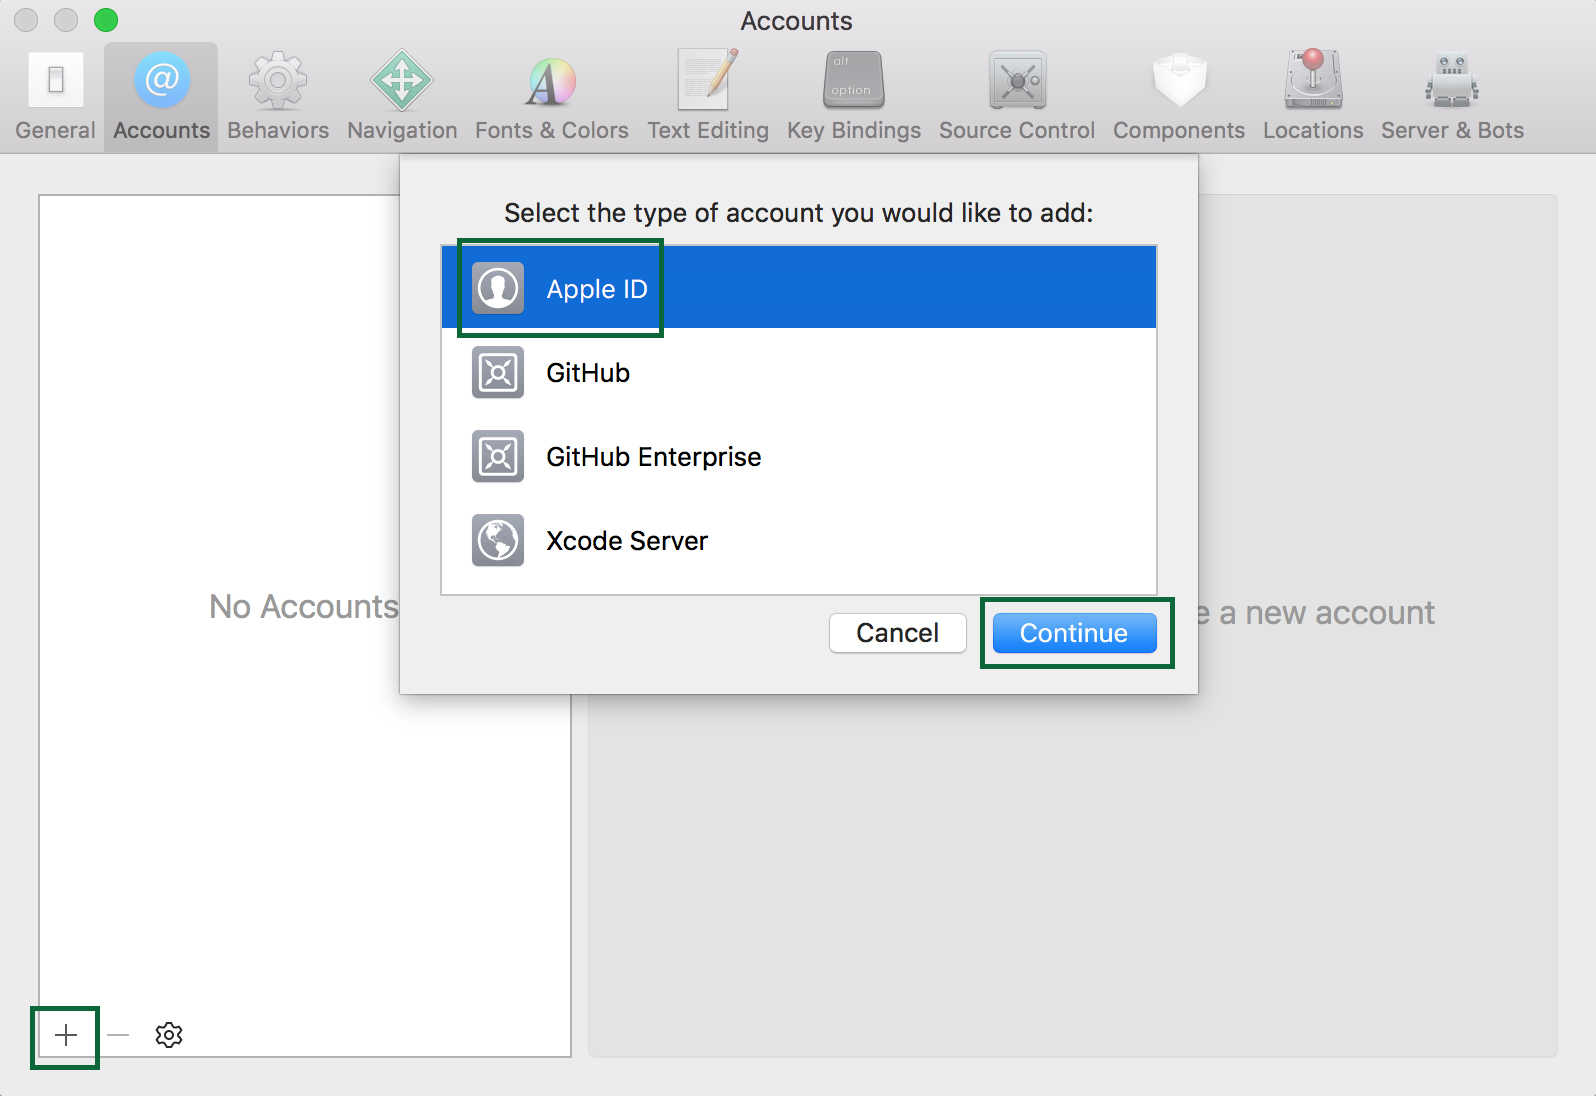
Enter your developer account credentials and click Sign In.
Entering your credentials this way allows Xcode to connect automatically to the Provisioning Portal on your behalf. It will also detect any connected devices and automatically register them with the Provisioning Portal if they aren’t there already.
Next you will see a screen that shows your information. Note that your role is Agent. This is the “super user” account and has the most permissions of any role. If your account is set up as a company or business — not an individual developer — you’ll have the ability to add other folks to your account. These other developers can have the role of Member or Admin.
At the bottom of the screen, you will see two buttons:
- Download Manual Profiles: downloads profiles that haven’t been added to Xcode yet.
- Manage Certificates: enables you to create additional certificates, similar to what you did via the Developer Portal in the previous part of this tutorial.
You can now close the preferences pane.
Remember that there will be times you’ll still need to know how to do this using the Provisioning Portal, so it’s a good thing you’ve seen how to do it the hard way first. Here are some situations in which you’ll need to know the old-school way:
- You’re working for a person or company that has their own account, and you need to use their account instead of your own.
- You need to test app services, such as Game Center, In-App Purchase, Data Protection, or iCloud. For these you need a provisioning profile with a bundle ID that does not use a Wildcard App ID. As you recall from the first part of this tutorial, Wildcard App IDs work with every app but do not allow you to test these services. In this case, you’ll need a provisioning profile with an Explicit App ID.
- You’re building a beta version of an app for someone’s device and you don’t have access to the device itself, just the UDID.
Running Your App On Your Device – Reminder
For this section of the tutorial, you need an app to test on your device. This tutorial uses the Drop Charge app from 2D iOS & tvOS Games by Tutorials.
In the previous part of this tutorial, you ran your app on a physical device. Now you’ll go into a bit more detail about how that works.
One of the things you did was open Project navigator, click on the project node of the tree, click General, and set Deployment Target at or below the iOS version on your device.
Deployment Target is a fancy way of saying “the minimum version of iOS that your code supports”. Be careful though! If, for example, you set the Deployment Target to iOS 8.0 but use an API that is only available on iOS 9, your app will crash! The safest thing to do is to test your code on a device running the oldest version of iOS you want to support.
Make sure the Bundle Identifier is the same as the bundle identifier you used for the App ID you registered in the Provisioning Portal:

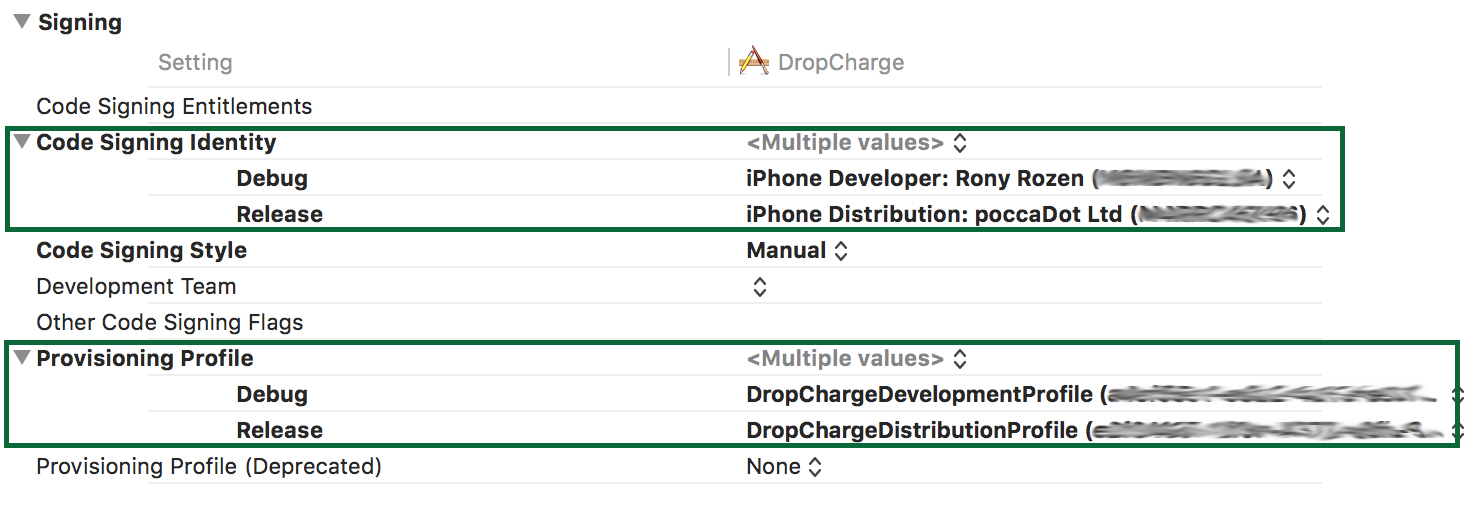
Next, you must point Xcode to the correct provisioning profiles. Click Build Settings and search for the word “signing”. In the search results list under the Code Signing Identity section, click the drop downs for the Debug and Release entries and choose the correct certificates. Then, under the Provisioning Profile section, choose the matching provisioning profiles from those presented by Xcode.
You should select your Developer Certificate & Profile for the Debug build, and your Distribution Certificate & Profile for the Release build:
Finally, make sure the device you want to run on is connected to your Mac, then choose that device using in scheme chooser on the top left.
Press Command-B to build the project. You may see a prompt saying “codesign wants to sign using key ‘privateKey’ in your keychain”. The Mac is letting you know Xcode wants to access your credentials. Enter your password and click Always Allow.
If there are any problems with your profiles, you’ll see something like this popup in Xcode:
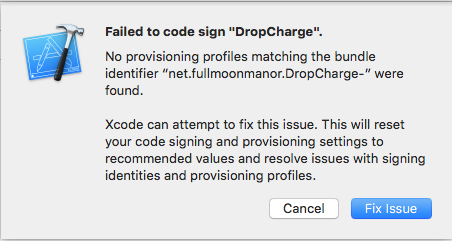
In this example, the Bundle ID had been accidentally mis-typed. Xcode will gladly go make you a new profile for you, but you do not want that so don’t click Fix Issue. Select Cancel instead and go back and correct the Bundle ID manually.
Press Command-B to build again. Now everything should be OK:
![]()
Press Command-R to run the app. In a few moments you should see your app running on your device! That’s always an exciting moment :]