In App Purchases Tutorial: Consumables
Consumables are one-shot items, such as ammo, or stickers. Find out how to add support for them in your app in this In App Purchases tutorial on consumables. By Nicholas Waynik.
Update 9/23/16: Updated for Swift 3, iOS 10, and Xcode 8.
Unlike other types of IAPs, Consumables are things that are only supposed to be used once. Think of extra lives in games, or stickers in a messaging app. Because of the disposable nature of these IAPs you have to consider some new functionality in your app: like keeping count of how many IAPs have been purchased and possibly limitting the number a person can have.
This In App Purchases tutorial picks up where things left things off in the previous In-App Purchases tutorial, so you’ll have to follow that tutorial first before starting this one. As a reminder, in that tutorial an app called “Rage” was created. It allowed customers to purchase rage face comics as non-consumable In-App purchases.
In this tutorial, you will extend the app to add a new consumable In-App Purchase – after all, those are often way more lucrative than non-consumables, since customers can purchase them more than once!
Note: This tutorial (and the previous) are focused on the “simplest and easiest” way to do things, not the most “robust and flexible” way of doing things. For more in-depth coverage, check out In-App Purchase Video Tutorial Series.
So without further ado, let’s dive into learning more about In-App Purchases – you’ll see it’s pretty easy, and there’s no need to rage about it! :]
Getting Started
Start by downloading the starter project for this tutorial.
Note that the starter project is not the same as where we left things off in the last tutorial – a few extra things were added for you. So, open the project in Xcode and have a look around:
- Added RandomFaceViewController.swift.
- Setup the UI for RandomFaceViewController in the Storyboard.
- Added an additional segue to show RandomFaceViewController.
- Added four random rage face images to the Asset Catalog.
You will have to make a few changes to this project for it to work with your own Apple developer account:
Select Rage in Project Navigator and then select the Rage target. Select the General tab and change the Bundle identifier to the one you used for the previous IAP tutorial.
Open RageProducts.swift and replace the value for GirlfriendOfDrummerRage to the product identifier you entered for it in iTunes Connect.
Once you’re done, build and run to try out the app on your device. If you haven’t already, purchase the “Girlfriend of Drummer” comic. Once it’s purchased, verify that you can tap the comic to view it.

Setting up IAP Consumables in iTunes Connect
You have an sneaky plan to make money – instead of allowing the user to see cool random rage faces as often as they’d like, instead you’ll add an arbitrary limit to it, and charge users to purchase more, mwuhahaha!
This way, there will be no limit to how much money users can spend on your app. Hopefully the bucks will keep rolling in!
Note: This is just the beginning of ways you can use consumable In-App Purchases to (arguably sneakily) increase your app’s revenue. To learn more, check out the many blogs and talks about freemium game design, gamer psychology, or any games by Zynga ;]
Just like you did with consumable In-App Purchases, the first step to make this all happen is to create a new In-App Purchase entry in iTunes Connect.
So log onto iTunes Connect, and click My Apps. Click your entry for Rage, then click Features, In-App Purchases and +.

Select the Consumable option, and click Create.
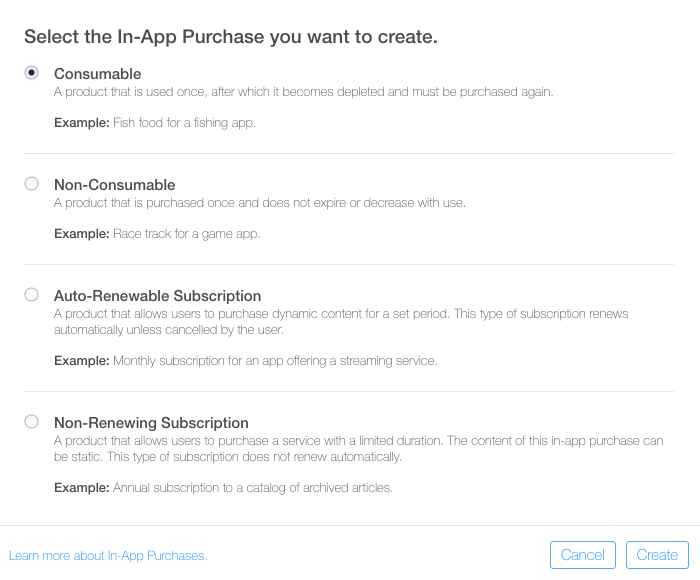
Fill out the screen that appears as follows (but replace the bundle ID with your own):
- Reference Name: Random Rage Face
- Product ID: com.razeware.rage.RandomRageFace (replace italic part with your bundle ID)
- Cleared for Sale: Yes
- Price Tier: Tier 1
Finally, scroll down to the Localizations section and fill in that section as follows:

Click Save, and you’re done! Time to try this out in your app.
Implementing a Consumable In-App Purchase
To begin, open RageProducts.swift and add a new static variable for the new product identifier you just created. Then modify the productIdentifiers set to also include the new variable. It should look similar to the following:
public static let RandomRageFace = "com.razeware.rage.RandomRageFace"

fileprivate static let productIdentifiers: Set<ProductIdentifier> =
  [RageProducts.GirlfriendOfDrummerRage,
   RageProducts.RandomRageFace]
Don’t forget to replace the value for RandomRageFace with whatever you set for the product identifier in iTunes Connect, or it won’t work.
Next, open IAPHelper.swift and replace deliverPurchaseNotificationFor(identifier:) with the following:
fileprivate func deliverPurchaseNotificationFor(identifier: String?) {
  guard let identifier = identifier else { return }

  purchasedProductIdentifiers.insert(identifier)

  if identifier == RageProducts.RandomRageFace {
    let defaults = UserDefaults.standard
    var currentValue = defaults.integer(forKey: RageProducts.RandomRageFace)
    currentValue += 5
    defaults.set(currentValue, forKey: RageProducts.RandomRageFace)
  } else {
    UserDefaults.standard.set(true, forKey: identifier)
  }

  UserDefaults.standard.synchronize()
  NotificationCenter.default.post(name: NSNotification.Name(rawValue: IAPHelper.IAPHelperPurchaseNotification), object: identifier)
}
Here you add a special case behavior for the consumable In-App Purchase. When a customer purchases one, instead of simply setting a flag indicating whether it’s purchased or not, you increment a value that keeps track of how many times the user can see a random rage face.
Note: This works but isn’t the ideal way of doing things, because now your IAPHelper class has hard-coded logic for a particular In-App Purchase. This doesn’t make it so reusable. For a more reusable way of doing things, check out In-App Purchase Video Tutorial Series.
In addition, note that storing the purchase using UserDefaults isn’t ideal, as that makes the in-app purchase tied to the particular device. In a real app, you should store the data on a server using a back-end such as CloudKit or Firebase.
Next open MasterViewController.swift and replace tableView(_:didSelectRowAtIndexPath:) with the following:
override func tableView(_ tableView: UITableView, didSelectRowAt indexPath: IndexPath) {
  let product = products[indexPath.row]
  if (product.productIdentifier == RageProducts.RandomRageFace) {
    self.performSegue(withIdentifier: showRandomFaceSegueIdentifier, sender: self)
  } else {
    self.performSegue(withIdentifier: showDetailSegueIdentifier, sender: self)
  }
}
Here you added logic to determine if the selected product is the RandomRageFace IAP. If it is then you will show the new RandomFaceViewController, otherwise you’ll perform the segue with the identifier value of showDetail and show the details of a specific rage face.
Go ahead and build and run. The new Random Rage Face consumable In-App purchase is listed in the table view.
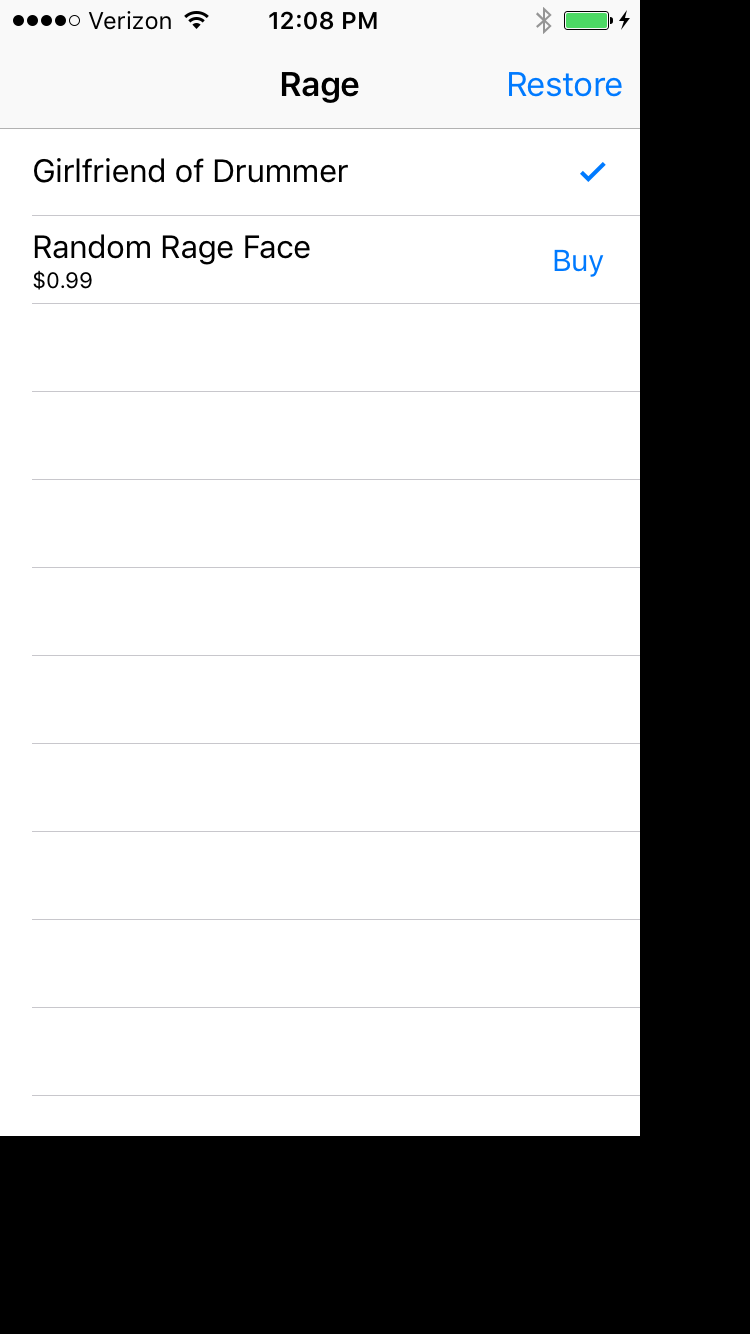
Now tap on Random Rage Face (the row, not the buy button):

You’ll see that the app displays the the view for RandomFaceViewController. Currently, tapping on the Random Rage Face! button does nothing. Quit the app so you can fix this.
Open RandomFaceViewController.swift and replace buttonPressed(_:) with the following:
@IBAction func buttonPressed(sender: UIButton) {
  let defaults = UserDefaults.standard
  var currentValue = defaults.integer(forKey: RageProducts.RandomRageFace)

  if currentValue <= 0 {
    return
  } else {
    currentValue -= 1
    defaults.set(currentValue, forKey: RageProducts.RandomRageFace)
    defaults.synchronize()

    refresh()

    let randomIdx = (arc4random() % 4) + 1
    let randomName = "random\(randomIdx).png"
    imageView.image = UIImage(named: randomName)
  }
}
This is basic logic to determine if the user has any random rage faces available. If they do, then you will display one of the random four images included in the starter project. There is one problem though: how does the user know if they have any available faces? To fix that, add the following two methods just above buttonPressed(_:):
override func viewWillAppear(_ animated: Bool) {
  super.viewWillAppear(animated)

  refresh()
}

func refresh() {
  let defaults = UserDefaults.standard
  let currentValue = defaults.integer(forKey: RageProducts.RandomRageFace)

  label.text = "Times Remaining: \(currentValue)"
}
When RandomFaceViewController is first presented, you update the label with the current rage face count by calling refresh(). The refresh() method simply retrieves the number of rage faces left to be viewed from NSUserDefaults. Finally, you display that number in a label at the bottom of the view controller.
And that's it! Build and Run the app and purchase a few more consumables. Then test out your random rage face button and make sure it works as expected!
