Scene Kit Tutorial with Swift Part 5: Particle Systems
In this 5-part Scene Kit tutorial series, you’ll learn how to make your first 3D iOS game: a game like Fruit Ninja called Geometry Fighter! By Chris Language.
Adding the Trail Particles
It’s finally time to add the cool particle effect to your game. Add the following to your GameViewController.swift class:
// 1
func createTrail(color: UIColor, geometry: SCNGeometry) -> SCNParticleSystem {
  // 2
  let trail = SCNParticleSystem(named: "Trail.scnp", inDirectory: nil)!
  // 3
  trail.particleColor = color
  // 4
  trail.emitterShape = geometry
  // 5
  return trail
}
Here’s what’s going on above:
-
This defines
createTrail(_: geometry:)which takes incolorandgeometryparameters to set up the particle system. - This loads the particle system from the file you created earlier.
- Next, you modify the particle’s tint color based on the parameter passed in.
-
This uses the
geometryparameter to specify the emitter’s shape. - Finally, this returns the newly created particle system.
This method helps you create instances of SCNParticleSystem, but you still need to add the particle systems to your spawned shape objects.
Note that createTrail(_: geometry:) takes in a color parameter and uses it to tint the particles. You will set the color of the particle system to be the same as the color of the shape.
Find the line in spawnShape() where you set the shape’s material diffuse contents and split it up so that the random color is stored in a constant like so:
let color = UIColor.random()
geometry.materials.first?.diffuse.contents = color
Next, add the following lines further down in spawnShape(), just after you apply a force to the physics body of geometryNode:
let trailEmitter = createTrail(color, geometry: geometry)
geometryNode.addParticleSystem(trailEmitter)
This uses createTrail(_: geometry:) to create a particle system and attach it to geometryNode.
Build and run; take a look at your hard work in action!

Woot! :] It looks great – but what would really make this shine is a heads-up display.
Adding a Heads-up Display
In this short section you’ll use the Game Utils to quickly add a little heads-up display to show your player’s remaining lives, best score, and current score. The code behind the scenes uses a Sprite Kit label and uses the output of the label as a texture for a plane.
Add the following new property to GameViewController.swift, right below spawnTime:
var game = GameHelper.sharedInstance
This lets you quickly access the GameHelper shared instance, which contains a set of methods to do the heavy lifting for you.
Add the following method to the bottom of GameViewController, below createTrail():
func setupHUD() {
  game.hudNode.position = SCNVector3(x: 0.0, y: 10.0, z: 0.0)
  scnScene.rootNode.addChildNode(game.hudNode)
}
Here you make use of game.hudNode from the helper library. You set its the HUD node’s position and add it to the scene.
Next, you need to call setupHUD() from somewhere. Add the following line to the bottom of viewDidLoad():
setupHUD()
Now that you have a heads-up display, you need to keep it up to date. Add the following call to game.updateHUD() to the bottom of renderer(_: updateAtTime:)
game.updateHUD()
Build and run; you’ll see your display at the top of the screen as shown below:
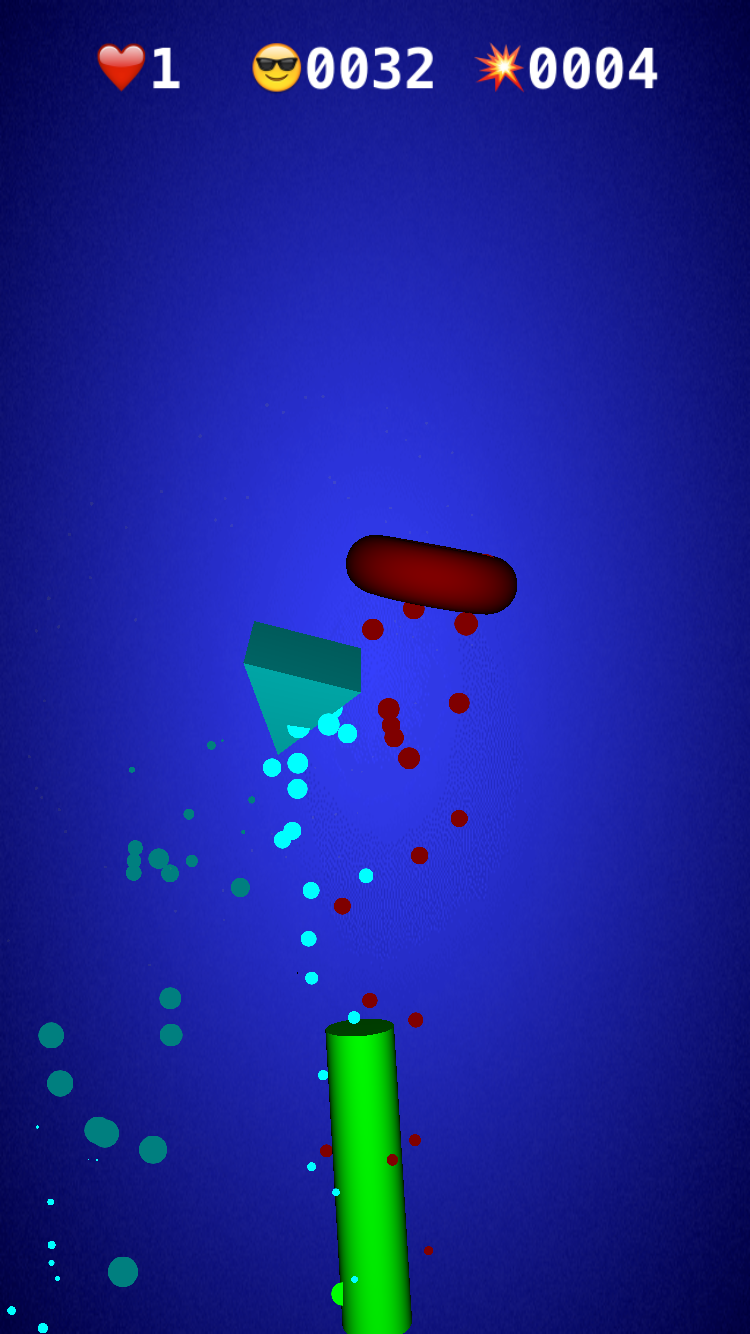
Your game now has a nifty little HUD with a life counter, the high score and the current score.
Okay, the heads-up display is nice, but it’s high time to add some interaction to your game.
Adding Touch Handling
As is usually the case, enabling touch in your app isn’t as straightforward as one would hope.
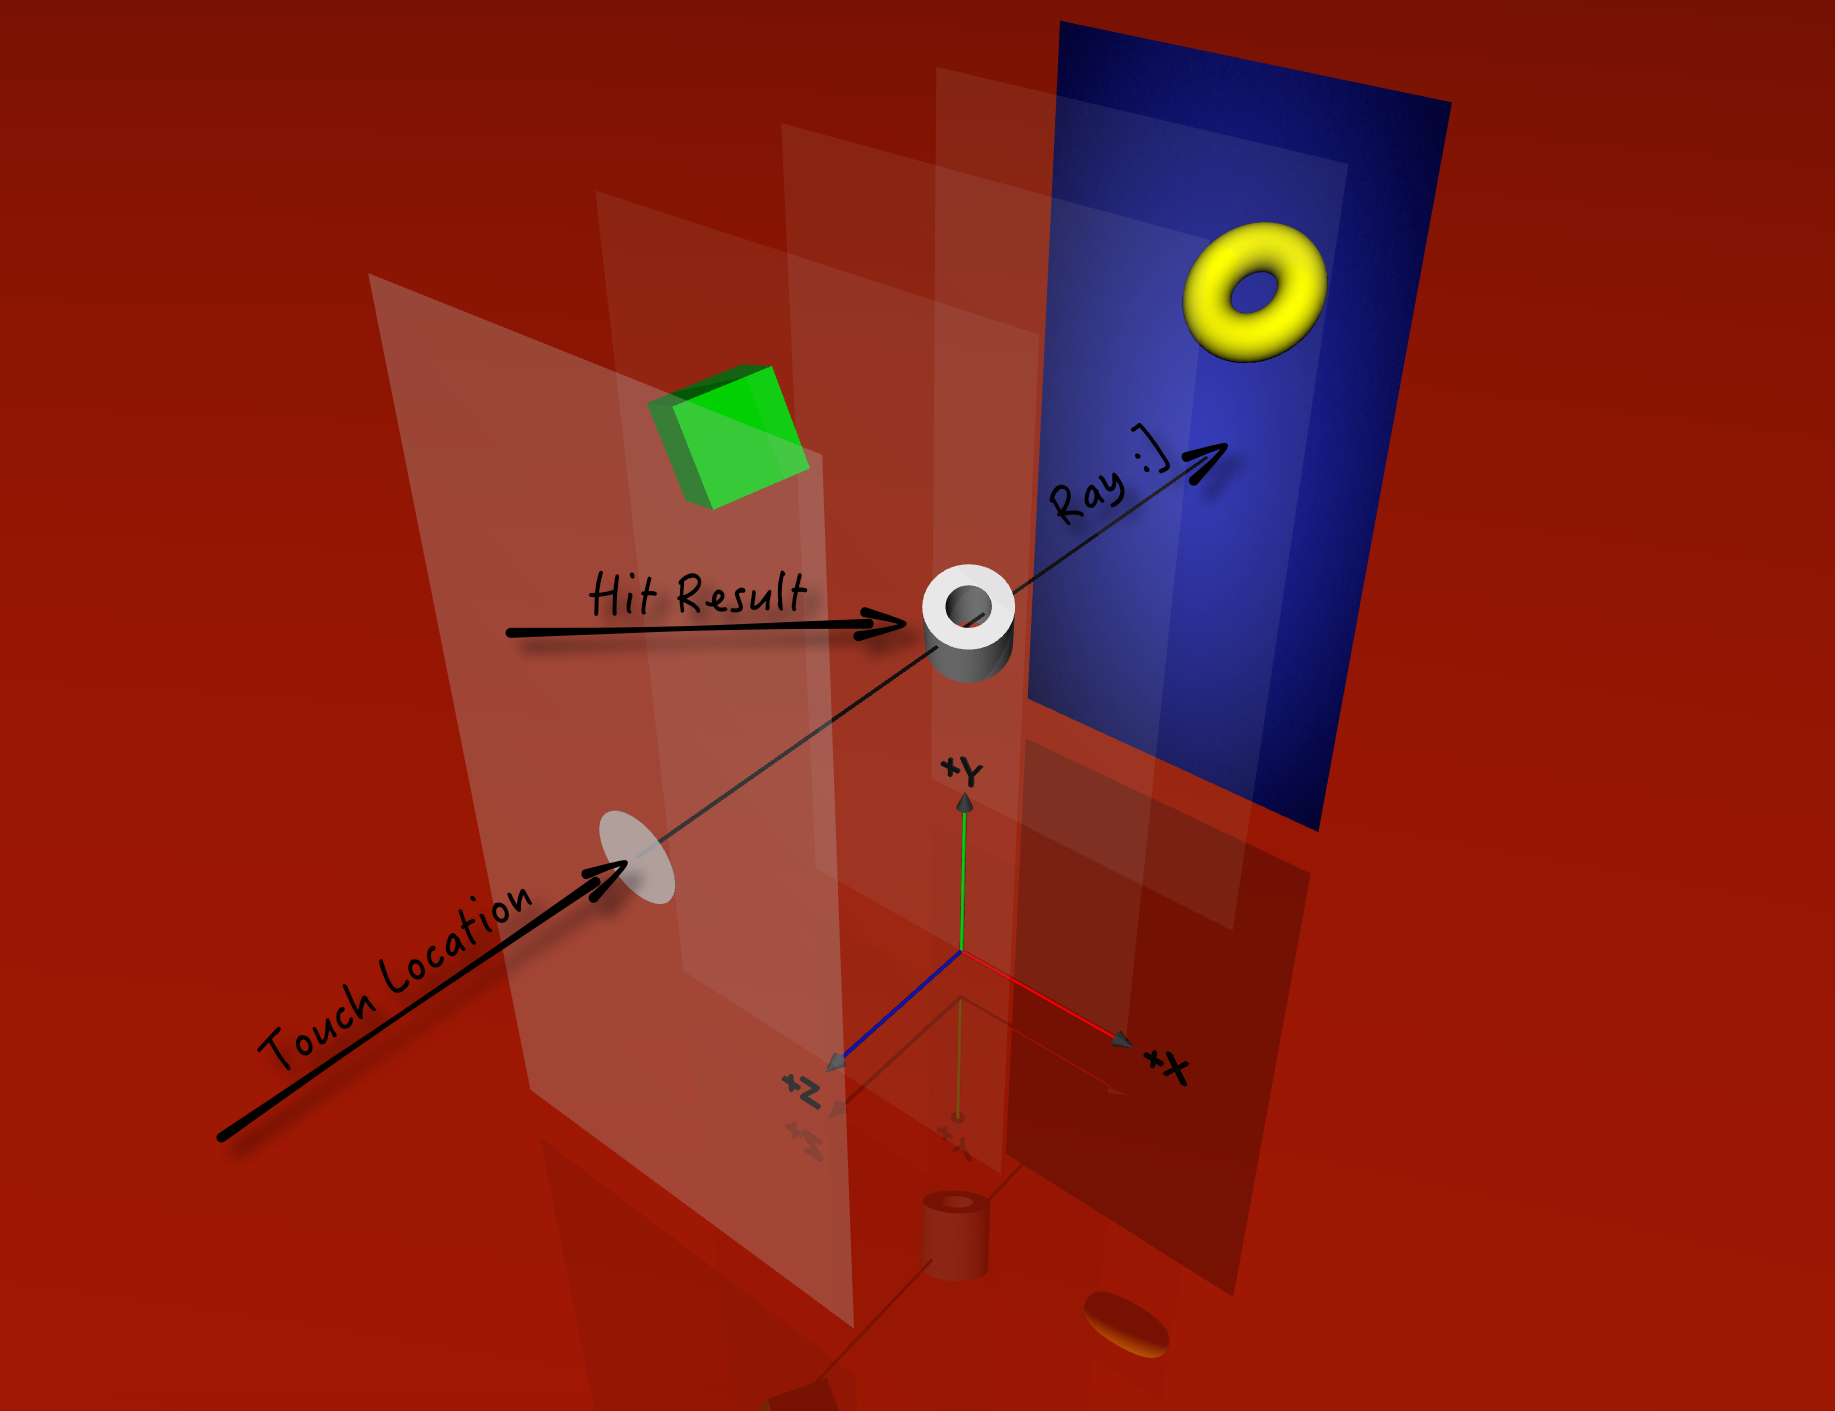
The first step is to understand how touch handling works in 3D. The image below shows a touch point in a side view of your scene and how Scene kit translates that touch point into your 3D scene to determine which object you’re touching:
So what steps do you take to handle the user’s touch event?
- Get Touch Location. First, you need to get the location of the user’s touch on the screen.
-
Convert to View Coordinates. After that, you need to translate that touch location to a location relative to the
SCNViewinstance that’s presenting the scene. - Fire a Ray for a Hit Test. Once you’ve established a touch location relative to the view, Scene Kit can perform a hit test for you by firing off a ray (No, not that Ray! :]) into your scene and returning a list of objects that intersect with the ray.
Naming Nodes
Before you can activate the touch ray of death, you need a way to identify each spawned object. The simplest approach is to give them names.
Add following to spawnShape(), right after you add the particle system to geometryNode:
if color == UIColor.blackColor() {
  geometryNode.name = "BAD"
} else {
  geometryNode.name = "GOOD"
}
True to the spirit of the black-hatted villains of old Western movies, you assign the moniker "BAD" to black-colored objects and "GOOD" to all others.
Adding a Touch Handler
Next you need to write a method that you will later call when you detect that the user has tapped a particular node.
Add the following method to the bottom of GameViewController, below setupHUD():
func handleTouchFor(node: SCNNode) {
  if node.name == "GOOD" {
    game.score += 1
    node.removeFromParentNode()
  } else if node.name == "BAD" {
    game.lives -= 1
    node.removeFromParentNode()
  }
}
This method checks the moniker of the touched node; good nodes increase the score and bad (black) nodes reduce the number of lives by one. In either case, you remove the node from the screen as it’s destroyed.
Using the Touch Handler
To capture the user’s touches, you’ll use touchesBegan(_: withEvent:), which is called every time the player touches the screen.
To implement your own version, add the following to GameViewController, right below handleTouchFor(_:):
override func touchesBegan(touches: Set<UITouch>, withEvent event: UIEvent?) {
  // 1
  let touch = touches.first!
  // 2
  let location = touch.locationInView(scnView)
  // 3
  let hitResults = scnView.hitTest(location, options: nil)
  // 4
  if hitResults.count > 0 {
    // 5
    let result = hitResults.first!
    // 6
    handleTouchFor(result.node)
  }
}
Taking each numbered comment in turn:
- Grab the first available touch.
-
Translate the touch location to a location relative to the coordinates of
scnView. -
hitTest(_: options:)gives you an array ofSCNHitTestResultobjects that represent any intersections that hit ray starting from the spot inside the view that the user touched, and going away from the camera. - Check if there are any results from the hit test.
- If there are, take the first result in the set.
- Finally, you pass the first result node to your touch handler, which will either increase your score – or cost you a life!
One final step. You don’t need the camera control anymore so change the line in setupView() as follows:
scnView.allowsCameraControl = false
Build and run; get ready to unleash your deadly finger of annihilation! :]

Tap on the spawned objects and make them disintegrate into thin air. Whoo-hoo! :]