Introduction to Unity 2D
This introductory Unity tutorial will get you up and running with Unity 2D by creating a lunar landing game. By Ben MacKinnon.
Unity is an extremely popular and versatile game engine that has a long list of supported platforms and devices to its credit. 3D games may be your first thought when it comes to Unity. The engine even used to be referred to as Unity 3D! However, a large portion of mobile, console and desktop games are presented in 2D, so it’s important to understand the features Unity provides for building 2D games.
In this tutorial, you’ll build a 2D space lander game and learn the following skills along the way:
- How to work with sprites and the camera.
- All about Physics 2D components and how to handle collisions and gameplay.
- How to set up 2D animation and states.
- How layer and sprite ordering affect a 2D game.
The materials for this tutorial were built in Unity version 2020.3. You can get this version from the Unity downloads page.
Getting Started
Download the materials for this tutorial by clicking the Download Materials button at the top or bottom of the tutorial.
Extract the contents. Then, open the starter project in Unity.
Open the Lander scene located in the Scenes folder of your Project window. You should see something similar to the following in the Game view:

You may not see the exact same picture because of sprite sorting, which will be explained later in this tutorial. The starter project is a functional 2D space lander game, but it has a few problems you’ll need to solve before you can truly call it finished.
Ready for lift off and a perilous journey down to the closest landing pad? Time to get started!

Sprites in Unity
At a high level, Sprites are simply just 2D Graphic objects. They are essentially standard textures you would usually use for 3D objects. However, Unity has special techniques for combining and managing these sprite textures to get super efficient performance in your games, as well as a convenient development experience.
In a nutshell, Sprites are easy to work with in Unity, thanks to a great 2D workflow and built-in editor.
To add a sprite to your game, drag and drop it from your Project folder into your Scene view. To see for yourself how easy the process is, first select the Scene view. Then, drag the playership sprite from the Sprites folder into your Scene view:

In the Hierarchy, click the playership GameObject Unity created for you and look at its details in the Inspector. Notice that Unity automatically attached a Sprite Renderer component, which contains your playership sprite, to the GameObject:

That’s all it takes! The Sprite Renderer lets you display images as Sprites in both 2D and 3D scenes.
Now, delete the playership GameObject from the Hierarchy.
Sprite Modes
Click a sprite in the Assets / Sprites folder. In the Inspector, there are three different modes in which you can use sprites:

- Single: A single-image sprite.
- Multiple: A sprite with multiple elements, such as animations, or spritesheets with different parts for a character.
- Polygon: A custom polygon-shaped sprite that you can create many different types of primitive shapes with. Examples: triangle, square, pentagon, hexagon.
A spritesheet is a single image that contains lots of smaller individual images, like so:
![]()
The reason for using spritesheets is that every image you use in your game will take up one draw call. For a few dozen sprites, this isn’t a big deal, but as your game grows in complexity and scope, this could be a potential issue.
By using spritesheets, you’re making one draw call for lots of Sprites, thus giving your game a performance boost. Of course, organization of your spritesheets is just as important as using them, but that’s for another tutorial!
Sprite Editing
It’s convenient to pack multiple graphic elements into a single image for animations or objects that have lots of moving parts; Unity makes it easy to manage these spritesheets with a built-in 2D spritesheet editor.
You’ll use two spritesheets in this game: one for the lander’s thruster animation, and one for an explosion animation. Both of these animations consist of multiple frames, which you can edit and slice using the Sprite Editor.
Assets/Sprites/Explosion/explosion-spritesheet.png has already been sliced and prepared into an animation for you, but Assets/Sprites/thruster-spritesheet.png still needs some attention.
![]()
Slicing Spritesheets
Click Assets/Sprites/thruster-spritesheet.png in the Project window. In the Inspector, the Sprite Mode is already set to Multiple (if not, change it, then click Apply).
Next, click Sprite Editor:
![]()
In newer versions of Unity, the Sprite Editor isn’t installed by default; it’s moved into the package system and needs to be added.
This warning appears the first time you try to open the Sprite Editor.
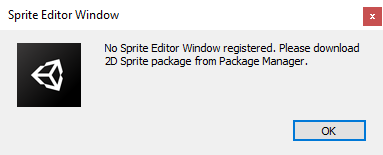
Go to Window ▸ Package Manager. Select Unity Registry from the Packages drop-down, and find 2D Sprite. Click Install to add the tools to your project.
![]()
Go back to thruster-spritesheet.png and click Sprite Editor again. A new window pops up to show the spritesheet automatically sliced into individual frames (the numbers were added for illustration purposes and aren’t part of the screenshot):

Click Slice in the upper-left corner of the window, noticing Automatic is the default slice operation:

This means Unity will attempt to locate and slice your spritesheet on its own to the best of its ability. In this scenario, it’ll work just fine, but you could also slice your spritesheet by cell size or cell count.
Custom Slicing
Selecting the cell size option lets you specify the size of each frame in your spritesheet using pixel dimensions.
Click Grid by Cell Size under the Slice menu in the Sprite Editor:

Under Pixel Size, enter 9 for X and 32 for Y. Leave the other values at 0 and Pivot set to Center. Then, click Slice:
![]()
Click Apply in the Sprite Editor window to apply the changes:
![]()
You’re done! Your thruster spritesheet is now ready to use, and you can close the close the Sprite Editor.