Scoped Storage Tutorial for Android 11: Deep Dive
Scoped storage is mandatory for all apps targeting Android 11. In this tutorial, you’ll learn how to implement the latest storage APIs in Android 11 by adding features to a meme-generating app. By Carlos Mota.
Scoped storage was one of the most significant features introduced in Android 10. It included an opt-out mechanism, but with Android 11, it’s now mandatory that all apps targeting this version have scoped storage implemented.
These new improvements have privacy in mind. Whereas granting runtime storage permission means an app can access almost every file on disk, scoped storage aims to avoid this. Now, if an app wants to access a file it didn’t create, a user needs to give it explicit access. Additionally, to reduce the number of files scattered across the disk, there are specific folders for storing them. When uninstalling an app, all the data outside those directories will be removed. This is something your free disk space appreciates. :]
The goal of this tutorial is to dive into scoped storage and show you more of its advanced functionalities. More specifically, you’ll learn:
- How to migrate your app data.
- Restricting and broadening access.
- How file managers and backup apps can access the file system.
- Limitations of the new requirements.
You’ll do this with Le Memeify, an app that displays all the images on your device and allows you to make incredible memes. It combines all the concepts of scoped storage and provides a great experience while testing. :] Feel free to share the best memes with us on Twitter @rwenderlich.
Note: This tutorial assumes you’re familiar with scoped storage. If you’re new to this concept, read Preparing for Scoped Storage before you continue.
It also uses Kotlin coroutines, navigation architecture component, View Binding and LiveData and ViewModel. If you’re unfamiliar with these concepts, take a look at these tutorials.
Getting Started
Access the tutorial files by clicking on Download Materials at the top or bottom of this page. You’ll find two projects inside the ZIP file. Starter has the skeleton of the app you’ll build, and Final gives you something to compare your code to when you’re done.

The image above shows what you’ll build!
Understanding the Project Structure
To understand the project structure, first open the Starter project in Android Studio and wait for it to synchronize.
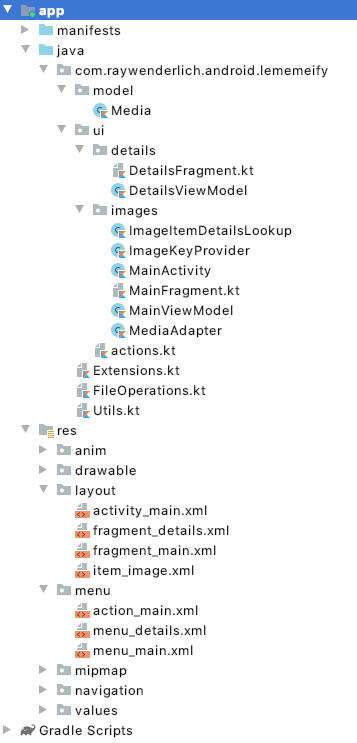
You’ll see a set of subfolders and important files:
- model: This is the data object used to represent an image. It contains the URI, modified date, size, etc.
- ui: In this folder, you’ll find the activity, fragments, view models and adapters you’ll use to allow your users to view and interact with the app’s data. This folder also has two subfolders for the two main screens of the app: details and images.
- ui/actions.kt: Here you’ll find the Kotlin sealed classes for any action a view might take. This makes things nice and tidy by explicitly listing these actions.
- FileOperations.kt: This file contains the class that defines all the file operations.
- Utils.kt: This file has the set of utility methods you’ll use throughout the project.
Running Le Memeify
To access the images on your device, you must grant the storage permission when prompted.
Build and run. After you accept the permissions, you’ll see a screen like this:

Your screen will show different images, of course. :]
Introducing Scoped Storage
Scoped storage brings two major changes. First, you no longer have access to a file via its path. Instead, you need to use its Uri. Second, if you want to modify a file not created by your app, you need to ask the user for permission.
There are two possibilities for doing this. One is via the MediaStore API that allows you to query the device for images, videos and audio. The other is using the Storage Access Framework (SAF), which opens the native file explorer and allows you to request access either for a specific file or for its root folder — depending on whether you’re using the action ACTION_OPEN_DOCUMENT or ACTION_OPEN_DOCUMENT_TREE, respectively.
What’s New in Android 11
Android 11 introduces a new set of features focused on files:
- Bulk operations
- Starring a file
- Trashing a file
In the next few sections, you’ll learn more about each of these.
Bulk Operations
One of the limitations on Android 10 is the lack of support for bulk operations performed on files. Every time you want to do something to multiple files, you need to iterate over a list and ask the user for consent for each individual file.
Android 11 added two new methods to solve this:
createWriteRequestcreateDeleteRequest
Both methods support modifying multiple files at the same time with a single request. Currently, you can select multiple files in the app and delete them, but it asks for permission one file at a time. To add the capability to delete multiple files and grant permission all at once, you’ll update Le Memeify to use createDeleteRequest.
Start by adding the following method to FileOperations.kt:
@SuppressLint("NewApi") //method only call from API 30 onwards
fun deleteMediaBulk(context: Context, media: List<Media>): IntentSender {
  val uris = media.map { it.uri }
  return MediaStore.createDeleteRequest(context.contentResolver,
                                        uris).intentSender
}
Imagine a user wants to remove five files that weren’t created with the app. To overcome the limitation of showing a dialog for each file, instead of calling contentResolver.delete, you can use MediaStore.createDeleteRequest, which allows the user to grant access to all files with a single request.
Now, update deleteMedia inside MainViewModel.kt:
fun deleteMedia(media: List<Media>) {
  if (hasSdkHigherThan(Build.VERSION_CODES.Q) && media.size > 1) {
    val intentSender =
      FileOperations.deleteMediaBulk(getApplication<Application>(), media)
    _actions.postValue(
        MainAction.ScopedPermissionRequired(
            intentSender,
            ModificationType.DELETE))
  } else {
    viewModelScope.launch {
      for (item in media) {
        val intentSender = FileOperations.deleteMedia(
                getApplication<Application>(),
                item)
        if (intentSender != null) {
          _actions.postValue(
              MainAction.ScopedPermissionRequired(
                intentSender,
                ModificationType.DELETE))
        }
      }
    }
  }
}
The code above will call MediaStore.createDeleteRequest if the device is running Android 11 or higher and there are multiple files selected for removal.
Finally, update onActivityResult inside MainFragment.kt:
override fun onActivityResult(requestCode: Int, resultCode: Int, data: Intent?) {
  super.onActivityResult(requestCode, resultCode, data)
  when (requestCode) {
    REQUEST_PERMISSION_DELETE -> {
      if (resultCode == Activity.RESULT_OK) {
        val multiSelection = tracker.selection.size() > 1
        if (!multiSelection || !hasSdkHigherThan(Build.VERSION_CODES.Q)) {
          delete()
        }
Only call delete when the conditions above aren’t met. In other words, since you already have permission to remove all the selected files, there’s no need to ask for each file individually.
Build and run the app and delete several images. Be careful and select the worst ones! :]

Now that you know how to perform bulk operations on files, it’s time to learn how to star a file.