Cocos2D-X Tutorial: Making a Universal App: Part 2
Learn how to make a universal app that works on the iPhone, iPad, and Android in this Cocos2D-X tutorial. By .
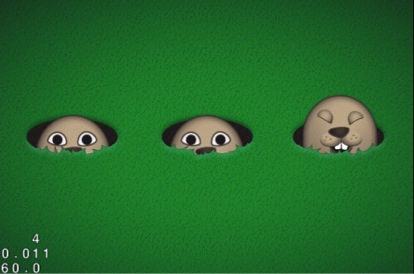
Whack that laugh off this mole's face!

This article is the second part of a two-part series on how to create a mole whacking game with Cocos2D-X. This series brings together a lot of concepts from other Cocos2D-X tutorials on this site, and introduces some new concepts along the way as well.
In the first part of the series, you created the basics of the game – cute little moles popping out of holes. You spent a lot of time thinking about how to organize the art and coordinates so that the game would look good on the iPhone, iPad, and Retina display – and be efficient too!
In this article, you’ll add some cute animations to the mole as he laughs and gets whacked, add gameplay so you can do the whacking and earn points, and of course add some gratuitous sound effects as usual.
If you don’t have it already, grab a copy of the project where you left things off in the last Cocos2D-X tutorial.
Defining Animations: Practicalities
To make the game a little more fun, you’re going to give the mole two animations. First, he’ll laugh a little when he pops out of the hole (to make you really want to whack him!), then if you do manage to whack him he’ll make a “just got whacked” face.
Property Lists
If you haven’t used property lists before, they are special files you can create in Xcode to contain data like arrays, dictionaries, strings, numbers, and so on in a hierarchical format. It’s extremely easy to create these, and just as easy to read them from code.
Let’s see what I mean by trying this out in Xcode. Right click on Resources, choose New File…, choose OS X\Resource\Property List, and click Next. Name the new file laughAnim.plist, and click Create. At this point the property list editor for laughAnim.plist should be visible, as shown below:

Every property list has a Root element. This is usually either an array or a dictionary. This property list is going to contain an array of image names that make up the laugh animation, so click on the second column for the root element (Type, currently set to Dictionary), and change it to Array.
Next, click the + button to add a new entry to the array. By default, the type of the entry is a String – which is exactly what you want. Change the value to mole_laugh1.png for the first entry in the animation.
Click the + button to add a new row, and repeat to add all of the frames of the animation, as shown below:

Next, repeat the process for the animation to play when the mole is hit. Follow the same steps as above to create a new property list named hitAnim.plist, and set it up as shown below:

Now, time to add the code to load these animations. Start by opening up HelloWorldScene.h and add a member variable for each animation, as shown below:
// Inside head file of HelloWorld
CCAnimation*		laughAnim;
CCAnimation*		hitAnim;
These will be used to keep a handy reference to each CCAnimation so it can be easily found and reused in the code.
Next add a function in HelloWorldScene.cpp to create a CCAnimation based on the images defined in the property list, as follow:
CCAnimation* HelloWorld::animationFromPlist_delay(const char *animPlist, float delay){
    CCArray *animImages = CCArray::createWithContentsOfFile(animPlist);
    CCArray *animFrames = CCArray::create();

    for (int i = 0; i < animImages->count(); i++) {
        CCString *temp = (CCString *)animImages->objectAtIndex(i);
        const char *animImage = temp->getCString();
        animFrames->addObject(CCSpriteFrameCache::sharedSpriteFrameCache()->spriteFrameByName(animImage));
    }

    return CCAnimation::createWithSpriteFrames(animFrames, delay);
}
and don’t forget to declare it in HelloWorldScene.h
CCAnimation* animationFromPlist_delay(const char *animPlist, float delay);
This is important to understand, so let’s go through it line by line.
- The property list is included in the project file, so this helper function can get a full path to a file in the project, which you’ll need to read in the property list.
- To read a property list, it’s as easy as calling a function on CCArray called createWithContentsOfFile and passing in the path to the property list. It will return an CCArray with the contents (a list of strings for the image names in the animation, in this case). Note this works because you set the root element to be a CCArray.
- Creates an empty array that will store the animation frames.
- Loops through each image name in the array read from the property list.
- Gets the sprite frame for each image and adds it to the array.
- Returns a CCAnimation based on the array of sprite frames.
Next, add the code to the end of your init function to call this helper function for each animation:
laughAnim = this->animationFromPlist_delay("laughAnim.plist", 0.1);
hitAnim = this->animationFromPlist_delay("hitAnim.plist", 0.02);
CCAnimationCache::sharedAnimationCache()->addAnimation(laughAnim, "laughAnim");
CCAnimationCache::sharedAnimationCache()->addAnimation(hitAnim, "hitAnim");
Note that after squirreling away a reference to the animation, it adds it to the animation cache. This is important to do so that the animations are saved off (and retained) somewhere. It’s also helpful since you could retrieve them from the animation cache by name if you wanted (but you dont’ need to since you’re keeping a reference ourselves).
One last step – let’s use the animations (just the laugh one for now). Modify the popMole function to read as the following:
void HelloWorld::popMole(GameSprite *mole){
    CCMoveBy *moveUp = CCMoveBy::create(0.2, ccp(0, _winSize.height * 0.25));
    CCEaseInOut *easeMoveUp = CCEaseInOut::create(moveUp, 3.0);
    CCAnimation *laughN = CCAnimationCache::sharedAnimationCache()->animationByName("laughAnim");
    laughN->setRestoreOriginalFrame(true);
    CCAnimate *laugh = CCAnimate::create(laughN);
    CCAction *easeMoveDown = easeMoveUp->reverse();
    mole->runAction(CCSequence::create(easeMoveUp, laugh, easeMoveDown, NULL));
}
The only difference here is that instead of delaying a second before popping down, it runs a CCAnimate action instead. The CCAnimate action uses the laughAnim set up earlier, and sets restoreOriginalFrame to TRUE so that when the animation is done, it reverts back to the normal mole face.
Compile and Run your code, and now when the moles pop out, they laugh at you!
Time to wipe that smile off their faces and start whacking!
Adding Game Logic
You’re now going to add the gameplay logic into the game. The idea is a certain number of moles will appear, and you get points for each one you whack. You try to get the most number of points you can.
So you’ll need to keep track of the score, and also display it to the user. And when the moles are finished popping, you’ll need to tell the user about that as well.
So start by opening HelloWorldScene.h, and add the following private variables to the HelloWorld layer:
CCLabelTTF*     _label;
int             _score;
int             _totalSpawns;
bool            _gameOver;
These will keep track of the score label, the current score, the number of moles popped so far, and whether the game is over or not.
Next add the following to the end of your init function:
this->setTouchEnabled(true);

float margin = 10.0;
_label = CCLabelTTF::create("score: 0", "Verdana", converFontSize(14.0));
_label->cocos2d::CCNode::setAnchorPoint(ccp(1, 0));
_label->setPosition(ccp(_winSize.width - margin, margin));
this->addChild(_label, 10);
This first sets the layer as touch enabled, since you’ll want to detect when the player taps the screen. It then creates a label to show the score. Note that it sets the anchor point to the bottom right of the label so that it’s easy to place it in the lower right of the screen.
Also note that rather than passing the font size directly, it goes through a helper function to convert the font size first. This is because the font size will need to be larger on the iPad, since it has a bigger screen. So implement convertFontSize next as the following:
float HelloWorld::converFontSize(float fontSize){
    if (_winSize.width >= 1024 ) {
        return fontSize * 2;
    }
    else{
        return fontSize;
    }
}
This is very simple – on the iPad the font size is doubled, otherwise it’s left alone.
Next you want to add the touch detection code to see if a touch has hit a mole. But before you can do that, you need to add a flag to the mole to the game knows whether the mole is currently tappable or not. The mole should only be able to be tapped while it’s laughing – while it’s moving or underground it’s “safe”.
You could create a subclass of CCSprite for the mole to keep track of this, but because you only need to store this one piece of information, you’ll use the userData property on the CCSprite instead. So add two helper functions and modify popMole one more time to do this as follows:
void HelloWorld::setTappable(void *sender){
    GameSprite *mole = (GameSprite *)sender;
    mole->setUserData(mole, true);
}

void HelloWorld::unSetTappable(void *sender){
    GameSprite *mole = (GameSprite *)sender;
    mole->setUserData(mole, false);
}

void HelloWorld::popMole(GameSprite *mole){
    if (_totalSpawns > 50) {
        return;
    }
    _totalSpawns++;

    mole->setDisplayFrame(CCSpriteFrameCache::sharedSpriteFrameCache()->spriteFrameByName("mole_1.png"));
    CCMoveBy *moveUp = CCMoveBy::create(0.2, ccp(0, _winSize.height * 0.25));
    CCCallFunc *setTappable = CCCallFuncN::create(this, callfuncN_selector(HelloWorld::setTappable));
    CCEaseInOut *easeMoveUp = CCEaseInOut::create(moveUp, 3.0);
    //    CCDelayTime *delay = CCDelayTime::create(0.5);
    CCAnimation *laughN = CCAnimationCache::sharedAnimationCache()->animationByName("laughAnim");
    laughN->setRestoreOriginalFrame(true);
    CCAnimate *laugh = CCAnimate::create(laughN);
    CCCallFunc *unSetTappable = CCCallFuncN::create(this,callfuncN_selector(HelloWorld::unSetTappable));
    CCAction *easeMoveDown = easeMoveUp->reverse();
    mole->runAction(CCSequence::create(easeMoveUp, setTappable, laugh, unSetTappable, easeMoveDown, NULL));
}
The changes to popMole are as follows:
- Right before the mole laughs, it runs a CCCallFunc action to call a specified function (setTappable). This function sets the userData property on the sprite to TRUE, which you’ll use to indicate whether the mole is tappable.
- Similarly, after the mole laughs, it uses a CCCallFunc action to call unSetTappable, which sets the flag back to FALSE.
- The function also immediately returns if there has been 50 or more spawns, since 50 is the limit for this game.
- It resets the display frame of the sprite to the base image (mole_1.png) at the beginning of the function, since if the mole was hit last time, it will still be showing the hit image and will need to be reset.
Ok, now that the sprite has a userData flag indicating whether it can be tapped or not, you can finally add the tap detection code as follows:
void HelloWorld::registerWithTouchDispatcher(){
    CCDirector::sharedDirector()->getTouchDispatcher()->addTargetedDelegate(this, kCCMenuHandlerPriority, false);
}

bool HelloWorld::ccTouchBegan(CCTouch *touch, CCEvent *event){
    CCPoint touchLocation = this->convertToNodeSpace(touch->getLocation());
    for (int i = 0; i < _moles->count(); i++) {
        GameSprite *mole = (GameSprite *)_moles->objectAtIndex(i);
        if (mole->GameSprite::getUserData(mole) == false) {
            continue;
        }
        if (mole->boundingBox().containsPoint(touchLocation)) {
            mole->GameSprite::setUserData(mole, false);
            _score += 10;

            mole->stopAllActions();
            CCAnimation *hitN = (CCAnimation *)CCAnimationCache::sharedAnimationCache()->animationByName("hitAnim");
            CCAnimate *hit = CCAnimate::create(hitN);
            CCMoveBy *moveDown = CCMoveBy::create(0.2, ccp(0, -_winSize.height * 0.25));
            CCEaseInOut *easeMoveDown = CCEaseInOut::create(moveDown, 3.0);
            mole->runAction(CCSequence::create(hit, easeMoveDown, NULL));
        }
    }

    return true;
}
The registerWithTouchDispatcher function sets things up so that the ccTouchBegan function gets called for each touch.
The ccTouchBegan function converts the touch to coordinates in the layer, and loops through each mole. If the mole isn’t tappable (the userData is FALSE), it skips to the next mole. Otherwise, it uses boundingBox and containsPoint to see if the touch point is within the mole’s bounding box.
If the mole is hit, it sets the mole as no longer tappable, and increases the score. It then stops any running actions, plays the hit” animation, and moves the mole immediately back down the hole.
One final step – add some code to update the score and check for the level complete condition at the beginning of tryPopMoles:
if (_gameOver) {
        return;
}
_label->setString(CCString::createWithFormat("score: %d", _score)->getCString());
if (_totalSpawns >= 50) {
    CCSize winSize = CCDirector::sharedDirector()->getWinSize();

    CCLabelTTF *goLabel = CCLabelTTF::create("Level Complete", "Verdana",
    converFontSize(48));
    goLabel->setPosition(ccp(winSize.width / 2, winSize.height / 2));
    goLabel->setScale(0.1);
    this->addChild(goLabel, 10);
    goLabel->runAction(CCScaleTo::create(0.5, 1.0));

    _gameOver = true;
}
and add the declarations as a public methods in HelloWorldScene.h
float converFontSize(float fontSize);
void setTappable(void *sender);
void unSetTappable(void *sender);
bool ccTouchBegan(CCTouch *touch, CCEvent *event);
void registerWithTouchDispatcher();
That’s it! Compile and Run your code, and you should be able to whack moles and increase your score! How high of a score can you get?
