Facebook Tweaks with Swift Tutorial
Learn how to use Facebook Tweaks, which allows you to modify parameters in your code whilst the app is running, and to enable or disable features on the fly. By .

Update 04/16/2015: Updated for Xcode 6.3 / Swift 1.2.
Note from Ray: This is a brand new Swift tutorial released as part of the iOS 8 Feast. Enjoy!
Have you ever been in the final stages of developing an awesome new app and spent 80 percent of your time on the last 20 percent of the project? Yeah, we’ve all been there!
It’s not you, it’s the Pareto principle, and if you work on projects you probably know all about the concept, even if you don’t know it by name. Here’s an example:
Assume you built an app that helps its user become more polite, because polite is the new cool. In the app, the user has a “Nice Jar.” Whenever they are nice to someone else, they open the app and adds a coin to the jar. When it’s full, they can reward themselves with an ice cream.
The app uses UIDynamics to add physics behavior to the coins, and the user interface shows a jar, a label and some buttons.
It’s nearly finished and you’re quite pleased with the result, so you put it onto your iPhone and show it to a friend. They look at it and say, “It’s nice, but why are the coins so small?”
Then you show it your colleagues the next time you’re at work and they say, “I can barely read the labels.” and “The coins just drop like rocks, shouldn’t they bounce?” And so on.
So you go to your computer, adjust some constants and put it on your phone again, but instead of rave reviews you get yet more suggestions and critiques. Obviously, your friends and colleagues are not pleased with the result and it seems like you’ll never break away from Xcode.
During the development of Paper, Facebook was in the same situation. To handle these small, subjective, late-stage adjustments, they came up with a rather clever solution that lets a tester change values or parameters for themselves directly from within the app, without touching code or any recompiling.
It’s called Facebook Tweaks, or FBTweak for short.
The best part is that Facebook published the source code of FBTweak under a BSD license, which means you can use it in your iOS app development. How polite — Facebook should add a coin to its Nice Jar.
In this tutorial, you’ll add FBTweak to the “Nice Jar” App.
Getting Started
To start this tutorial, download the starter project here. Open the project, and then build and run. You should see this:
The NiceJar App

If you touch the jar, a new coin appears and falls to the bottom of the jar, but you can only touch it if you’ve been nice to somebody today. Oh, you tipped your Barista this morning? That qualifies as polite. :]
Switch to Xcode and take a minute to look around the project, especially the interesting code in ViewController.swift. You should notice the following parts:
- To animate the coins:
UIDynamicAnimator,UIDynamicItemBehavior,
UIGravityBehaviorandUICollisionBehavior(inviewDidLoad) - To set the gravity direction according to the device orientation:
CMMotionManager. - For touch handling:
touchesEnded(_:withEvent:)
Getting Tweaks
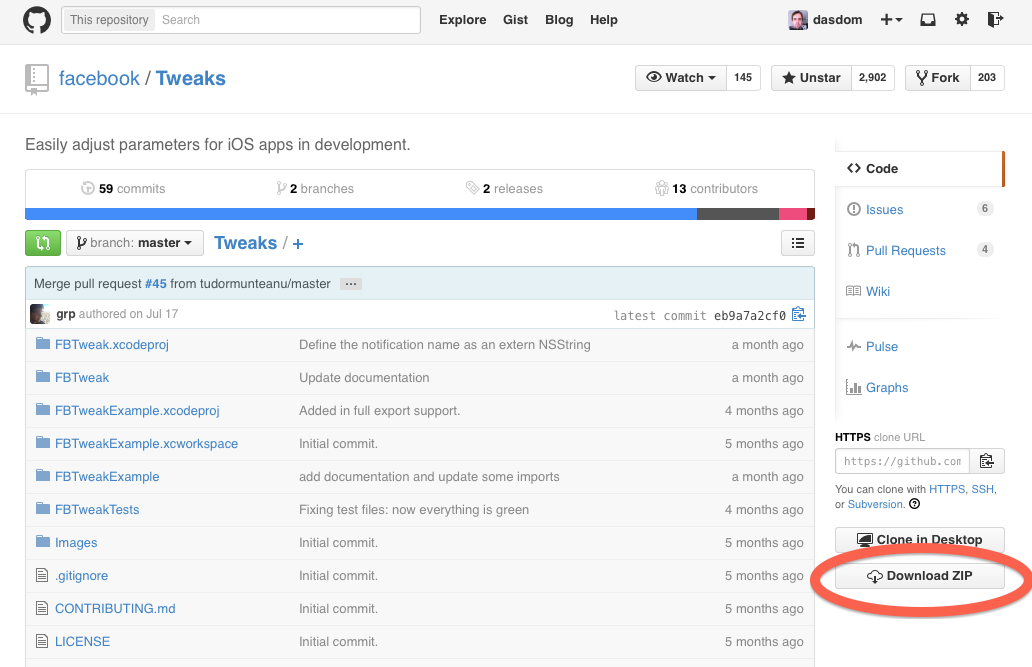
Open this link and click the Download ZIP button.
FBTweak on github
Adding FBTweak to NiceJar
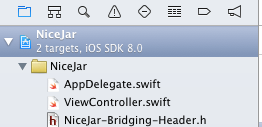
FBTweak is an Objective-C library, so if you want to use it in a Swift project, you have to add a bridging header.
Back in Xcode, go to File\New\File…, choose the iOS\Source\Header File template and click Next. Name the file NiceJar-Bridging-Header.h, select the folder NiceJar and click Create.
Replace the contents of NiceJar-Bridging-Header.h with the following:
#ifndef NiceJar_NiceJar_Bridging_Header_h
#define NiceJar_NiceJar_Bridging_Header_h

#import "FBTweak.h"
#import "FBTweakStore.h"
#import "FBTweakCategory.h"
#import "FBTweakCollection.h"
#import "FBTweakViewController.h"
#import "FBTweakShakeWindow.h"

#endif
Select the Project Navigator on the left, and then select the project.
Select Build Settings, choose the filters All and Levels and then enter bridgin as the search term.

Add NiceJar/NiceJar-Bridging-Header.h as an Objective-C Bridging Header. This file path is relative to your project, so if you saved NiceJar-Bridging-Header.h in another folder, make sure to use the correct path.

And just like that, you’ve enabled Swift to access these Objective-C classes. You can find out more about mixing Swift and Objective-C in the same project here.
FBTweak comes with a view controller that shows the available tweaks, and allows the user make changes to them.
The easiest way to present this view controller is to exchange the UIWindow in AppDelegate.swift with an instance of FBTweakShakeWindow. Open AppDelegate.swift and change the line:
var window: UIWindow?
to
lazy var window: UIWindow? = {
  let window = FBTweakShakeWindow(frame: UIScreen.mainScreen().bounds)
  return window
}()
Within the closure, an instance of FBTweakShakeWindow is instantiated and returned. The return value is then set to the window property of the project. This means instead of a UIWindow, the application window is now an instance of FBTweakShakeWindow.
lazy modifier tells the app delegate not to initialize the window until it’s actually accessed. This handy trick speeds up load times by preventing the creation of objects until they’re needed. You can read more about property modifiers here.FBTweakShakeWindow is a subclass of UIWindow that adds methods to present the tweaks view controller with a shake gesture. Take a look at the source code to see how this happens.
Build and run. With the app running and the simulator in the foreground, select Hardware\Shake Gesture (^⌘Z). The tweaks view controller will be presented modally, but doesn’t yet list any tweaks.
An empty tweaks view controller

The First Tweak
On the FBTweak Github page, you can read an explanation of the simplest way to add tweaks to your project, and that is to use one of the provided macros like FBTweakValue(...), FBTweakBind(...) and FBTweakAction(...).
Hold up right there! Swift doesn’t support macros, so you’ll have to add tweaks with a slightly more elaborate syntax.
Open ViewController.swift and find touchesEnded(_:withEvent:). Exchange the line:
let coinDiameter = CGFloat(50)
With this:
let identifier = "de.dasdev.nicejar.coinsize"
//1
let store = FBTweakStore.sharedInstance()
//2
var category = store.tweakCategoryWithName("Jar View")
if category == nil {
  category = FBTweakCategory(name: "Jar View")
  store.addTweakCategory(category)
}
//3
var collection = category.tweakCollectionWithName("Coins")
if collection == nil {
  collection = FBTweakCollection(name: "Coins")
  category.addTweakCollection(collection)
}

//4
var tweak = collection.tweakWithIdentifier(identifier)
if tweak == nil {
  tweak = FBTweak(identifier: identifier)
  tweak.name = "Size"
  tweak.defaultValue = CGFloat(50)

  collection.addTweak(tweak)
}

//5
let coinDiameter: CGFloat = CGFloat((tweak.currentValue ?? tweak.defaultValue).floatValue)
- You get the shared instance of the tweak store that holds a reference to all tweak categories that have been defined.
- Then you get the category with the name Jar View, and if there isn’t a category with that name, it’s created and added to the store.
- You get a collection with the name Coins, and if there isn’t a collection with that name, it’s created and added to the category.
- You get the tweak with the identifier
de.dasdev.nicejar.coinsize, and if it can’t be found it creates a tweak with that identifier, adds it to the collection and gives it the default value ofCGFloat(50). - The
coinDiameteris then set to thecurrentValueof the tweak if it’s non-nil, otherwise it’s set to itsdefaultValue.
Build and run. Reward your recent politeness by tapping the jar. Then go to Hardware\Shake Gesture. You should now see the entry Jar View in the list of tweaks.
The tweak view controller with one category

Tap it and you’ll push the tweak category view onto the navigation stack.
The coin size tweak

Change the value of the coin size to 70 and tap Done. Tap the jar again to see bigger, more satisfying coins fall into the jar.
Coins with two different sizes

Congratulations! You added your very first tweak to the project. You could now hand the phone back to your friend and let them determine the perfect coin size, without ever touching Xcode.