Google Analytics for iOS
Learn how to add usage tracking and other metrics into your iOS app with this Google Analytics Tutorial for iOS! By .
Learn how to use Google Analytics for iOS7!
To build successful products, you and your team have to become a lean, mean, measuring machine! Otherwise, you’ll have little way of knowing which parts of your app are consistently used and in working order.
There are many ways to measure usage and many off-the-shelf frameworks that can help. In this tutorial, you’re going to look at using Google Analytics for iOS.
This tutorial will take you through the major components of the Google Analytics SDK. Along the way, you will add Google Analytics to a timer app suitable for runners, and put the SDK to work tracking how frequently people use the various features and controls.
When you are finished you will have enabled app screen and event tracking, you will be able to track app versions usage, and will allow the app users to opt-out of the anonymous usage tracking if they wish so:

Take your position at the starting line. Get ready… get set… BOOM! GO, GO, GO!
Getting Started: What is Google Analytics?
Google Analytics is a service offered by Google that generates detailed statistics about your website or mobile app’s usage. Originally, the product was aimed at marketers rather than developers. However, modern development methodologies require developers to define, measure and test the features they create in an iterative, low-cost way. Google Analytics is a great tool for measuring your app’s usage to test if new features are working both functionally and experientially.
Google Analytics provides you with high-level, dashboard-type data for an overview of your app’s performance, along with more in-depth reporting tools. Its analysis can identify such things as poorly performing screens, important user events and the geographical distribution of your user-base… all of which are critical to improving your app!
With a quick glimpse at the Google Analytics Dashboard you can see how many unique users your app had last month, what percentage of them used it more than once, how long did they use your app in a single session, which country your users came from and more:

By tracking events in your app like users pressing various buttons or performing different actions you can have insights on whether one or other feature is more used and plan how to develop your app further. For example on the report below you can clearly see that users prefer saving photos to their device (2,223 times last month) vs. sharing straight to Facebook (113 times) and posting to Twitter (33 times):

Lap 1: Setting Up Google Analytics for Your App
Okay, that might have felt like a false start, but now you are off and running. Go to www.google.com/analytics. The homepage should appear like so:

Note: If you do not have a Google account, you will need to create one now by selecting Create an Account on the top-right side of the page. For the remainder of this tutorial we are going to assume you have create your own Google Analytics account.
Once you have logged in, you simply need to click the Access Google Analytics button on the top right.

The first screen you see lists all of your accounts. If you have clients, typically you will have one account set up for each. If you are new to Google Analytics you will only have the first account you set up.

Select the Admin view on the top right. To see the main dashboard area for managing your Accounts, Properties, and Views.

On the main dashboard you are presented with a workflow that starts with Account, progresses to Property and ends in View (Profile). Lets first break down what each of these sections refer to.
- Account – It can seem confusing however, within your own Google Analytics Account you can be a member of multiple analytics accounts owned by clients or other collaborators. In the account drop down list on the right-hand column you will see a list of all of the accounts you are a member of.
- Property – A property refers to a particular website or application that belongs to a given account. In this tutorial you will be creating a new Clock property to house all of the data associated with your app.
- View – The final column is the view column. This enables you to create different views on your data. By creating different views on a single property (in this tutorial’s case an app) you are able to monitor data from different versions of your app which you will look at later on in the tutorial.
Ok lets go! Ensure that you have the correct Account selected for this project. You don’t want to add a new property to one of your clients’ accounts.
Select the Property drop-down and click on the Create new property item, like so:

Google then asks you to submit the details for the app you want to track. Make sure to choose Mobile app at the top and enter the information as required. In the Setting up your property section, enter Clock for the App Name.
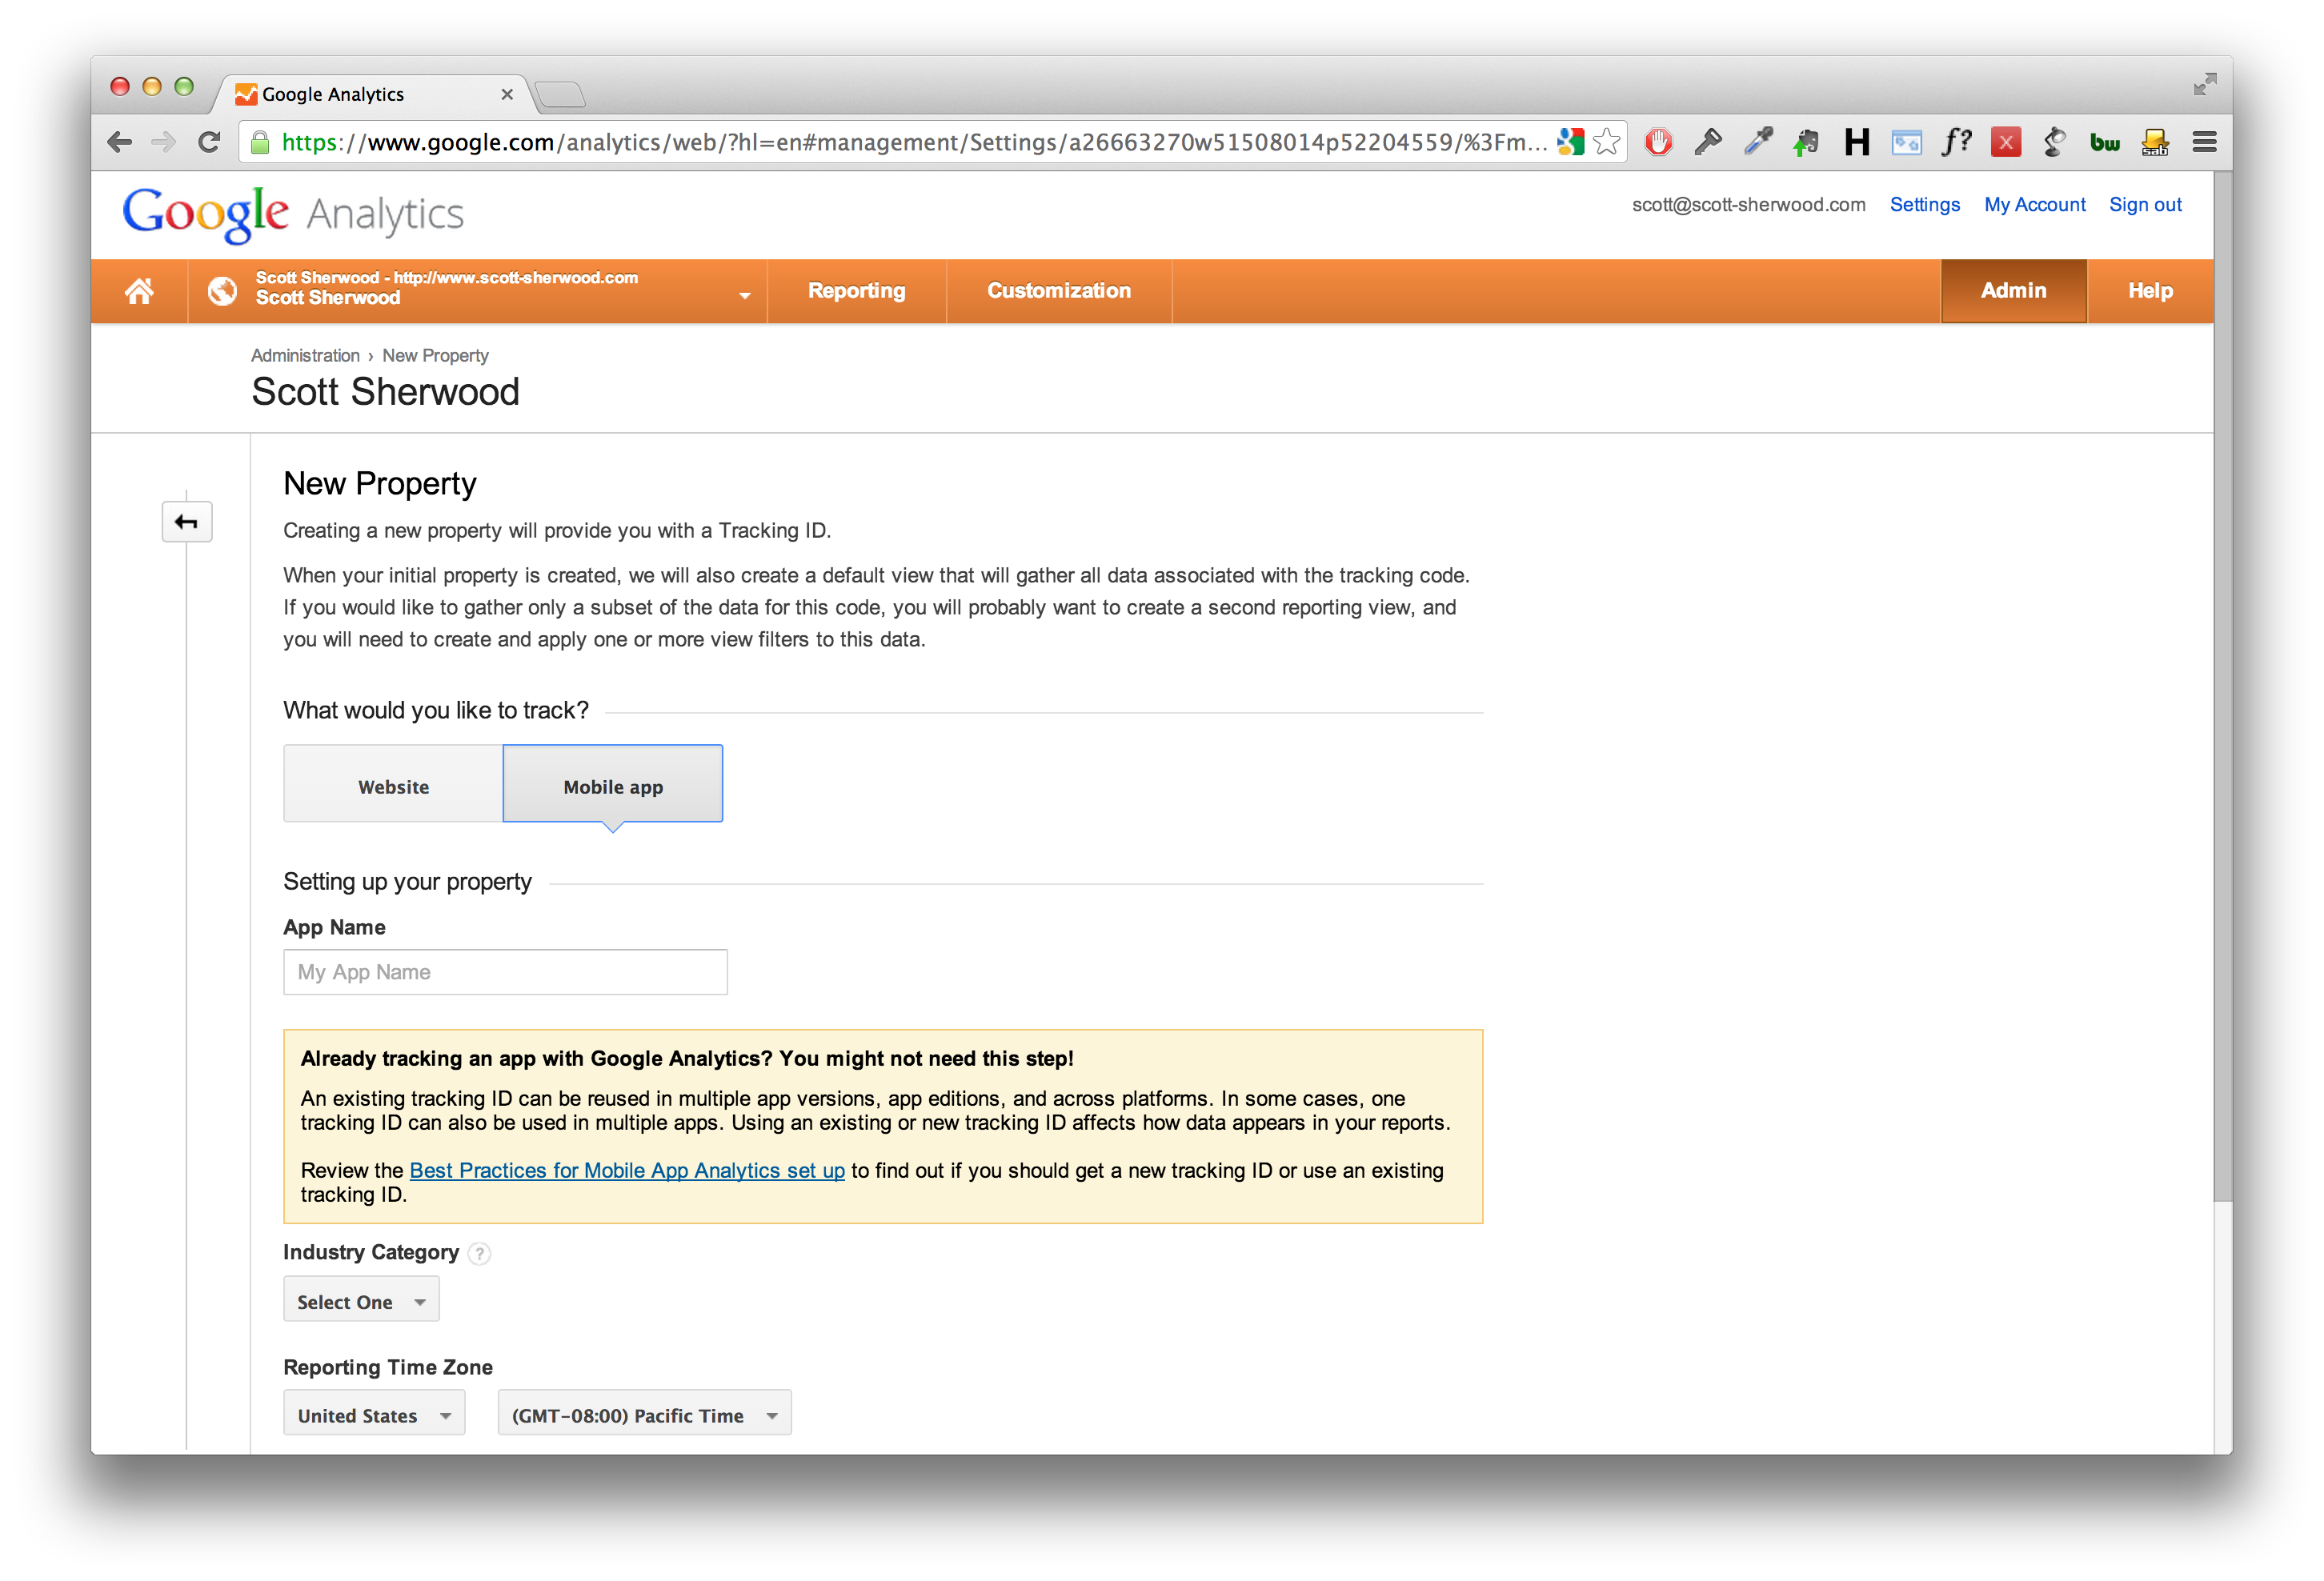
After accepting the terms of service, the website takes you to a page with your tracking ID and the download link for the SDK.
Downloading the Google Analytics iOS SDK
Before you do anything else, write down your app’s Tracking ID, which will be of the form ID UA-XXXXXXXX-Y. Keep the ID handy, because you will need it soon.
Now download the Google Analytics iOS SDK presented on the final summary page. Save this somewhere handy, such as your desktop, so you don’t have to rummage around trying to find it later. Download the version without Admob features.

Lap 2: Setting Up the Google Analytics SDK
To begin this lap, please download the starter project.
Open the starter project in Xcode and build and run it in the Simulator to verify it is working. You should see a tab-bar-based app with a clock and a stopwatch.

Unzip the Google Analytics SDK you downloaded when creating your tracking ID. You will see the following:
- GoogleAnalytics
- GoogleTagManager
- libGoogleAnalyticsServices.a
- Readme.txt
Inside the GoogleAnalytics folder, open the Library folder, select the following files and drag them into the Clock group within your starter project.
- GAI.h
- GAITracker.h
- GAITrackedViewController.h
- GAIDictionaryBuilder.h
- GAIFields.h
- GAILogger.h

Be sure to select the checkboxes: Copy items into destination group’s folder and Add the files to the Clock target.
Now you need to add the Google Anayltics iOS SDK that is named libGoogleAnalyticsServices.a. The Google Analytics SDK also uses the CoreData and SystemConfiguration frameworks (at the moment you have to add these frameworks manually, in the next version hopefully Google will use automatic importing in the next version), so you need to add all of the following to the app’s libraries:
- libGoogleAnalyticsServices.a
- CoreData.framework
- SystemConfiguration.framework
- libz.dylib
Begin by selecting libGoogleAnalyticsServices.a and dragging it into your Frameworks folder. You can place it anywhere inside your project, but it’s best to keep all of your frameworks in one place.

Next add the CoreData framework. Select the Clock project file in the Project Navigator and then select Build Phases. Expand the Link Binary With Libraries section and click the add (+) button.

In the pop-up window, type in CoreData to refine the search and select CoreData.framework from the filtered list.

Repeat the previous steps to find and add both SystemConfiguration.framework and the libz.dylib library.
Finally, modify Clock-Prefix.pch to import the GAI.h header, as follows:
#import "GAI.h"
#import "GAIFields.h"
You’ve equipped your app with the SDK. Let’s get tracking!