iOS Storyboards: Getting Started
In this tutorial, you’ll learn how to design scenes, connect view controllers and define visual transitions in storyboards, without writing any code. By Ehab Amer.
Storyboards are an exciting feature first introduced in iOS 5, which save time building user interfaces for your apps. Storyboards allow you to prototype and design multiple view controller views within one file, and also let you create transitions between view controllers.
Before storyboards, you had to use XIB files (aka NIB files). You could only use one XIB file per view (for example, per UITableViewCell, UITableView or other supported UIView types).
The following image shows you what a storyboard looks like. It’s similar to the storyboard you’ll build during this tutorial:
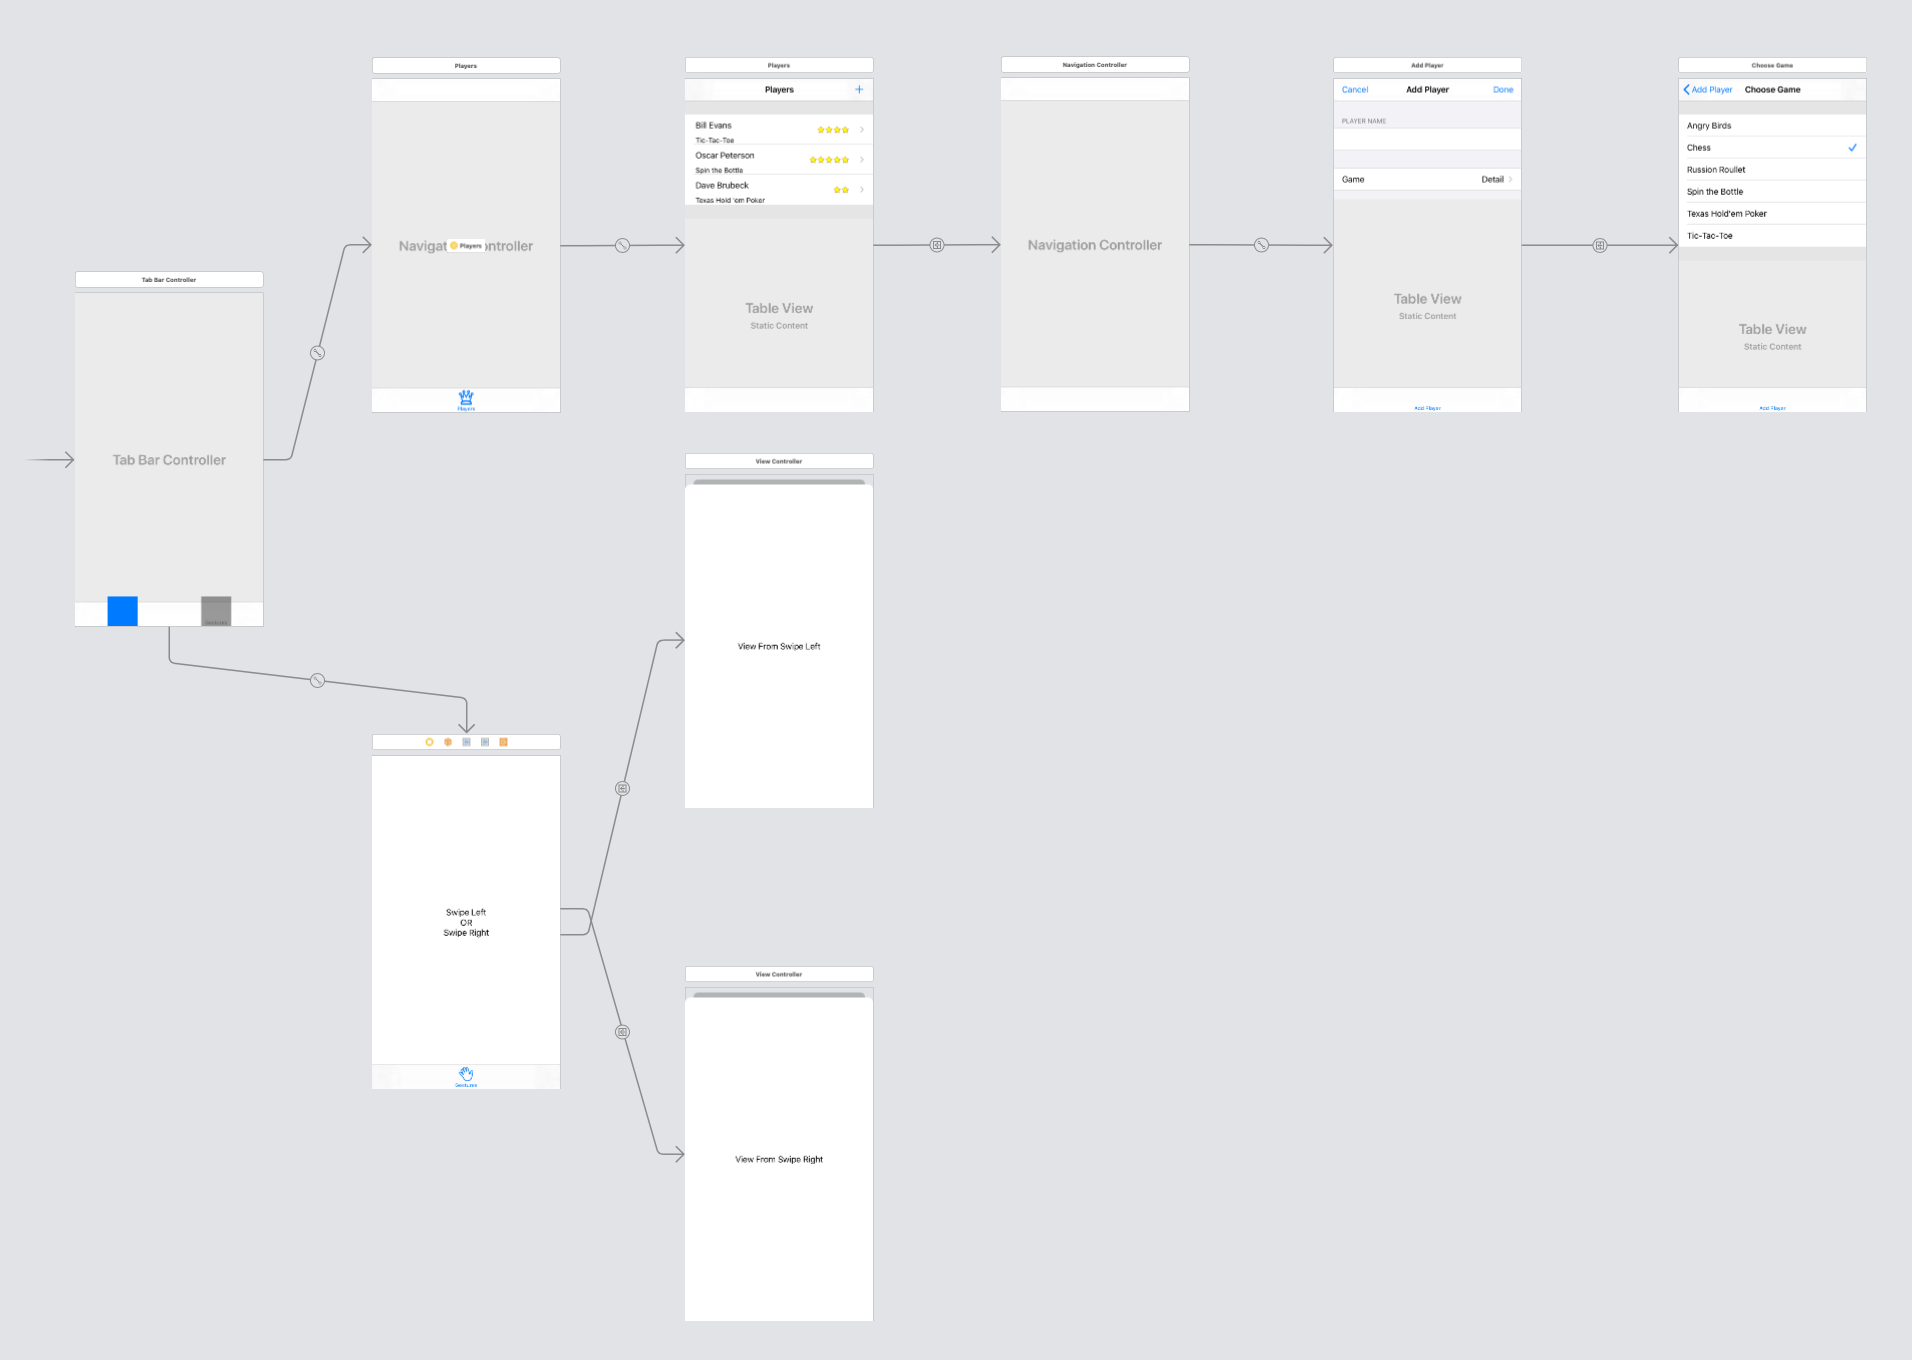
You may not know what this app does, but you can see its scenes and how they’re related.
In this tutorial, you’re going to build Ratings, a prototype app that shows a list of players, the games they play and their skill rating. You’ll learn common tasks that you can accomplish using storyboards, like creating scenes and wiring up view controllers. And you’ll do all of this without a single line of code. :]
Getting Started
Download everything you need for this tutorial by using the Download Materials button at the top or bottom of this page. There’s no starter project, but there’s a folder named Images containing assets that you’ll need later.
Now, open Xcode and create a new iOS app using the Single View Application template.

Fill in the template options as follows, then click Next and then Create:
- Product Name: Ratings.
- Organization Name: Fill this in however you like.
- Organization Identifier: The identifier you use for your apps.
- Language: Swift.
- User Interface: Storyboard.
- Make sure you’ve unchecked the Use Core Data, Include Unit Tests and UI Tests options.
After you finish, the main Xcode window should look like this:

The new project consists of six files:
- AppDelegate.swift
- SceneDelegate.swift
- ViewController.swift
- Assets.xcassets
- LaunchScreen.storyboard
- Main.storyboard, the star of this tutorial
You don’t need to change anything in the .swift files in this tutorial, so don’t worry about them.
Under Deployment Info in the General project settings, uncheck iPad. Find Device Orientation and, since this is a portrait-only app, uncheck the Landscape Left and Landscape Right options.
Understanding Storyboard Previews
Open Main.storyboard in the Project navigator to view it in the Interface Builder editor:

Here, you see a single view controller containing an empty view. The arrow pointing to the view controller from the left indicates it’s the initial view controller for this storyboard. You’ll learn about this in more detail later.
You’ll notice the default scene size is for a 4.7-inch screen. Xcode enables Auto Layout and Size Classes by default for storyboards. They allow you to make flexible user interfaces that can resize easily, which is useful for supporting various sizes of iPhones and iPads.
To change the scene size to another device, click the button at the bottom-left of the storyboard. You’ll then be able to select from the full range of supported device sizes, from the iPad Pro (12.9-inch) to the iPhone 4s (3.5-inch), in both portrait and landscape orientations.

Designing Your Storyboard
To design the layout in the storyboard editor, drag controls from the Object Library and drop them into your scene in the position you want. You can change their position or remove them later.

You’ll rely heavily on the Object Library to design your storyboards. Before you start on the app, there’s one more item on the screen you should know about: The Document Outline.

The Document Outline shows all the items you have inside the open storyboard file, as well as any view controller and any of the controls it includes. View controllers are called scenes on the storyboard. In this tutorial, you’ll use the name “scene” to refer to the view controller inside your storyboard.
The Document Outline will be one of your main navigation points to select the elements of the storyboard.
Now, it’s time to start building the Ratings app.
Just Add It to My Tab
The app you’re about to build has a tabbed interface with two scenes. To add the tabbed interface, start by opening Main.storyboard and deleting the only scene there. Simply click on View Controller in the Document Outline and press the delete key on your keyboard.
Drag a tab bar controller from the Object Library into the canvas. You can filter the list by typing part of the name of the item you’re looking for.

Tab bar controller comes pre-configured with two additional view controllers, one for each tab. It’s a so-called container view controller because it contains one or more other view controllers. Other common containers are the Navigation controller and the Split View controller.
The arrows between the tab bar controller and the view controllers it contains represent the container relationship. The icon shown below, in the middle of the arrow body, signifies that they have an embed relationship.

Build and run and you’ll see something like this in the console:
Ratings[9912:704408] [WindowScene] Failed to instantiate the default view controller for UIMainStoryboardFile 'Main' – perhaps the designated entry point is not set?
Don’t panic! :] That error simply indicates that the app didn’t find the initial view controller to show. Before you fix this, take a moment to understand what’s going on.
Understanding the Error
First, the error message mentioned the name of your storyboard, Main, explicitly. It’s not a keyword, so how did Xcode know that this is the storyboard file it should be loading at the beginning of your app?
To understand that, open the application settings by selecting the project file from the Project navigator, selecting Ratings from the Targets list and making sure that you’ve selected the General tab at the top.

In this settings screen, you’ll see that the value in the drop-down for Main Interface is Main. This drop-down will only show the storyboard files in your project.
